Basic Buttercream Frosting

I remember when I was growing up, my mom was always baking these big, gorgeous wedding cakes for friends and family.  It was so exciting to sit and watch her frost the cake and stack the tiers high, then decorate it with perfect frosting roses and embellishments. She always made the most perfectly white, fluffy vanilla buttercream frosting to frost it with.  She would spread leftover frosting on graham crackers for Joanie and I.

When I started baking cakes and cupcakes several years ago, I couldn’t get the consistency of my buttercream frosting right.  The frosting would never be fluffy enough and would never hold up when I piped it through a tip.  I didn’t understand what I was doing wrong until finally I had my mom walk me through it.  Turns out there is a very simple trick to getting the fluffiest frosting that’ll stay where you put it.  The trick is, you beat the crap out of it!  My mom told me to whip the butter in the mixer on high for no less than 7 minutes!  So here is my buttercream frosting recipe based on my mom’s recipe, but I don’t use shortening like she did because I just don’t like the mouth feel.
cupcake2
cupcake5

Ingredients:

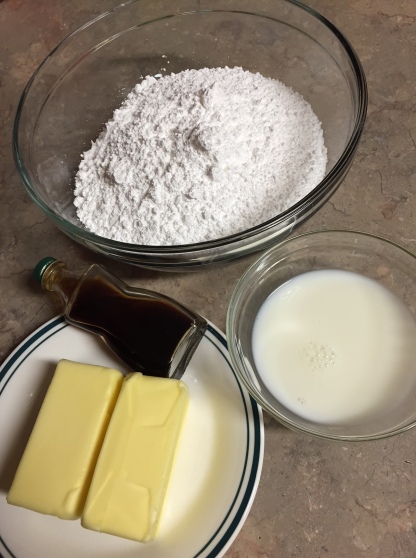
1 cup unsalted butter at room temperature.  (This is VERY important, if your butter is too soft or melted it won’t fluff up.  I would err on the side of too cold if anything.  Let your butter set on the counter over night if you can.)

4-5 cups powdered sugar
2 tsp real vanilla extract
5-6 Tbs milk

Method:

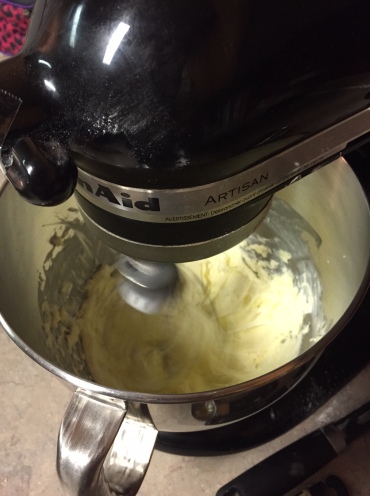
With an electric mixer with a whisk attachment, beat the butter on high for 10 minutes.  You can periodically stop the mixer to scrape down sides of the bowl.  The butter will get fluffy and almost white in color.
cupcake4

When butter is very light and fluffy (after 10 minutes of whipping) turn mixer off and add the vanilla and two cups of the powdered sugar.  Turn mixer on low until the sugar is combined and then turn it on medium speed and add 2 tablespoons of the milk.
Turn mixer back to low and add the rest of the powdered sugar and a couple more tablespoons of milk until you have a fluffy, light, spreadable consistency.

You are now ready to spread the frosting onto cakes or cupcakes.  This can be done using an off-set spatula or pastry bag and tip.  If you don’t have either of these, the back-side of a butter knife works just fine.  This recipe will frost approximately 24 cupcakes or 1 9×13 cake or a two layer 8 inch round cake.  Happy frosting!!

~Janna
cupcake1

Grapefruit Pie

I love citrus and grapefruit is one of my favorites.  It reminds me of being at my grandparents house in Florida and picking the tart fruit right from the tree!  As I was testing my key lime pie last year I started thinking about the possibility of grapefruit pie.  I’ve tried different variations of grapefruit pie over the last year and finally came up with one that I think is perfect.  As I researched grapefruit pie, I realized that they all use the actual wedges, and made a fruit pie, while I wanted more of a custard.  So I juiced the grapefruit and simmered it and reduced it by half so it was super sweet and super tart.  I also used the zest of one whole grapefruit to make sure it had tons of flavor.  Then I took the custard base that I use for the key lime pie and used the grapefruit juice and zest instead.  I couldn’t be more happy with the results and I hope you like it too!

~Jannawhipped-cream-birdie 3

Ingredients for filling:

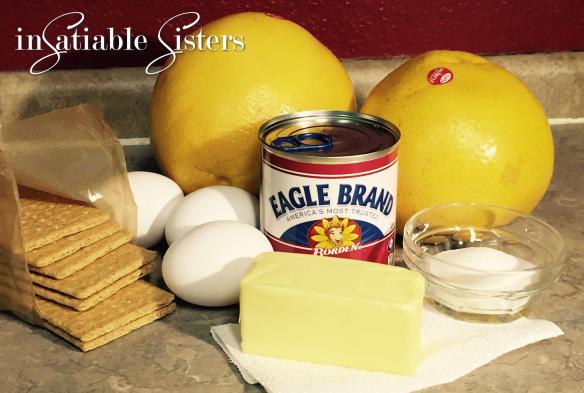
1 cup grapefruit juice, I used Ruby Red but any variety will do (One very large grapefruit will give you about 1 cup)
Zest from your grapefruit
1 14oz can of sweetened condensed milk
3 large egg yolks
1 9″ graham cracker crust  (or you can use a ready made crust)

Ingredients for crust:

2 cups of graham cracker crumbs
2 Tbs granulated sugar
5 Tbs unsalted butter, melted

Ingredients for whipped cream:

2 cups heavy whipping cream
1 cup powdered sugar
1 vanilla bean
1 tsp vanilla extract
*If you don’t have a vanilla bean you can double your vanilla extract.
grapefruitpie1

Method:

Pre-heat oven to 350 degrees Fahrenheit.

In a 9 inch pie plate mix the graham cracker crumbs with the sugar.  Pour the butter into the dish and mix with a fork until all the graham cracker is coated.  Press mixture onto the sides of the dish and then press into the middle making an even thickness throughout.  Set aside.

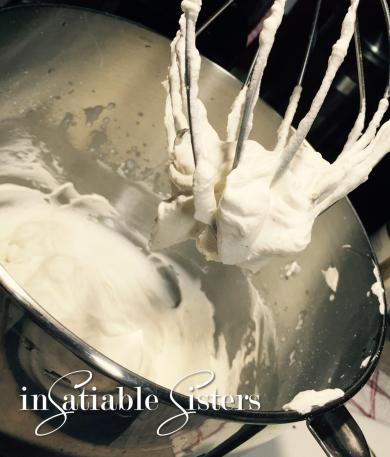
To make the whipped cream, put the heavy cream into a cold mixer bowl (I stick mine in the freezer beforehand for a few minutes).  Using the whisk attachment and the mixer on high, whip the cream until it thickens up and forms peaks (3-4 minutes).  Turn the mixer off and add your vanilla and powdered sugar.  Turn the mixer on medium to incorporate the sugar and vanilla.  Once finished, put the whipped cream into a lidded air-tight container and store in refrigerator.  You will need your bowl and whisk attachment again so you’ll need to wash it.
whipped-cream

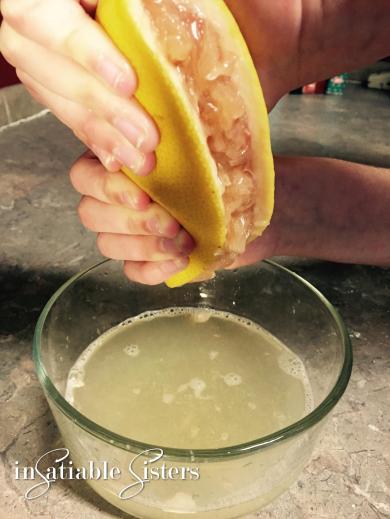
Squeeze grapefruit juice into a small bowl or sauce pot.  Strain out seeds and big clumps of pulp.

grapefruit8

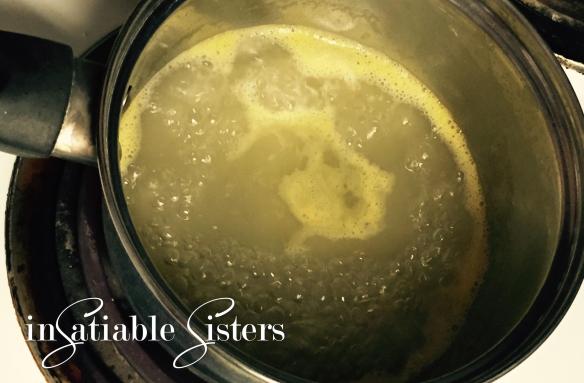
Simmer in sauce pot on med/high heat to reduce by half.  This will take approximately 10-15 minutes.  Keep an eye on it and stir occasionally.  You will end up with 1/2 a cup of reduced juice.  Add the zest and cool in an ice bath.  (Don’t skip the ice bath!  You do this so you don’t cook the eggs by adding hot juice.)

grapefruit7

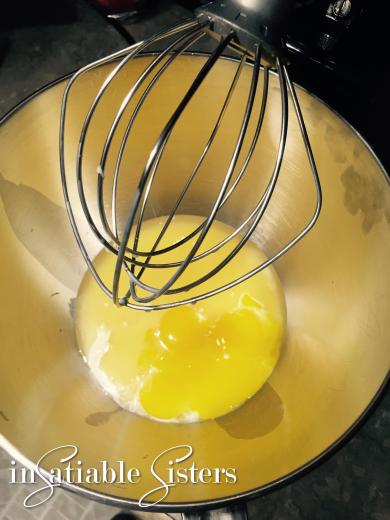
Once the juice isn’t hot to the touch (it’s okay if it’s warm) add it, the sweetened condensed milk, and egg yolks to a mixer bowl.  Using your whisk attachment again, blend on high until well incorporated, 1-2 minutes.

grapefruit6

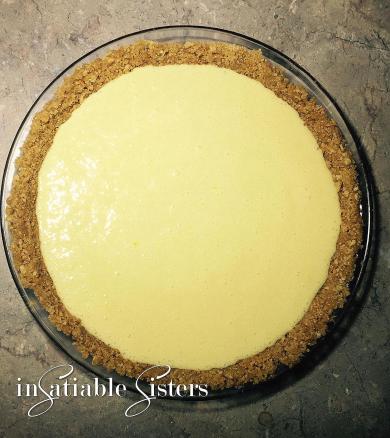
Pour the filling into the pie crust and bake for 15 minutes.  grapefruit5

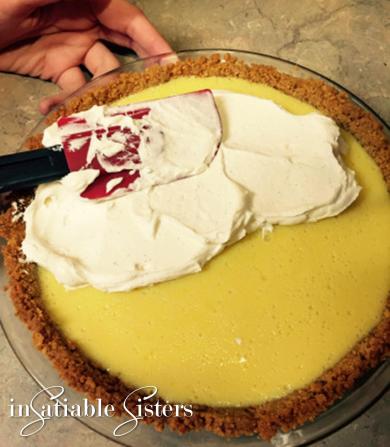
Let pie rest out of the oven for 10 minutes before chilling it in the fridge.  Top with homemade whipped cream and serve cold.
grapefruit4

grapefruit3

Pasta a la Limone

I came across this pasta recipe on America’s Test Kitchen, which is one of Joanie and my FAVORITE websites!  I watched the video and could almost taste the lemon and basil.  My mouth was watering, I had to make it.  I was slightly skeptical that it wouldn’t turn out very flavorful because it uses pasta water and a splash of heavy cream for the main ingredients in the sauce.  Boy was I wrong!  This pasta is a really good summer time dish.  It’s very light and refreshing, tasting of lemony tartness and fresh basil!  I’m in LOVE!!  I usually tweak a few things in recipes to suit to my taste, for this one I doubled the parmesan and added a little more lemon zest.  If you are preparing this recipe for less than 6 people you might want to cut recipe in half, unless you want leftovers.  The recipe says it feeds 4-6.  Using a whole pound of pasta, this recipe feeds at least 8, especially if you’re using it as a side dish.

This makes a quick and easy weeknight meal, taking only minutes more than the time it takes to cook the pasta.  Buon appetito!!  ~Janna

DSC_0065

Ingredients:

Table salt
1 Lb spaghetti
1/4 C extra virgin olive oil, plus more for serving
1 medium shallot, minced (about 3 tablespoons)
1/4 heavy cream
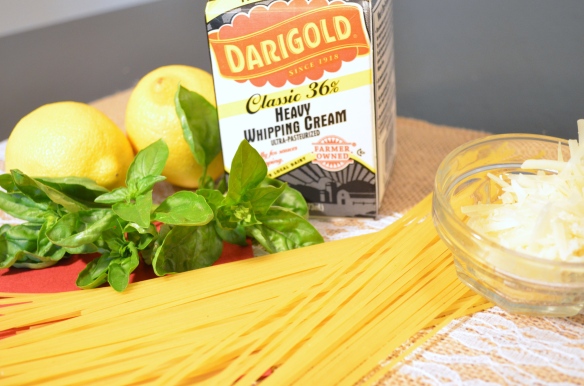
2 Tsp finely grated lemon zest and 1/4 of fresh lemon juice (about 3 lemons)
2 Oz finely grated parmesan cheese, plus more for serving
ground black pepper
2 Tbs finely shredded fresh basil leaves

Method:

Bring 4 quarts of water to a boil in a dutch oven or large pot.  Add 1 tablespoon salt and pasta to boiling water, cook stirring frequently until cooked al dente, about 7 minutes.  Reserve 1 3/4 cups of the pasta water, drain pasta and set aside.

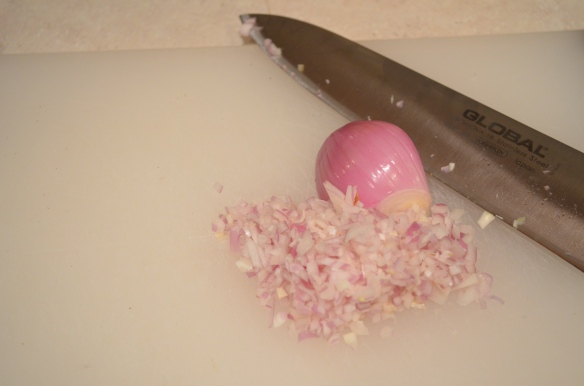
Heat 1 tablespoon oil in the now empty pot over medium heat until oil is shimmering and hot.  Add shallot and 1/2 teaspoon salt; cook until shallot is softened, about 2 minutes.
DSC_0322
Whisk 1 1/2 cups of reserved pasta water and cream into pot.  Bring to simmer and cook for 2 minutes.  Remove pot from heat, return pasta to pot and stir until coated.  Stir in remaining 3 tablespoons of oil, lemon zest, lemon juice, cheese and 1/2 teaspoon black pepper.

Cover and let pasta stand for 2 minutes, tossing frequently and adjusting consistency with remaining 1/4 pasta water if necessary.
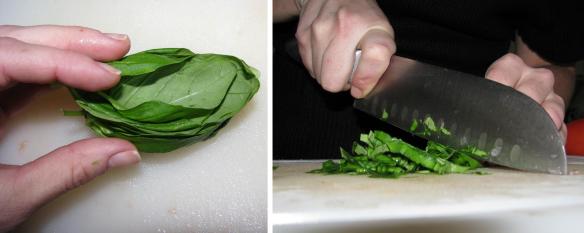
Chiffonade
Stir in fresh basil and season with salt and pepper to taste.  Serve, drizzling individual portion with oil, a sprinkle of cheese and a bit more basil.Picture3

Rainier Cherry Crisp

The produce in the Pacific Northwest is abundant in the summer!  Sometimes it’s hard to keep up with all that goodness.  Right now, in mid summer, we have cherries and apricots coming out of our ears!!  Traditionally, rainier cherries aren’t used in pies and baking because theyre not very tart, just sweet and delicious.  I decided to give rainier cherry crisp a try anyway.  I’ve added lime juice to give it a little tartness.  This crisp turned out 100 times better than I expected.  I was very pleasantly surprised upon the first warm, cinnamony bite.  My husband and I ended up eating several large spoonfuls right out of the dish!  This crisp is best served hot (you can reheat in the microwave if needed).  I bet its fantastic ala mode as well!  So without further ado, here is my recipe for Rainier cherry Crisp.

* I apologize for the lack of pictures, I was too excited while creating this dish to remember to stop and take pics!  I will add pictures and re-post next time I make it.

Ingredients:

Filling:
4 cups fresh rainier cherries, pitted and halved
1  Tbsp. corn starched whisked in 1/3 cup cold water
2 Tbsp. lime juice (or lemon)

Crisp:1/3 cup a/p flour
3/4 cup quick oats
1/3 cup brown sugar, lightly packed
1 Tbsp. ground cinnamon
4 Tbsp. butter, melted

Directions:

Preheat oven to 425 degrees Fahrenheit.

In a bowl, mix cherries, corn starch and lime juice until combined.  Put cherry mixture in a 8 or 9 inch round pie dish.  in a separate bowl, combine flour, oats, cinnamon and brown sugar, mix to incorporate and then add the melted butter.  Mix until all ingredients are incorporated.  Evenly spread the oat mixture to the top of the cherries.  Bake 20-25 minutes or until top is golden brown.  Enjoy warm!

Final 2


Taco Soup

Tacos are one of my favorite foods and I usually make them for dinner at least once a week in one combination or another.  Tacos also make great leftovers, check out Joanie’s Southwest Enchilada recipe for a great use of leftover taco fixins!!  This week it was all about taco soup, hot and steamy, and especially satisfying with loads of cheese and cilantro to garnish. I love it SPICY (surprise, surprise), and I mean make-your-eyes-water-and-your-mouth-drool kind of spicy.  Luckily, my husband also loves a little heat.  We keep a giant jar of chili paste in the fridge and use it on almost everything.  Of course, you can make this recipe as mild or as spicy as you wish.  To make it extra fiery, try adding diced fresh jalapenos, powdered cayenne pepper or just dump in some tapatio!  To tone down the heat a bit just use plain diced tomatoes instead of the ones with green chilies and don’t use tapatio or hot sauce at the end.

I’ve been on a couponing kick lately and have gotten some great deals on canned beans, taco seasoning, canned diced tomatoes and even tortilla chips!  So I put it all together in a big pot (or crockpot) and voila: lovely, spicy, mouth watering taco soup!  This soup is perfect paired with a cold, wintery evening, and like most soups even better for lunch the next day.

Makes about 6, 1 cup servings.

Taco Soup Ingredients

Ingredients:

2 Tbs butter
1/2 sweet onion, finely diced
6-8 chicken tenderloins or about 3 breasts, cut into bite sized chunks
0ne packet of taco seasoning
A few dashes of fresh ground black pepper
2 cans chicken broth
1 can diced tomatoes with green chilies, with juice
1 can black beans, drained but not rinsed

Garnish:
Tortilla chips, roughly crumbled
Shredded cheddar, Colby jack or Mexican blend cheese
Chopped fresh cilantro
Tapatio or other hot sauce, if desired
Sour cream

Method:

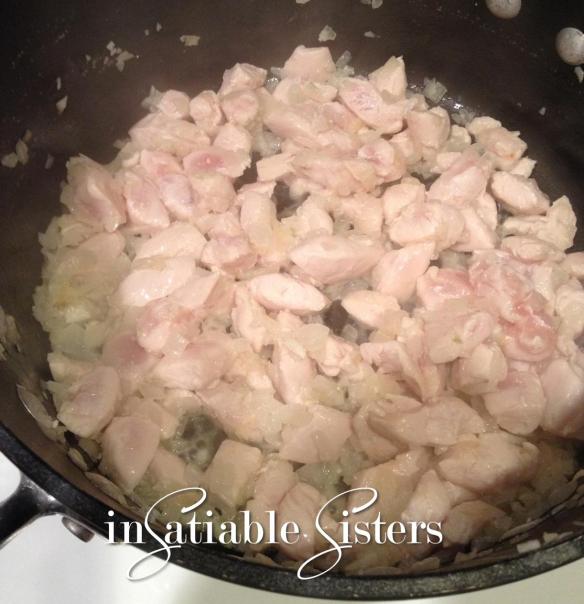
In a large soup pot cook chicken and onion in the 2 Tbs butter until chicken is cooked through and onion softens.Taco soup Meat

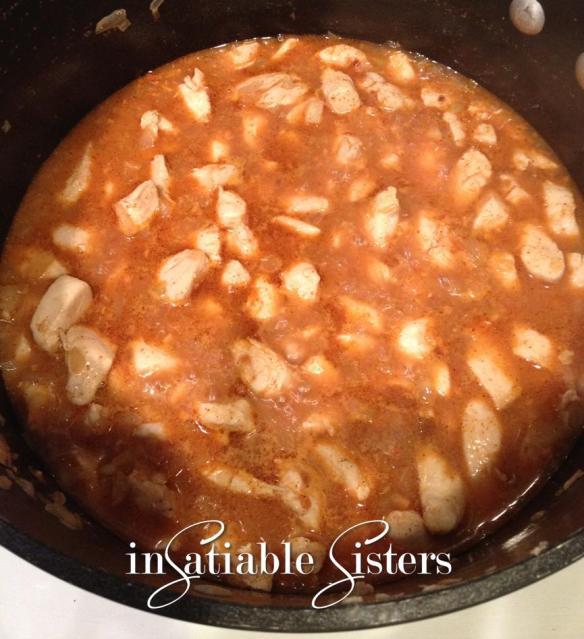
Add a few dashes of freshly ground black pepper, about 1/2 a can of the chicken broth, and the taco seasoning.  Stir around and scrape the bottom of the pan to unstick all those yummy chicken bits.Taco Soup Simmer

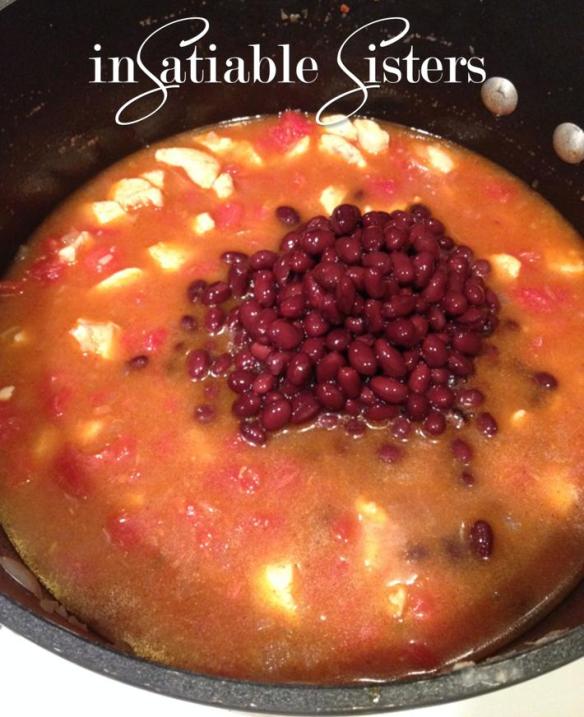
Let simmer for a couple minutes, stirring occasionally and adding a little more broth if it gets too dry and thick.  Add the rest of the chicken broth, the diced tomatoes with chilies and the black beans and let soup come back to a simmer.  Salt as needed.  🙂Taco Soup Beans

Taco Soup End

Ladle the soup into bowls and garnish with shredded cheese, crumbled tortilla chips, sour cream and cilantro!  I put a few dashes of hot sauce in it as well.  Enjoy!Taco Soup Final w Title

Wheat n Honey Bread

There’s something satisfying about making food from scratch using delicious, wholesome ingredients.  I love knowing exactly what is in the foods that my family and I are eating, and I think we all appreciate it more when there’s a little elbow grease involved in making it.  My sister in Alaska frequently grinds her own wheat for bread (she also has six kids and a full time job).  I would LOVE to do this, but in reality I just don’t have the kitchen space for a wheat grinder right now.  Hopefully in a few months I will have that needed space, and someday I hope to grow my own wheat too.  For now, I buy my flour.

This recipe is the best I’ve found to make yummy wheat bread that is perfect for slicing for sandwiches or toast.  I used it for French toast this morning and it was delicious as well!  As you can see, this bread is pretty versatile and you won’t want store-bought bread after you make this.  This bread was adapted from a cookbook called Baking With Julia (Childs).  I’ve changed a few things and added a couple more to fit my tastes.  The wheat gluten I’ve added is essential for getting a good rise and a light, fluffy loaf.  You can find wheat gluten in your local super market.  Also, don’t skimp on the kneading, you don’t want to end up with a brick!
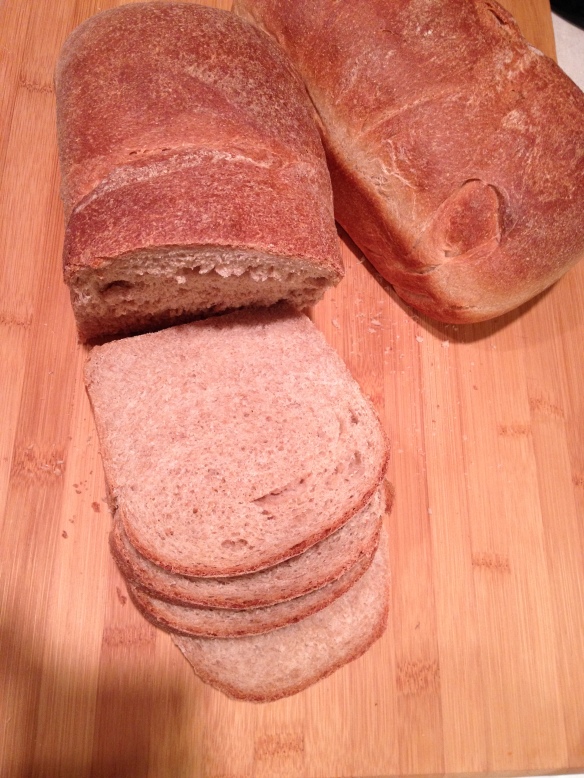
IMG_4726
Ingredients:

2 1/4 cups of warm water (105-115 degrees Fahrenheit)
1 Tbs active dry yeast
1/3 cup honey
2 cups (plus 1/4 cup for kneading) all purpose flour
3 cups whole wheat flour
1 1/4 Tbs salt
1/4 cup wheat gluten
1 Tbs vegetable or canola oil, plus more for oiling the bowl

Directions:
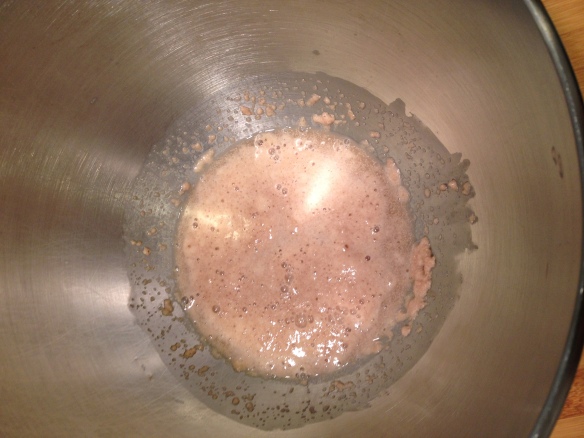
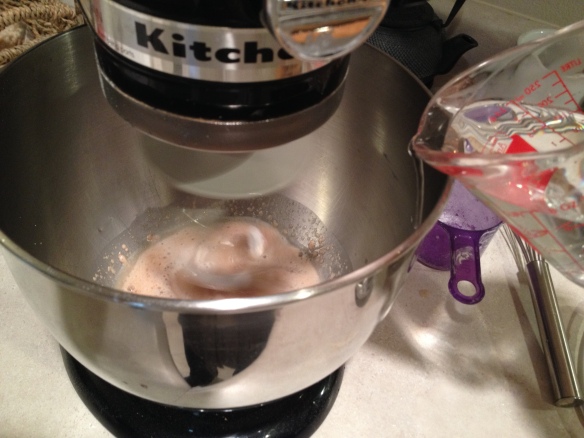
Pour 1/2 cup of the warm water into the bowl of a stand mixer.  Add the yeast and honey and whisk slightly to blend.  Allow the mixture to rest for approximately 5 minutes until bubbly.IMG_4707
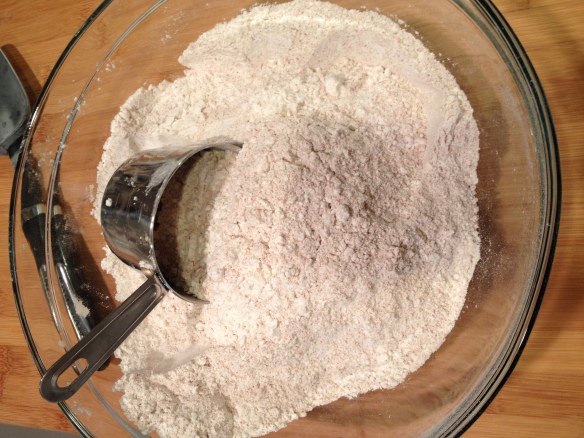
In a separate bowl, combine 2 cups of the all purpose flour and 3 cups of the whole wheat flour, gluten and salt.  Stir to combine and set aside.
IMG_4706

Using your mixer on low speed with a dough hook attached, add the rest of the warm water to the yeast mixture, also add the oil and about half of the flour mixture one cup at a time, scraping sides as needed.IMG_4708
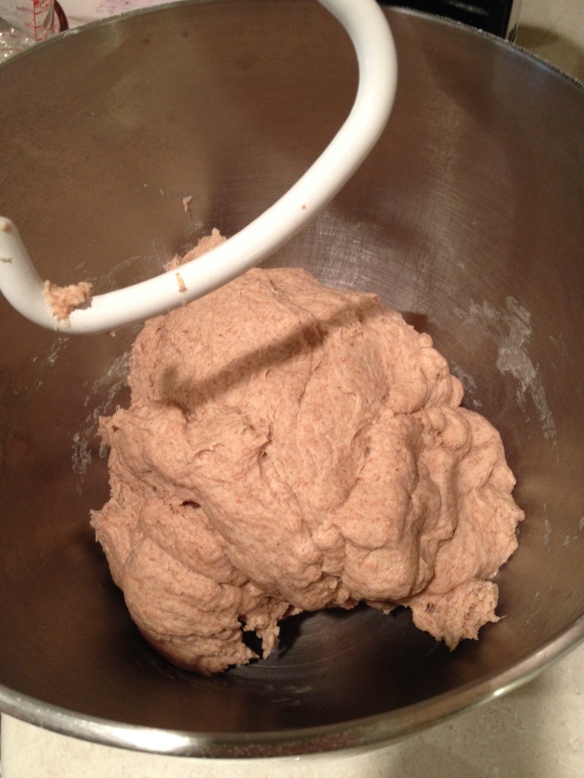
On low speed, add the rest of the flour.  Increase the mixer speed to medium, stopping to scrape down the bowl and hook as needed, until the dough comes together.
IMG_4711

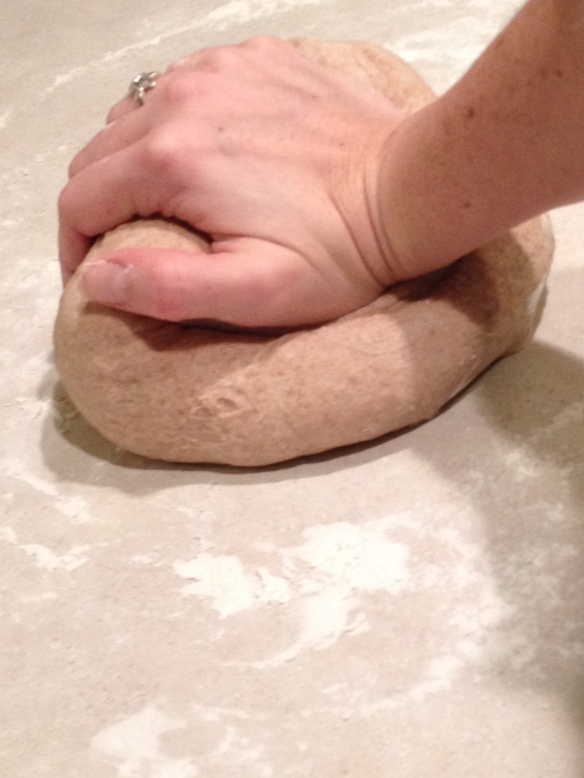
If dough is too dry add a teaspoon of water, if too sticky, add a tablespoon of a/p flour. Continue to knead at medium speed for about five minutes, until the dough is smooth and elastic.  You can skip kneading by hand in the next step if you increase kneading time in the mixer by five minutes.  I don’t recommend this though.  Your mixer motor could get really hot and possibly burn out.  Kneading dough by hand is more romantic anyway and it’ll make you appreciate the bread more.  Also, you’ll get killer arms and shoulders if you do this on a regular basis!
IMG_4713

Flour a clean counter top and put dough out.  Knead the dough by hand for 8 to 10 minutes.   This dough will be slightly sticky(tacky) even after it’s kneaded sufficiently.  If the dough is really sticky (sticks to your palms while kneading) add flour a sprinkle at a time until it barely sticks to your palm when kneading.

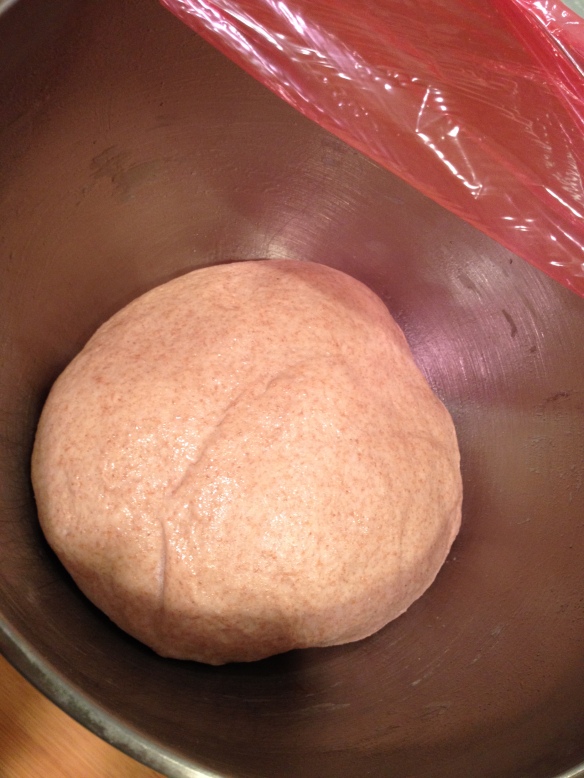
Once you are done kneading, shape the dough into a ball and place it into a large oiled bowl (big enough to hold at least double the volume of your dough).  Turn dough once to coat both sides.  Cover the bowl tightly with plastic wrap and let the dough rest at room temperature until it doubles in volume, about 1 1/2 hours.
IMG_4715

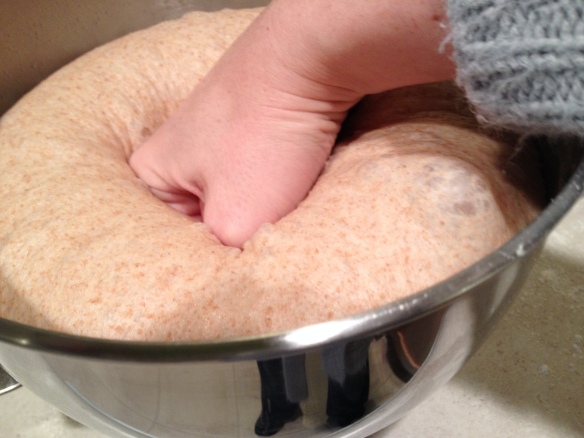
Oil or butter the bottom and sides of two 9×5 (I recommend glass) loaf pans and set them aside.  Punch down the dough and turn it out on to a lightly floured surface.
IMG_4717

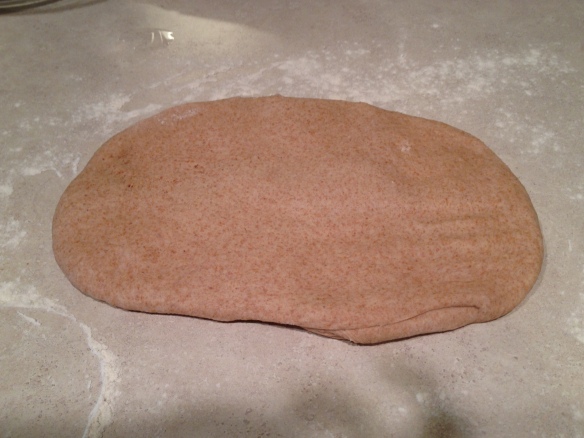
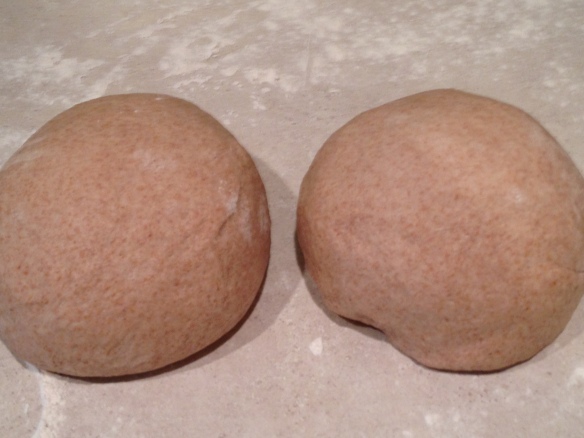
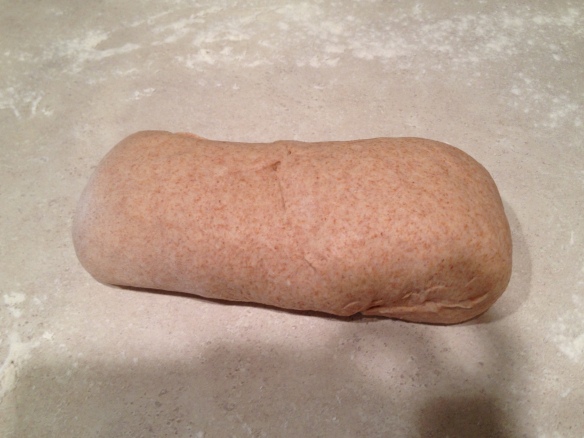
Divide the dough in half.  Using your hands or a rolling pin, roll the dough into a 9×12 rectangle.  The dimensions don’t have to be perfect, but it should be uniform.  with your dough laying vertically start rolling the dough (snuggly, but not tight) roll it all the way to the other end and pinch to seal the edges.  Gently tuck the ends under to make it look nice and set the bread in the loaf pan.
IMG_4718

IMG_4719

Turn the dough so that seem side is down and tuck in the ends just enough so the dough will fit nicely in the pans.
IMG_4722

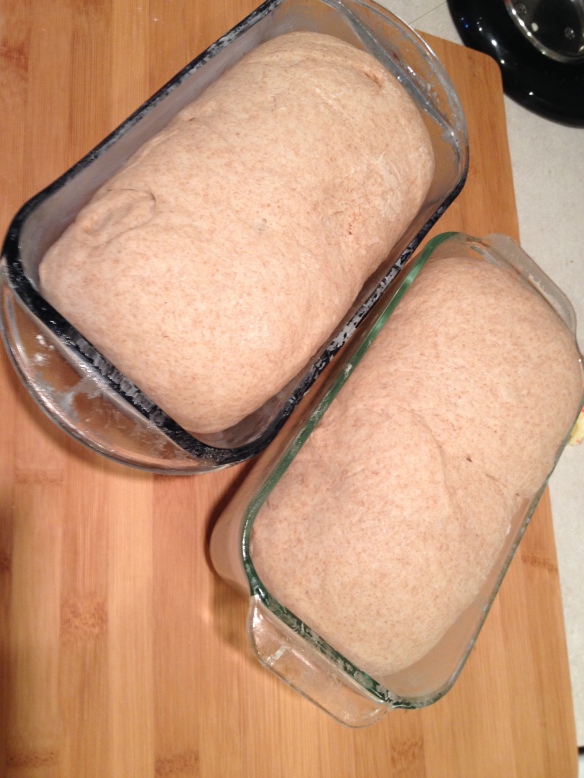
Drop the dough in the pans and cover loosely with oiled plastic wrap (the easiest way to oil plastic wrap is to spread it on a flat surface and spray with cooking spray, then pick it up two edges and drape over the dough).  Allow the dough to rise again until about double in the pans.  This will take about another hour.
IMG_4723

IMG_4725
In the meantime, turn oven on 375 degrees Fahrenheit.

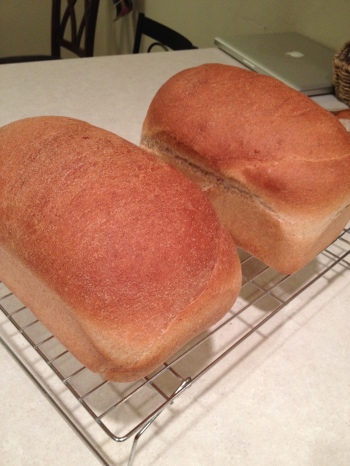
The breads is risen sufficiently when it is about double and if you poke a finger into it, the impression your finger makes stays in the bread.  Bake in the oven for about 25 minutes.  The internal temperature should be 200 degrees Fahrenheit when bread is done.
IMG_4698

Turn bread out onto cooling racks right away and let them cool to almost room temperature before slicing.  Keep bread sealed in a plastic bread bag, it should last for 2-3 days before getting dried out.  You can also freeze it.

Six Pepper Chili

I love chili! Probably partly because I like spicy food and I put a lot of kick into my chili.  In our house, when Joanie and I were kids, chili was a staple and it was always homemade. Sometimes we would even make moose chili but that’s a whole other blog!

Over the years I’ve tried many different chili styles adding this or that, making it spicy or mild, or trying different meat or beans.  I even made it cheesy a time or two, which essentially turned out to be a chili dip that went perfectly with nacho cheese Doritos!  I finally perfected this chili on a crisp autumn evening up at our cabin in the mountains.  I also recently used it to win a chili cook-off!  One thing I would change in this recipe is I would fire roast all of the peppers to bring out all of the flavors in the different varieties.  This one is a little spicy, fair warning.  If you don’t want as much spice, omit the cayenne pepper and jalapeno.  ~Janna

Serves: 12

Ingredients:

1 lb sweet Italian pork sausage
10-12oz of pearl onions, whole (or 1 medium yellow onion roughly chopped)
1 red or green bell pepper, diced
2 Serrano peppers, diced
2 jalapeno peppers, diced
2 poblano peppers, diced
12 oz bottle of beer
2 cans 15oz tomato sauce
1 can 12oz tomato paste
1 can, 14.5oz fire roasted diced tomatoes
2 cans 15.25oz each of dark kidney beans, drained but not rinsed
Cayenne pepper
1 Tbs Chili powder
2 tsp garlic powder
2 Tbs Worcestershire sauce
1/2 Tbs sugar
black pepper
salt to taste

Method:

Brown pork in a skillet on med/high heat.

In large stock pot, sauté onions and all peppers. Once tender, (about 5-7 minutes) add the bottle of beer and stir a couple of minutes.

Add the tomato paste, tomato sauce, diced tomatoes and beans, stir to combine and bring back to a simmer.

Add the pork without draining (unless there is tons of grease) and all of the spices.  Stir to combine and Simmer at least 1 hour.  Salt to taste and enjoy on a cold winter evening!6 Pepper Chili with Title

Hearty Beef Stew

This beef stew is the best beef stew you will ever have!  It’s loaded with delicious meat potatoes, veggies and fresh herbs. It’s slow simmered to get a thick, silky broth that is perfect for sopping up with a crusty piece of French bread with homemade butter.  This is one of those times when I wish I still lived in a cabin in the woods in Alaska.  I’m sure fresh moose steak or caribou would be fabulous in this stew.  I can just imagine the stew simmering away all day while I’m out shoveling snow or bringing in fire wood.  I envision my husband’s soggy coat and gloves hanging by the wood stove to dry after a hard days work.  The sun is going down, making way for a frosty evening, the perfect accompaniment to a bowl of hearty stew.  Is your mouth watering yet?  Mine is.

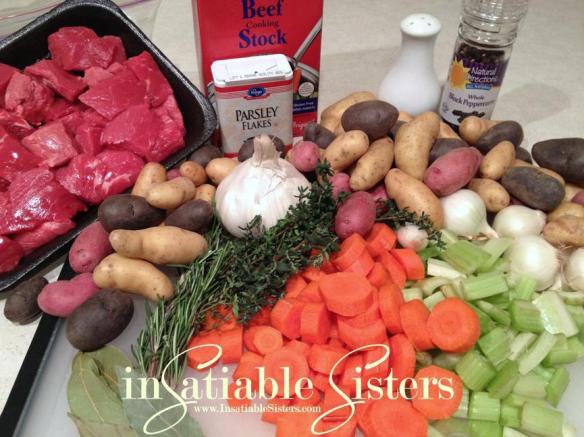
Beef Stew Ingredients

Ingredients:

1lb Stew beef chunks or any beef steak cut into bite sized chunks
4 Tbs butter
2 Tbs flour
1 sprig of fresh rosemary
2 sprigs of fresh thyme
2 bay leaves
1/2 tsp dried parsley
Freshly ground black pepper
3 cloves of garlic, finely chopped
1 1/2 cups of pearl onions, or any onion
1 cup of chopped celery
2 cups of chopped carrot
3 cups of marble potatoes or any potatoes cut into bite sized chunks
4 cups of beef stock
1 cup red wine (I used syrah)
2 Tbs Worcestershire sauce

Method:

Brown beef in a skillet.
Beef Stew Beef

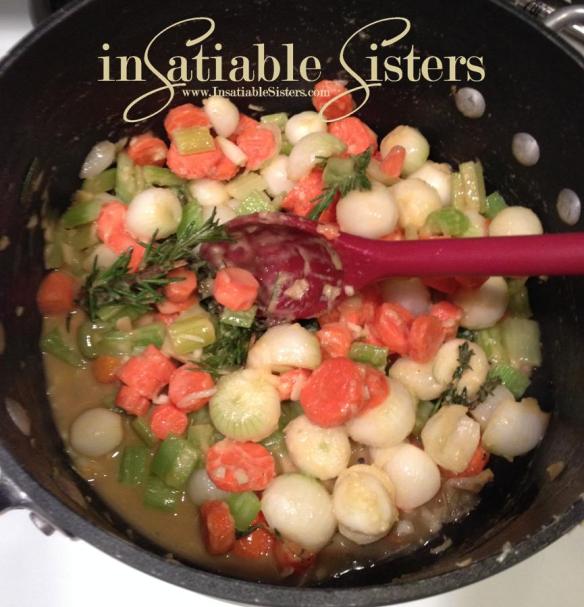
In a large stew pot, melt butter on low heat, when melted add the flour a little at a time and whisk until you make a paste called a roux.  Add the garlic, onion, celery, carrot, thyme, rosemary, black pepper, bay leaves and cook on low for a few minutes.
Beef Stew Roux

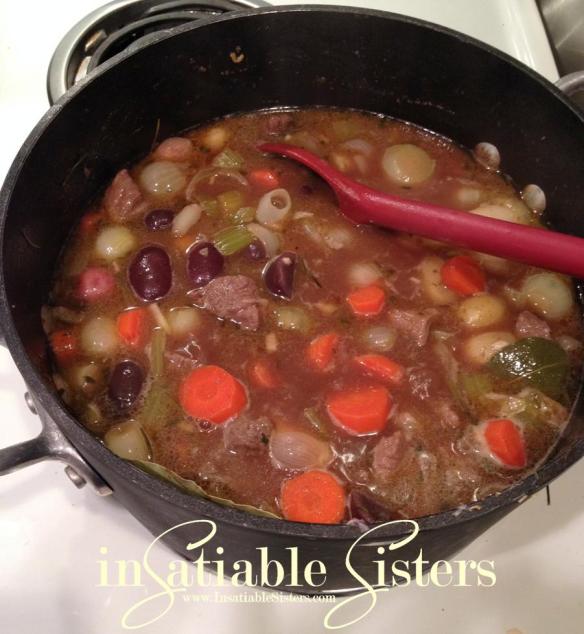
Add the beef stock, cooked beef, potatoes, wine and Worcestershire sauce.  Simmer on low/med heat for 2-3 hours, stirring occasionally.  If stew isn’t as thick as you like, make a thickener by whisking 1/2 cup of cold water with 2 Tbs flour, pour into soup and stir.
Beef Stew in Crock

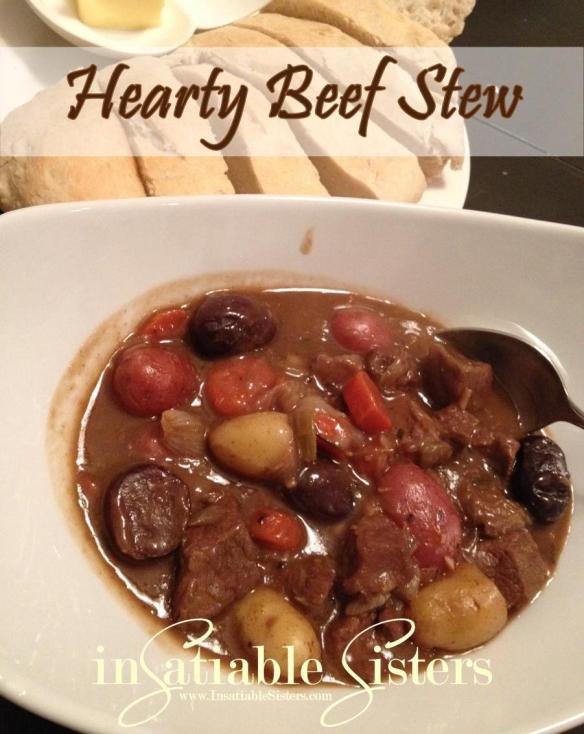
Ladle into bowls, serve with crusty bread slathered with homemade butter and enjoy!
Hearty Beef Stew 2

Bacon Cheddar Sliders

Sliders, the little brother to the burger.  But just as flavorful and you don’t feel guilty having more than one!  Not that I could eat more than one hamburger in one sitting but just the thought of being able to have two of these delightful little buggers makes me feel powerful!  Like I can do anything I want, like have fries with it!  No not really but they are very satisfying.  This is my latest and best recipe for beef sliders.  I usually use Hawaiian sweet rolls because they are sweet and fluffy.  They provide a really good palate-pleasing flavor when combined with the salty, tangy and spiciness of the meat.  This time however, I didn’t us Hawaiian sweet rolls, I used regular hamburger buns and used a canning jar ring as a cutter to cut them down to size.  My husband says these are the best burgers he’s ever had, and that includes regular sized burgers.  These are definitely kid friendly as well, even with the added jalapeno! Which is really amazing because my kids think ketchup is spicy!! ~Janna
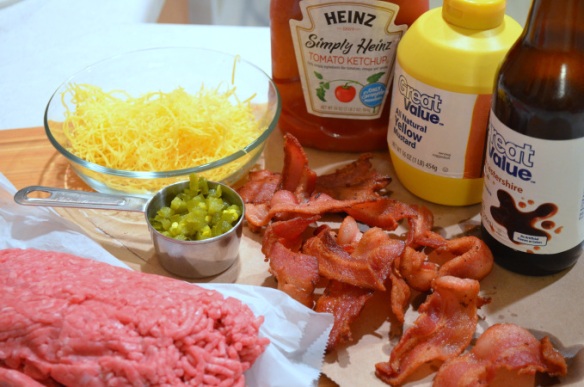
Slider Ingredients

Makes 10 sliders

Ingredients:

1 Lb lean ground beef (don’t go too lean, the fat is where the FLAVA is)!!  I usually use
85/15 beef for burgers
6 slices of bacon, cooked crisp and crumbled
1 1/2 oz finely shredded medium or sharp cheddar cheese (you could also use pepper jack or really any shreddable, meltable cheese that you like) plus more if you want cheese on top of sliders.

1 1/2 Tbs Ketchup
2 tsp yellow or Dijon mustard
1/2 tsp Worcestershire sauce
1/4 tsp garlic powder
Dash of salt
Dash of freshly ground black pepper
1/8 c pickled jalapenos, finely diced
Hawaiian sweet rolls or hamburger buns, cut to size

Method:

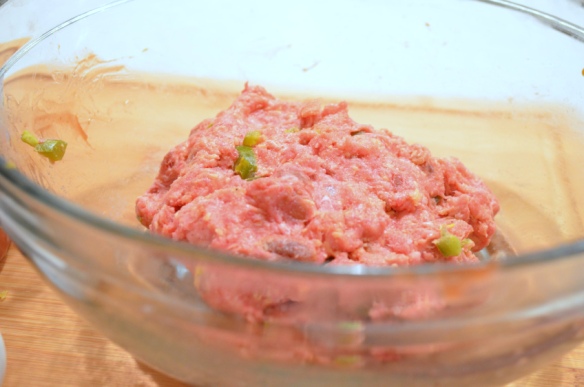
Combine all ingredients in a large bowl, mix the mixture around with your hands to fully integrate and disperse the ingredients.
Slider Mixture

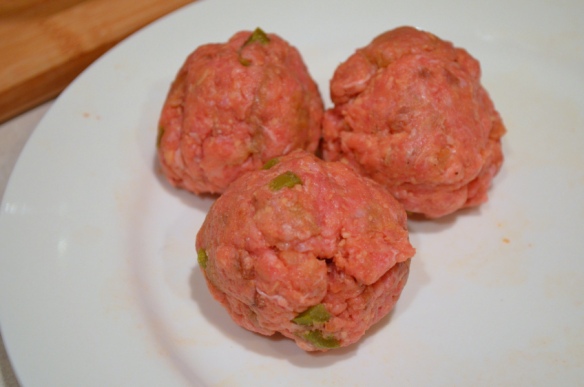
Take some of the meat mixture and form a ball about the size of a golf ball, each ball of meat should be about 1.6 oz.  You should get about 10 meat balls.
Slider Ball 1

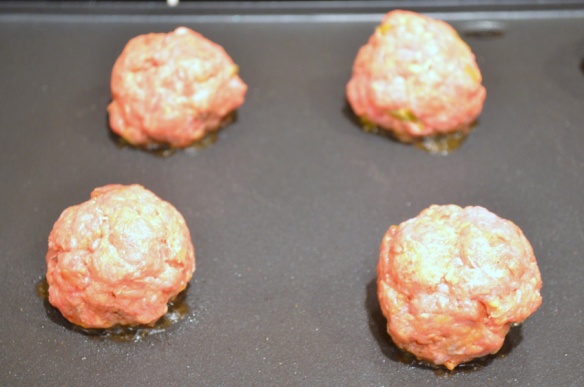
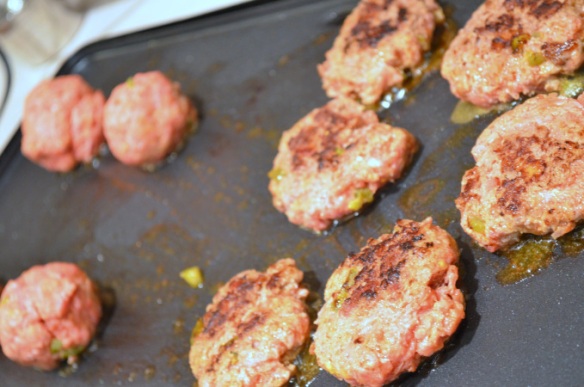
Heat an electric griddle or skillet to 325 degrees Fahrenheit.  Once the skillet is heated place the meat balls a couple inches apart, let cook for a few minutes (don’t flatten them yet), when browned on bottom, smash each meatball with a spatula and flip over to cook the other side.  Cook until desired doneness.
Slider Ball
Slider grill

When cooked through, add the remaining shredded cheese (this part is optional).  Remove from heat and drain on paper towels.  Scrape grease off griddle and place buns on to warm them (or you can just toast them).  Top your sliders with whatever condiments you like and enjoy!
Sliders with Title

Cider Brined Pork Roast with Roasted Veggies

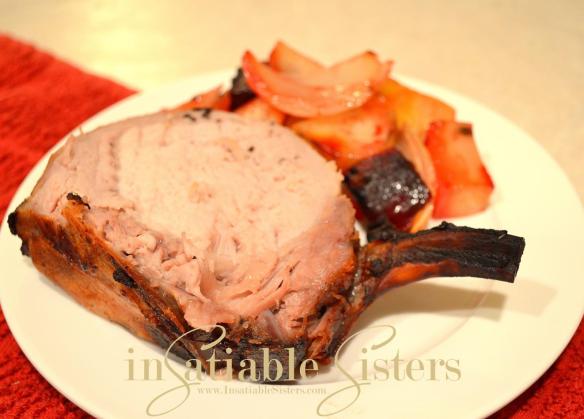
I have to admit, this is not my recipe although I have made  a tweak or two.  This recipe originally came from Bon Apetit Magazine.  My boss made this for a dinner that we were hosting and it was so mouth watering and tender and delicious I had to make it myself and it’s become a favorite in my household.  In true Janna fashion I’ve added alcohol to the recipe.  Note-  The pork in this recipe will need to brine for at least 12 hours.  ~Janna

8 servings

DSC_0310

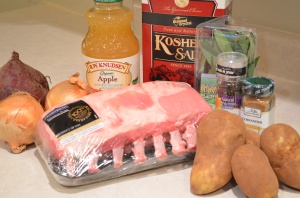
Ingredients:
1 C packed brown sugar
1 C kosher salt
8 bay leaves (divided)
2 tsp Coriander
1 tsp black peppercorns plus more freshly ground
24 oz unfiltered apple cider
1 12oz bottle of hard apple cider
1 8 bone pork loin roast (about 5lb), chine bone removed, rib bones frenched and tied with kitchen twine
3 Yukon gold or russet potatoes pealed (or just scrubbed) and cut into about 1 inch chunks
1 medium yellow onion, cut into 1 /12 inch chunks
1 large beet peeled and cut into 1 1/2 inch chunks
4 Tbs olive oil (divided)

Bring brown sugar, salt, 2 bay leaves, 1/2 tsp of ground coriander, 1 tsp black peppercorns, and 2 cups water to a boil in a medium sauce pan.  Reduce heat and simmer, stirring occasionally, until sugar and salt dissolve, about 4 minutes.  Transfer brine to a large bowl and add apple cider hard cider and 2 cups ice.  Let cool.

Place pork and brine into a large 2 gallon zip top bag, seal bag and refrigerate for 12-24 hours.

Remove pork from brine and pat dry with paper towels.  Let sit at room temperature for 1 hour.

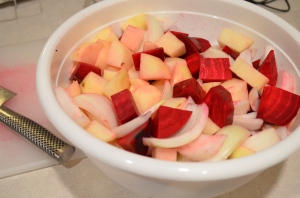
Toss potatoes, onions and beets in 2 Tbs olive oil in roasting pan, season with salt and freshly ground black pepper and set aside.

DSC_0326

Place oven rack in lower third of oven and preheat to 375 degrees F.  Season pork with black pepper and 1 tsp of coriander.  add remaining olive oil to a large skillet over high heat.  Sear pork until browned on all sides.
DSC_0327

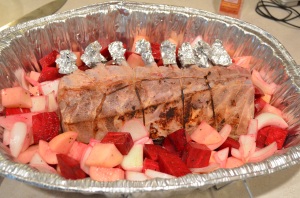
Transfer pork to a roasting pan and surround with vegetables.  Tuck remaining bay leaves into the kitchen twine over top of pork.  Wrap bones in foil to prevent burning, roast pork  until an instant read thermometer reaches 145 degrees Fahrenheit.  when done, let roast sit for 30 minutes before slicing.  Vegetables may need to be roasted for additional time while pork is resting.
Pork