Coconut Pecan Spread

Coconut seems to be one of those foods that people have a definite opinion on:  you either love it or hate it.  Janna and I both love it.  LOVE.  And what better way to enjoy coconut than combined with crunchy pecans, mixed into a messy, delicious batch of sweet custard and piled high onto a Dark Chocolate Cupcake? Okay, so maybe there are some other equally delicious ways to eat it, but it’s hard to beat that yummy combo!

This blog post just happened to coincide with my nephews birthday.  It’s a labor of love for me to make birthday cakes for the family whenever possible, and this time the request was for German chocolate cupcakes.  So, I baked 2 dozen Dark Chocolate Cupcakes, topped them with the spread and delivered them to the birthday boy, all the while snapping pictures, of course.

This spread is more than just a cupcake topping.  It’s pretty versatile and can be used as a filler or frosting for layer cakes, a topping for ice cream, a finishing touch for cinnamon rolls…the sky’s the limit!  However you do it, enjoy!
Picture3

Ingredients
:
1 12 oz can evaporated milk
4 egg yolks
1 1/2 tsp vanilla extract
1 1/2 cups granulated sugar
3/4 cup unsalted butter
10 oz sweetened flake coconut
1 1/2 cups chopped pecans
IMG_5507

IMG_5515

Directions:

In a large saucepan, whisk together the milk, egg yolk and vanilla until well blended.  IMG_5513Add sugar and butter and cook on medium heat until thickened, stirring constantly, about 10-12 minutes.  Resist the urge to turn up the heat to avoid scorching

Once thick, remove from heat and stir in the coconut and pecans until well combined.  Allow mixture to cool completely before using as a spread or filling.

Makes about 4 cups.
Picture1

Picture8


Basic Buttercream Frosting

I remember when I was growing up, my mom was always baking these big, gorgeous wedding cakes for friends and family.  It was so exciting to sit and watch her frost the cake and stack the tiers high, then decorate it with perfect frosting roses and embellishments. She always made the most perfectly white, fluffy vanilla buttercream frosting to frost it with.  She would spread leftover frosting on graham crackers for Joanie and I.

When I started baking cakes and cupcakes several years ago, I couldn’t get the consistency of my buttercream frosting right.  The frosting would never be fluffy enough and would never hold up when I piped it through a tip.  I didn’t understand what I was doing wrong until finally I had my mom walk me through it.  Turns out there is a very simple trick to getting the fluffiest frosting that’ll stay where you put it.  The trick is, you beat the crap out of it!  My mom told me to whip the butter in the mixer on high for no less than 7 minutes!  So here is my buttercream frosting recipe based on my mom’s recipe, but I don’t use shortening like she did because I just don’t like the mouth feel.
cupcake2
cupcake5

Ingredients:

1 cup unsalted butter at room temperature.  (This is VERY important, if your butter is too soft or melted it won’t fluff up.  I would err on the side of too cold if anything.  Let your butter set on the counter over night if you can.)

4-5 cups powdered sugar
2 tsp real vanilla extract
5-6 Tbs milk

Method:

With an electric mixer with a whisk attachment, beat the butter on high for 10 minutes.  You can periodically stop the mixer to scrape down sides of the bowl.  The butter will get fluffy and almost white in color.
cupcake4

When butter is very light and fluffy (after 10 minutes of whipping) turn mixer off and add the vanilla and two cups of the powdered sugar.  Turn mixer on low until the sugar is combined and then turn it on medium speed and add 2 tablespoons of the milk.
Turn mixer back to low and add the rest of the powdered sugar and a couple more tablespoons of milk until you have a fluffy, light, spreadable consistency.

You are now ready to spread the frosting onto cakes or cupcakes.  This can be done using an off-set spatula or pastry bag and tip.  If you don’t have either of these, the back-side of a butter knife works just fine.  This recipe will frost approximately 24 cupcakes or 1 9×13 cake or a two layer 8 inch round cake.  Happy frosting!!

~Janna
cupcake1

Gooey Marshmallow Treats

Picture11
Also known as Rice Krispies Treats, these simple squares are a fun finger food that will instantaneously transport you back to childhood.  Rice Krispies Treats were invented in 1939 by Malitta Jensen and Mildred Day at the Kellogg Company home economics department as a fund raiser for Camp Fire Girls. (source: Wikipedia)
And what’s not to love?  Crispy rice cereal is generously coated in fluffy sugary marshmallows so it’s bound to be delicious.  Best of all, they are fast, easy and inexpensive.  Yes, they are full of carbs, sugar and delicious full-fat butter.  But that’s what dessert is all about!  Indulge a little….

Ingredients:
16 oz mini marshmallows, divided
4 oz butter + some for greasing (Coconut oil can be used for a dairy-free treat.)
1/4 tsp salt
6 cups crisp rice cereal
OPTIONAL: 1 cup chocolate chips, mini chips, mini m&m’s, caramel chips, etc.

Directions:

Generously grease a 9×13 pan with butter.

In a large pot, melt butter on medium-low heat.  Stir in HALF the mini marshmallows and continue to stir until they are completely melted and form a gooey cream.

Add salt and stir.  Remove from heat immediately.

Pour cereal into the pot and fold it into the melted marshmallows until all cereal is thoroughly coated with marshmallow.
Picture12

Add the additional whole marshmallows and any optional chips that you want.  Quickly fold them into the cereal.  You don’t want this second addition of marshmallows to melt, it’s so delicious when you bite into a fluffy whole marshmallow!

Turn the mixture out into your buttered pan and press it flat with clean, buttered hands.  It’s delicious when it’s warm, but they will cut much more easily if you allow them to cool completely.  RC

*Tip: If you have leftover chips, consider melting them and drizzling over the top of the cut squares.  Yum!
Gooey Marshmallow Treats

Blackberry Mousse Cheesecake

Mini Final 3.jpg

Blackberries are synonymous with Fall in the Pacific Northwest.  Everywhere you go you can find fresh blackberries for sale, blackberry shakes and smoothies, blackberry desserts, jam & syrup…you name it!  I’m lucky enough to have access to TONS of wild blackberry bushes that are heavy with ripe, juicy berries.  I’ve been a little obsessive this season about making sure I’ve picked enough to last me through the winter, and my torn up hands are proof of that!  But, it’s well worth it to have a nice supply in the freezer.  Not only are they amazing in tons of recipes, but they also make flavorful (and pretty!) little ice cubes for your water.

This recipe is a spin off from my Key Lime Cheesecake recipe.  I used the same basic method with a few key ingredient swaps.  Anyone who knows me knows that I’m not a dessert girl, but I could eat these all day!  It’s light and moussy with tons of blackberry flavor, not to mention the color!!  They’re pretty little things!

Keep in mind, the recipe as written includes the blackberry seeds.  If you are someone who is sensitive to those hard little seeds, just replace the 2 cups of blackberries with 1 cup of fresh, strained blackberry juice.  Also, you can prepare in two ways: traditional cheesecake in a spring-form pan, or, my favorite, cheesecake mini’s (as pictured above).

Happy Blackberry Season!!

Ingredients:

Crust:
1 package Graham Crackers (approx 1 ½ cups crushed)
⅓ cup granulated sugar
6 tablespoons melted butter
½ teaspoon cinnamon

Blackberry Mousse:
2 cups fresh blackberries (or 1 cup fresh, strained blackberry juice for seedless texture)
¼ cup water
¼ cup lemon juice
2 envelopes Knox gelatin
1 cup sugar
5 eggs
½ cup butter, softened
2 8-oz packages cream cheese, softened
1 cup heavy whipping cream

Optional Blackberry Syrup:
1 cup fresh blackberries
2 tablespoons lemon juice
2 tablespoons granulated sugar

Directions:

To Prepare Crust: In a food processor, process graham crackers until they turn to coarse crumbs.  Transfer to a bowl, add melted butter, sugar and cinnamon.  Stir until thoroughly combined and mixture is the consistency of wet sand.  Press crumbs firmly into the bottom of an ungreased spring-form pan.  (If you’re making individual cheesecakes in a cupcake pan, scroll to the bottom for further instructions.)   Bake for 7 minutes.  Remove and allow to cool completely.Crust.jpg

To Prepare Blackberry Syrup:  In a small saucepan, mash blackberries.  Add lemon juice and cook on medium heat until they release their juices, 5-10 minutes.  Strain the liquid through a fine mesh strainer.  Return to pan, add the sugar and cook on medium for another 5 minutes or until liquid coats the back of a spoon.  Allow to cool completely.

To Prepare Blackberry Mousse:  Add blackberries to a medium saucepan and give them a quick squish with a fork.  Add water and Knox gelatin and allow to sit about 5 minutes until the gelatin begins to develop and the liquid thickens.Blackberries.jpg

Add eggs and sugar and whisk until eggs are well beaten into the mixture.  Turn your heat on medium and stir constantly while the mixture slowly comes to a boil.  Stirring is VERY important, you don’t want to end up with scrambled eggs in your cheesecake!

Once the mixture has thickened remove from heat and set aside.

In a large mixing bowl, cream the butter and cream cheese together.  Add the blackberry mixture and mix on medium speed until well combined, scraping the sides and bottom so that all of the cream cheese is incorporated.  Refrigerate until cool stirring occasionally, about 1 hour.

Meanwhile, whip the heavy cream in a metal bowl until stiff peaks form.  When the blackberry mixture has cooled, fold in the whipped cream.  Whipped cream step.jpg

Pour the mousse into prepared crust and smooth it out with a knife or the back of a spoon.  Refrigerate until firm, about 2 hours.

To release from the pan, run a thin knife around the edge of the pan before opening the spring-form clip.  Remove the pan cuff.  Place a sheet of parchment over the top of the cheesecake, then flip it over onto a flat surface.  Gently insert a butter knife between the crust and the pan and the the cheesecake should easily release.

Before serving, drizzle with blackberry syrup.
Cheesecake Final 3.jpg

Variation:

To prepare cheesecake mini’s, fill cupcake pans with foil liners (recipe makes about 24).

Note: You cannot prepare mini’s in batches, they must all be done at once because the cheesecake mixture will firm up in the mixing bowl if left unpoured.  If you don’t have at least 24 cupcake spaces, you can purchase disposables at any dollar store or grocery store.

Distribute graham cracker mixture evenly into all foil liners, about 1 tablespoon each.  Press firmly into the bottom of each cup.  (Try using a clean spice bottle for this.)  Crust Mini.jpg

Bake about 7 minutes at 375.

Once crust has cooled, fill with prepared blackberry mixture all the way to the top of the foil liner.  Refrigerate until cool and set, at least 2 hours.
Mini's.jpg

Top with blackberry sauce and fresh berries.  Indulge!
Mini Final.jpg

Turkey Shepherd’s Pie

Close up.jpg

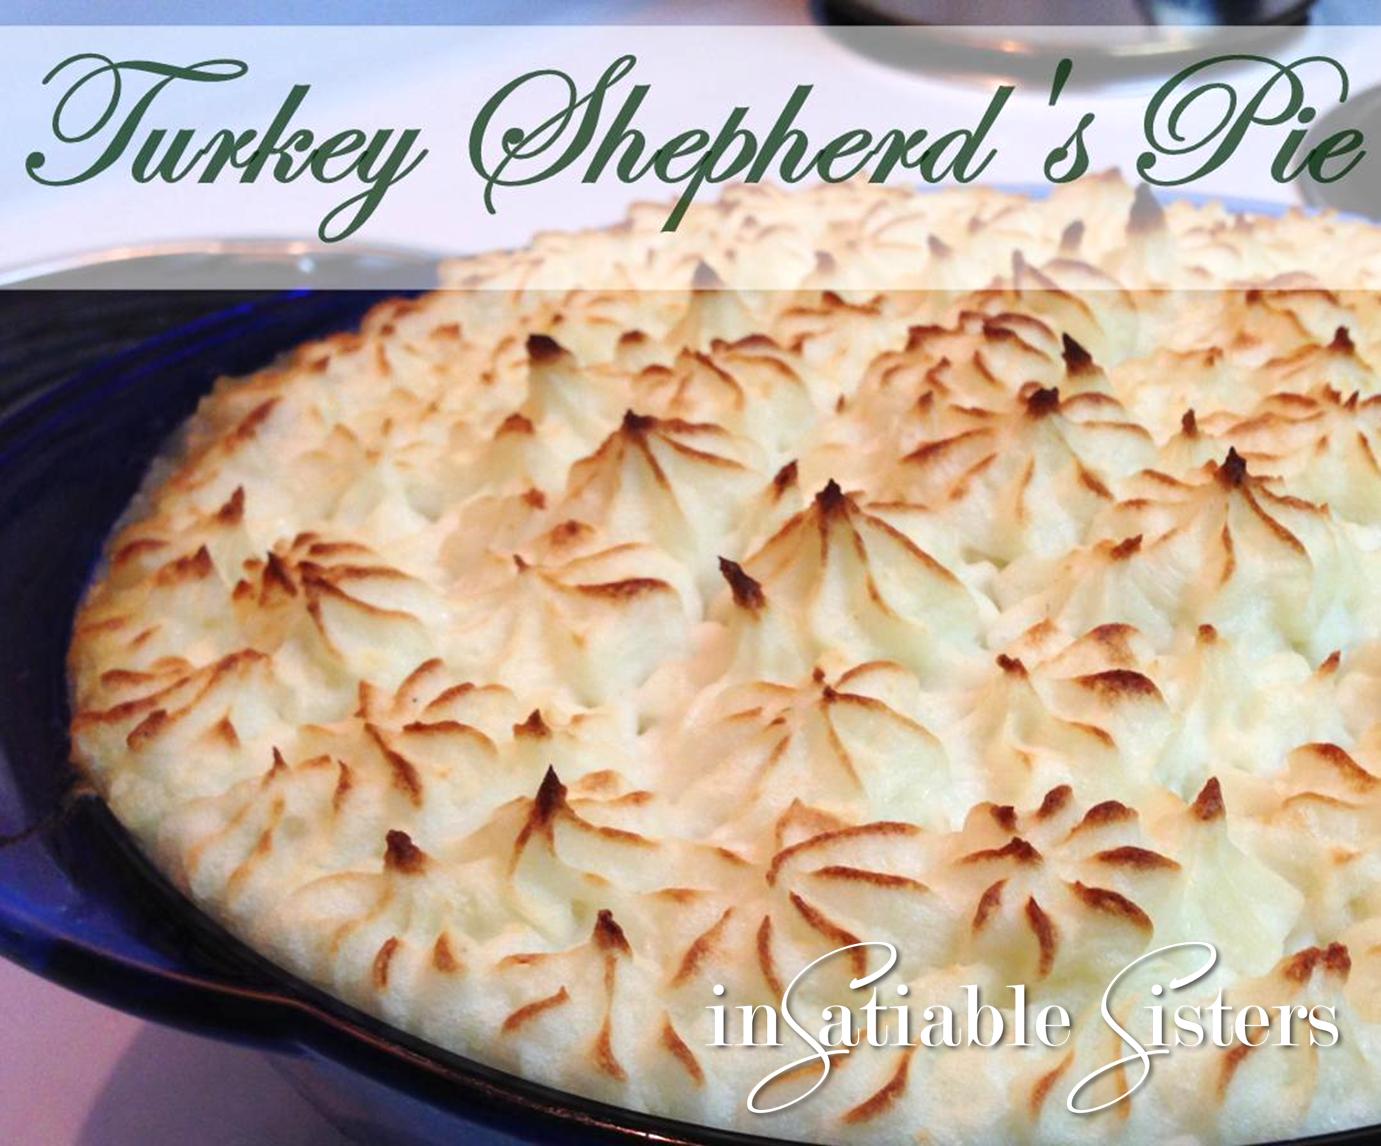
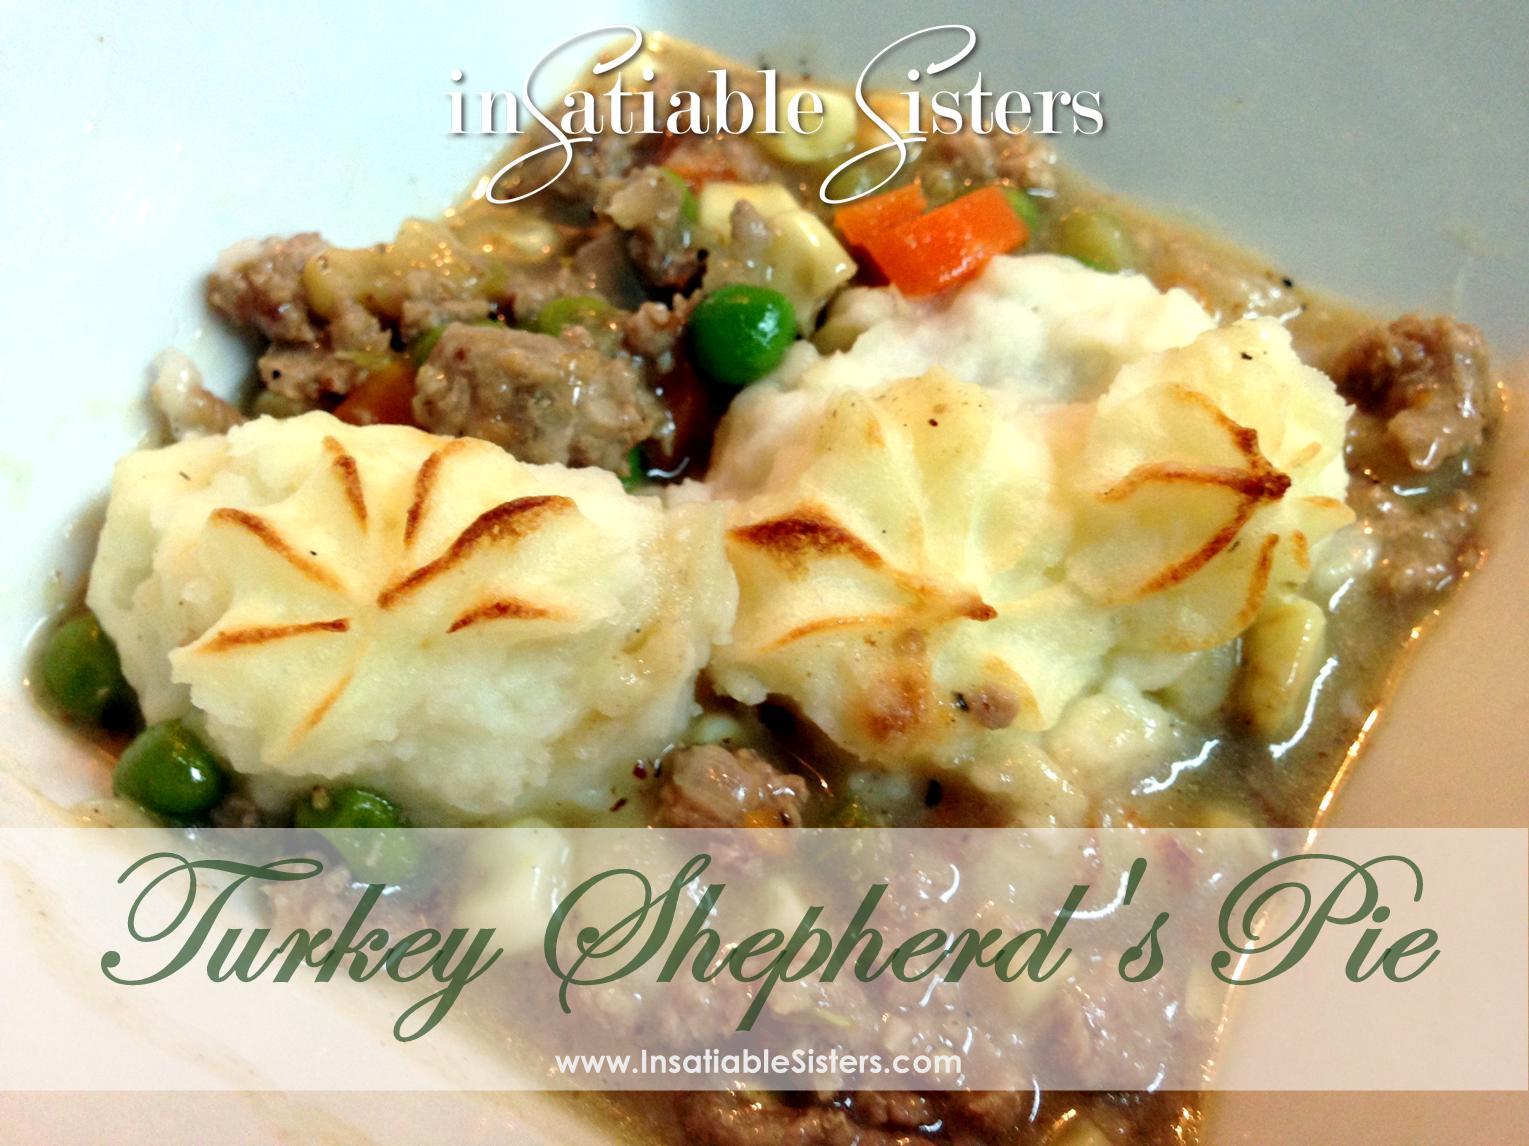
Today is St. Patrick’s Day, and what better way to celebrate this Irish holiday than with some traditional Irish fare.  And you can’t get any more “traditional Irish” than Shepherd’s Pie.  Originally called “Cottage Pie” this hearty dish was a means to use up roasted meat of any kind.  The Shepherd part didn’t come into play until 1877, and is generally used when the meat is lamb (mutton).

However, I am not a fan of mutton, plus it’s super expensive, so I opted for a more economical, typically American choice: ground turkey.  Affordable, lean, and easy to find in any grocery store, ground turkey can be a great substitute in many recipes that call for ground lamb, wild game, or beef.  The mild flavor is like a blank canvas with so many possibilities to please your palate.  If you prefer to go the traditional route, you can use mutton or beef, or even a mixture of the two, in place of the turkey.

There are quite a few steps that take you back and forth so don’t forget to read the recipe through first!  There’s a lot going on, but all the steps are oh, so worth it!  I hope you enjoy my spin on this dish.  Enjoy!  ~Joanie
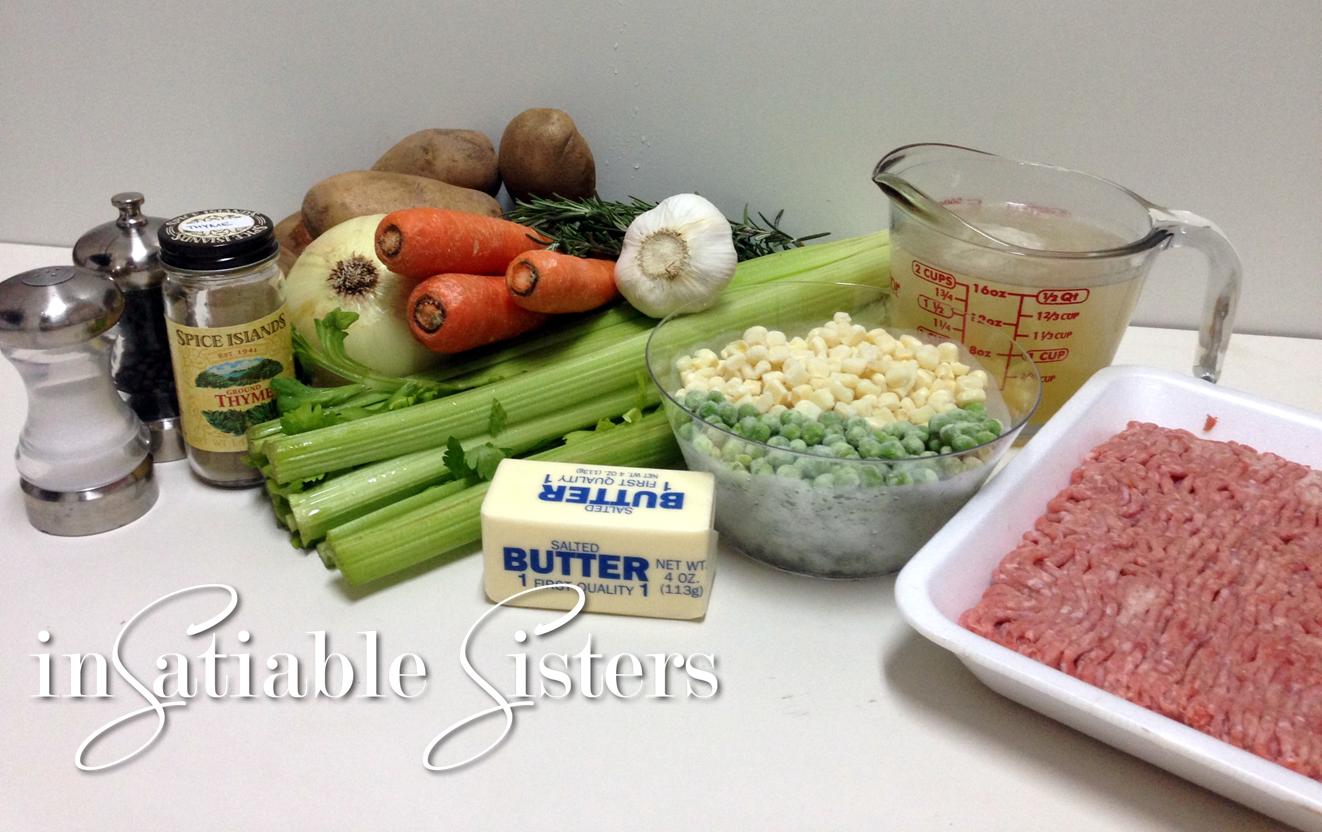
Ingredients:

Mashed Potatoes:
6-8 Medium potatoes, peeled
3 Tbs butter
1 tsp garlic powder (optional)
1/2 cup full fat sour cream
Salt to taste

Pie Filling:
1 lb Ground Turkey
1 1/2 Cups fresh or frozen corn
5 Tbs butter, divided
1 Cup onion, diced
3 Celery stalks, chopped
3 Large carrots, peeled and chopped
2 Tbs all purpose flour
2 Cups turkey or vegetable broth
4-6 sprigs of fresh rosemary
1 tsp ground thyme
2 Tbs Worcestershire sauce
1 cup frozen English peas
Salt & fresh ground pepper to taste
Ingredients.jpg

Directions:

Peel and quarter potatoes.  Fill a large stock pot with water, add the potatoes and bring to a boil over medium-high heat.  Once potatoes are tender, drain and set aside.

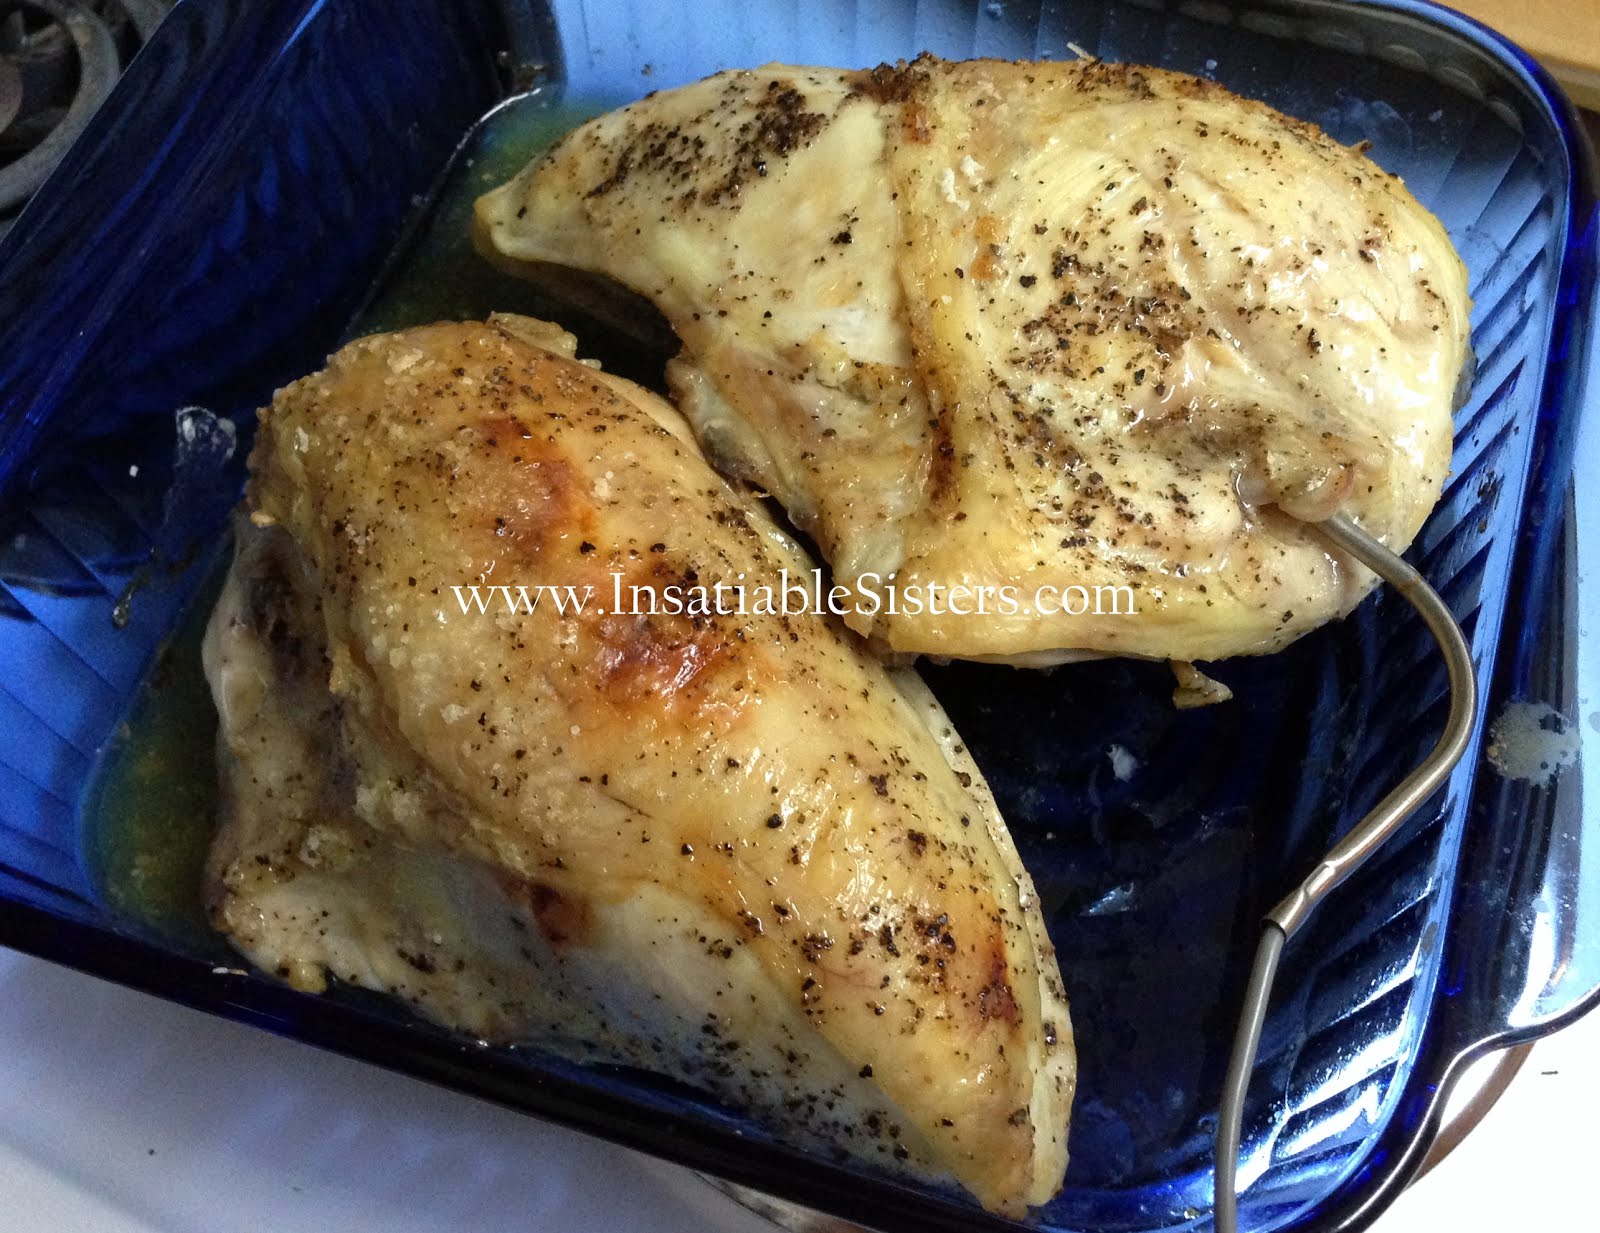
In a deep skillet or sauce pan, brown meat.  Remove the cooked meat from the pan and set aside.  Keep the pan and drippings for a later step.  (If you’re using ground beef or lamb, you may want to drain it, as these meats are much fattier than turkey.)

While the meat is browning, you should have time to caramelize the corn.  Add 1 tablespoon of the butter and the corn to a skillet and cook on medium-high heat until you see it start to turn dark golden brown, about 10-15 minutes.  Caramelizing the corn brings out the sugar and adds a really yummy layer of flavor.  Adjust the heat accordingly if it starts to scorch, you don’t want burned corn ruining your yummy dinner!  Caramelized Corn.jpg

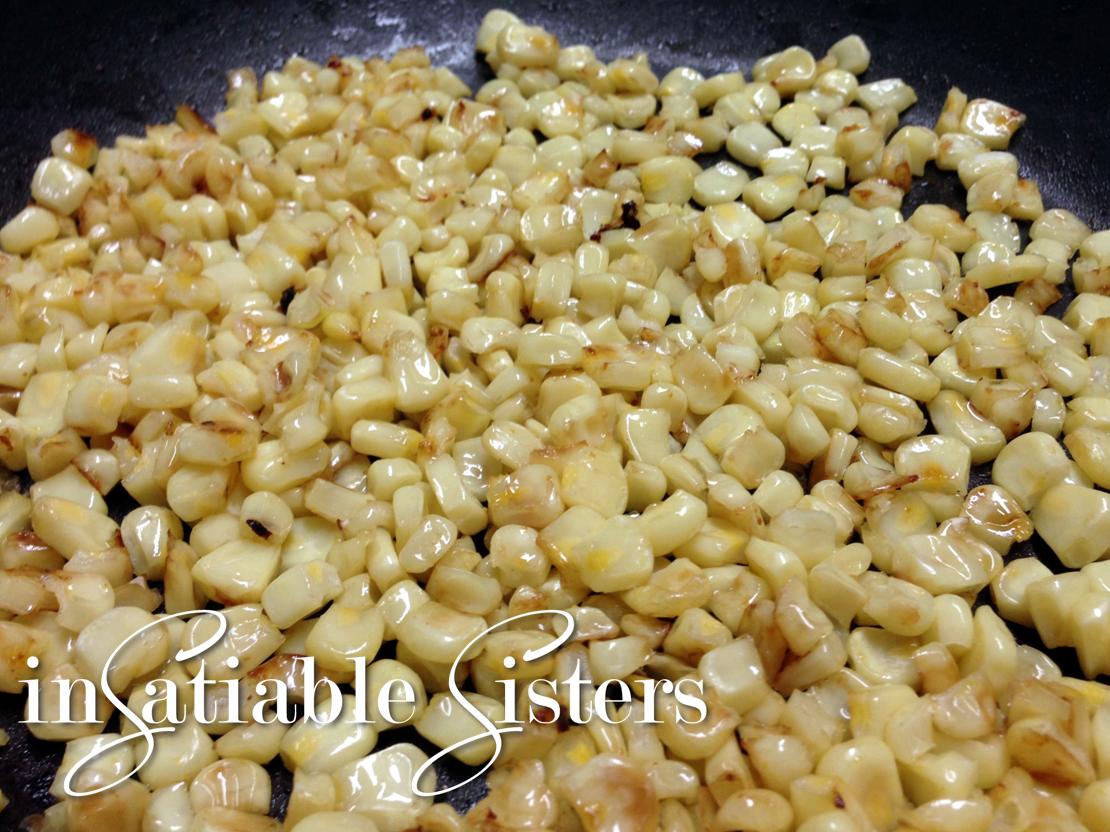
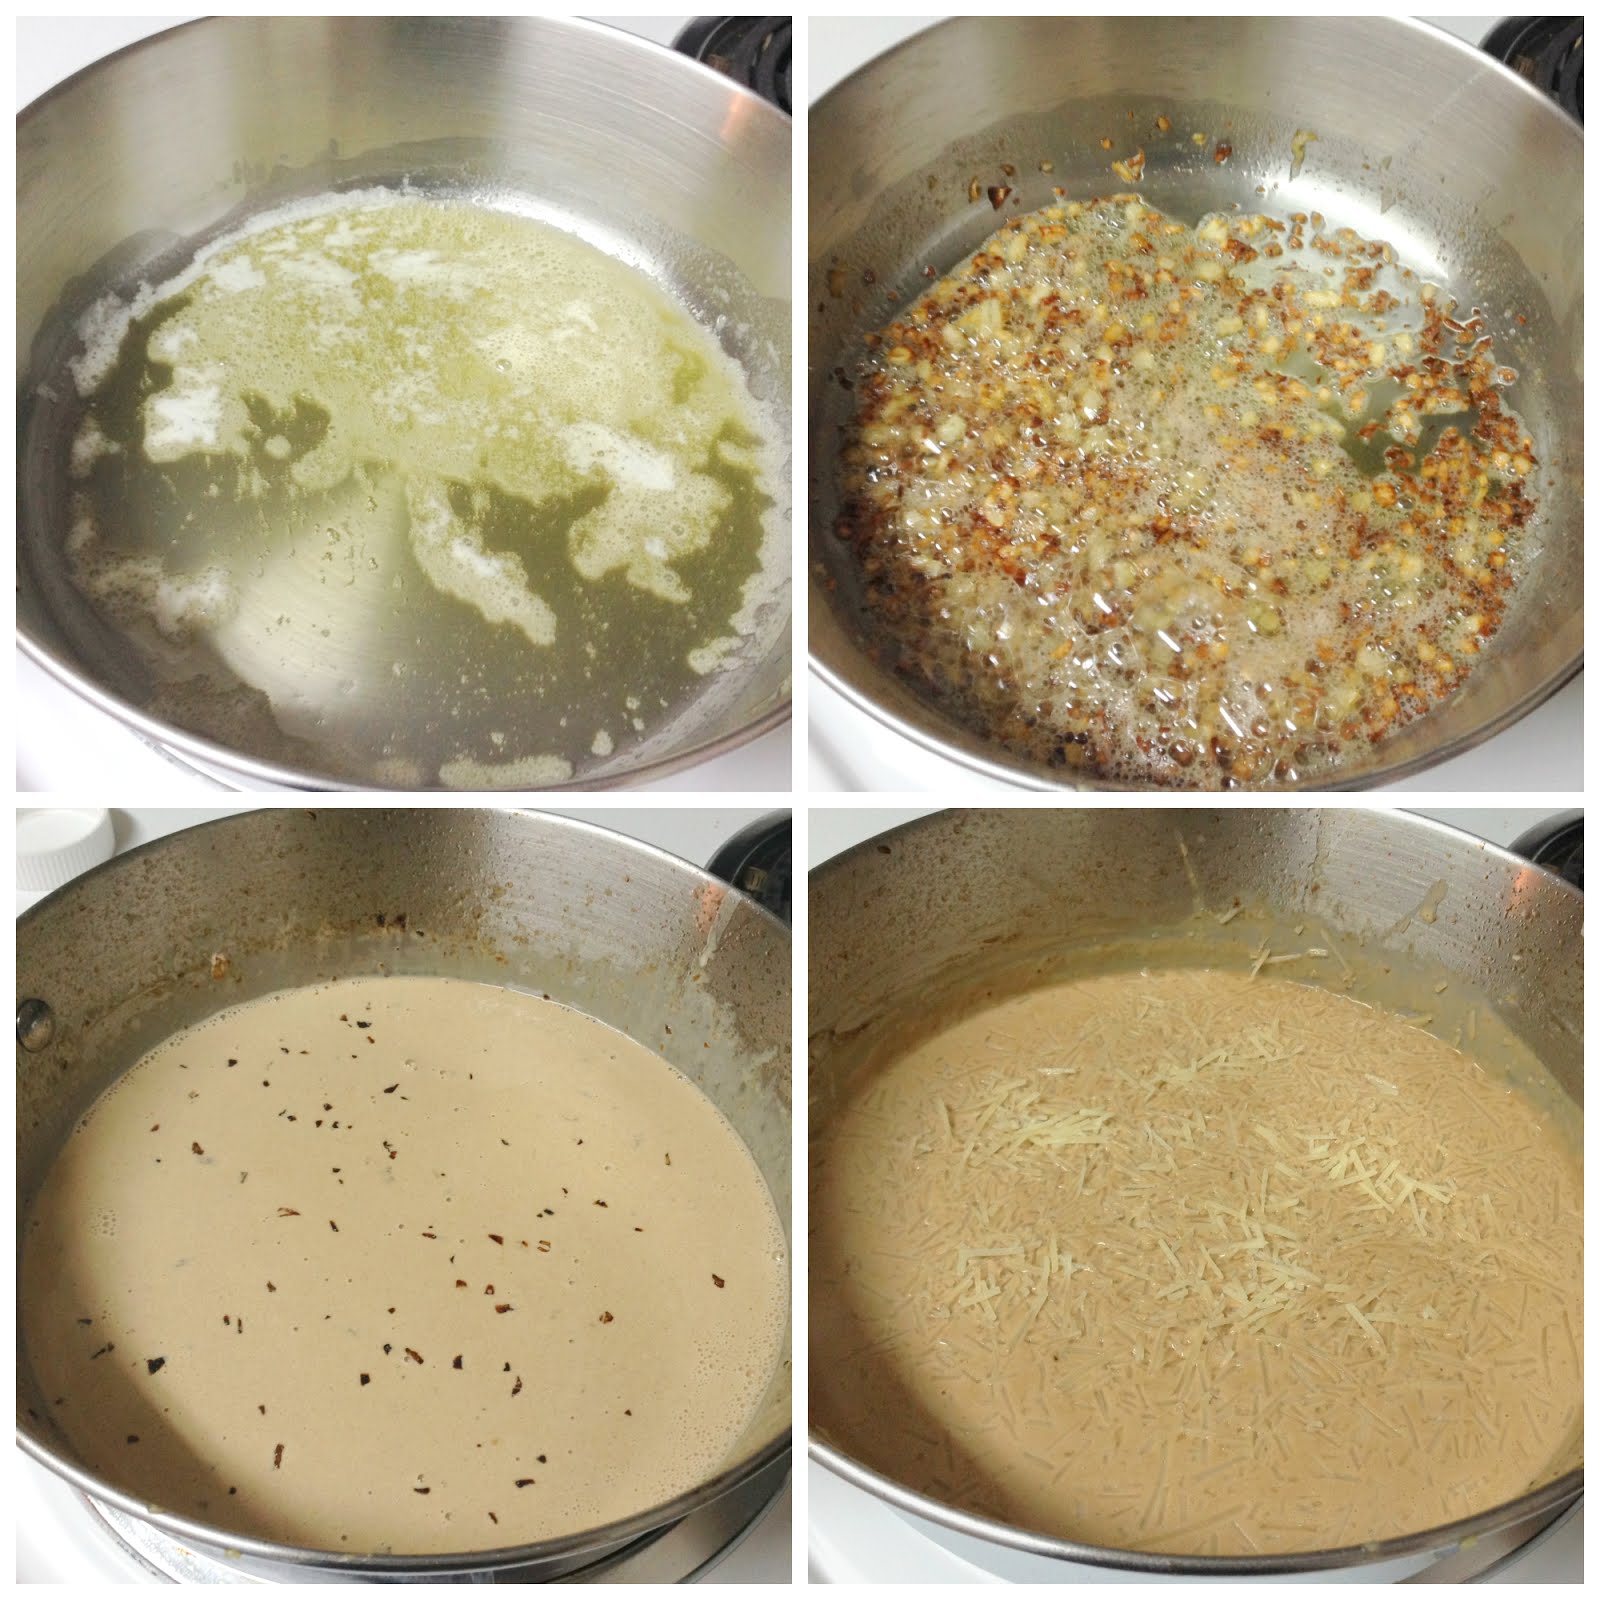
In the pan you browned the turkey in, add 2 Tbs of the butter and let it sizzle on med-high heat for about 1 minute.  Don’t let it burn.  Add the onion and cook for about 2 minutes.  Add the carrots and celery all at once, reduce heat to medium and let it all cook together for about 5 minutes.Trinity.jpg

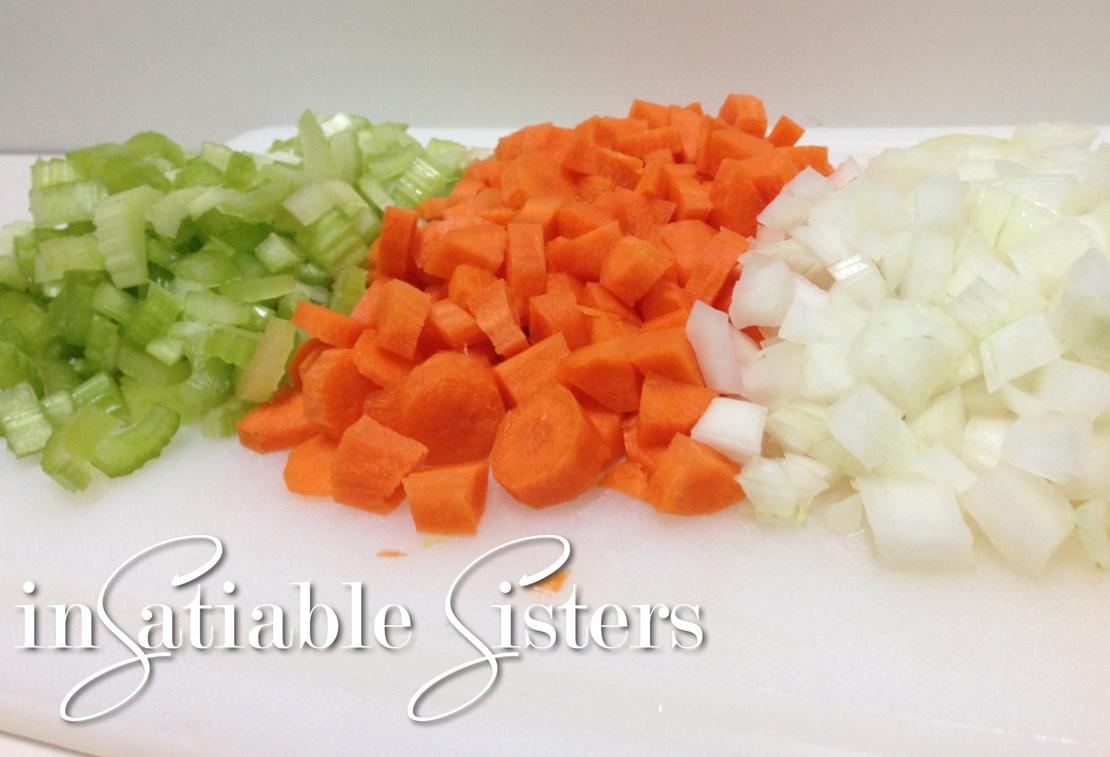
Make a well in the middle of the veggie pan and add 2 tablespoon of butter and 2 tablespoon of flour and whisk together to form a roux.  When the roux is golden in color, slowly begin to add about 1/2 the turkey stock, whisking as you go.  Roux.jpg

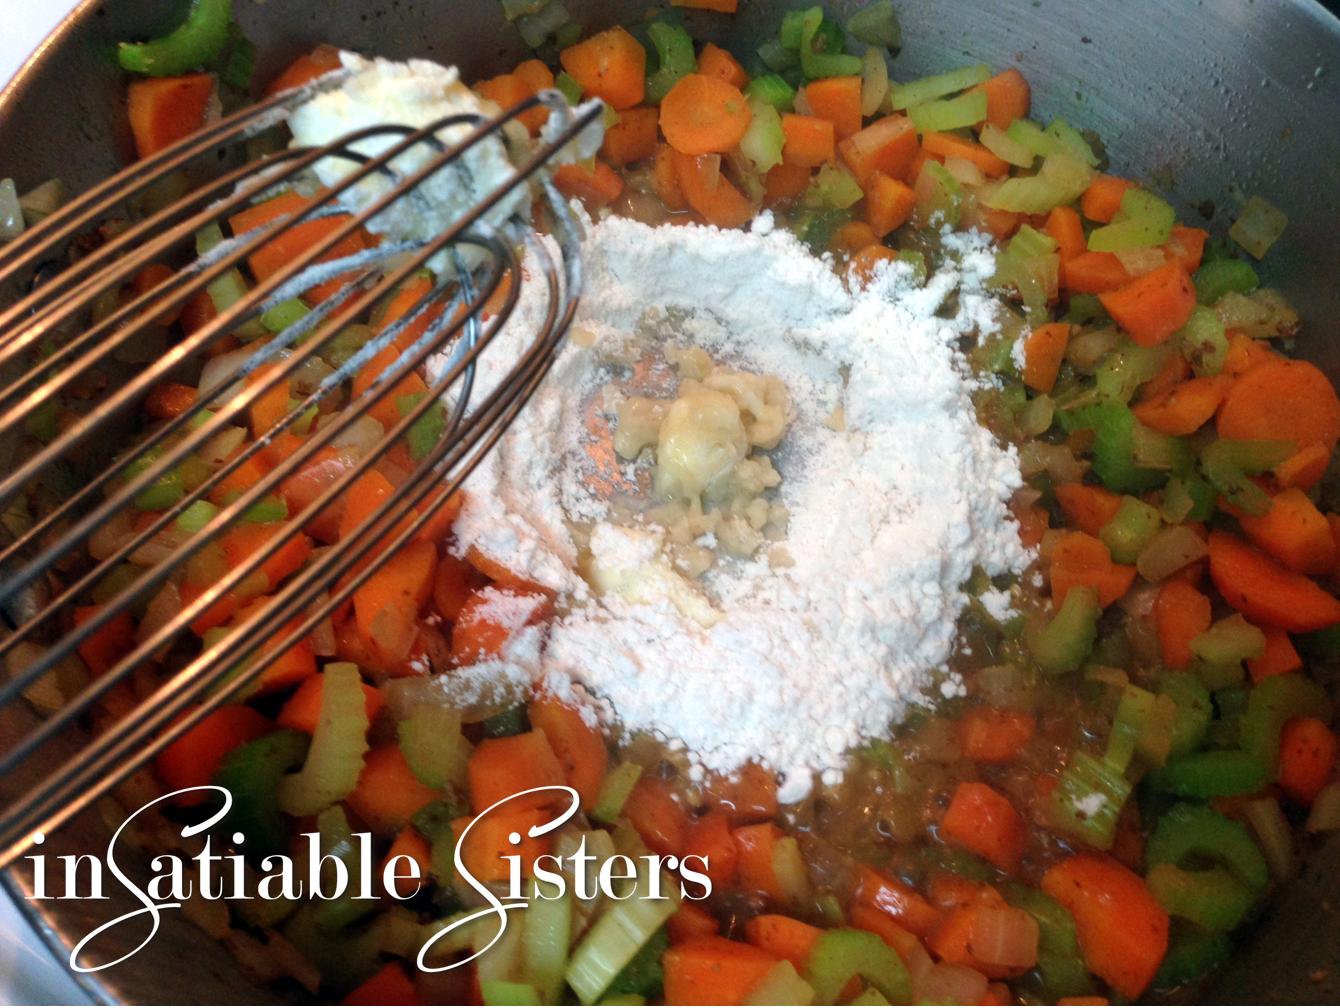
Once the mixture begins to thicken, add the rest of the stock, the fresh rosemary sprigs (whole, you’ll fish them out later), the thyme, Worcestershire sauce, English peas and salt & pepper.  Let this all cook together on medium heat for about 10 minutes.Rosemary.jpg

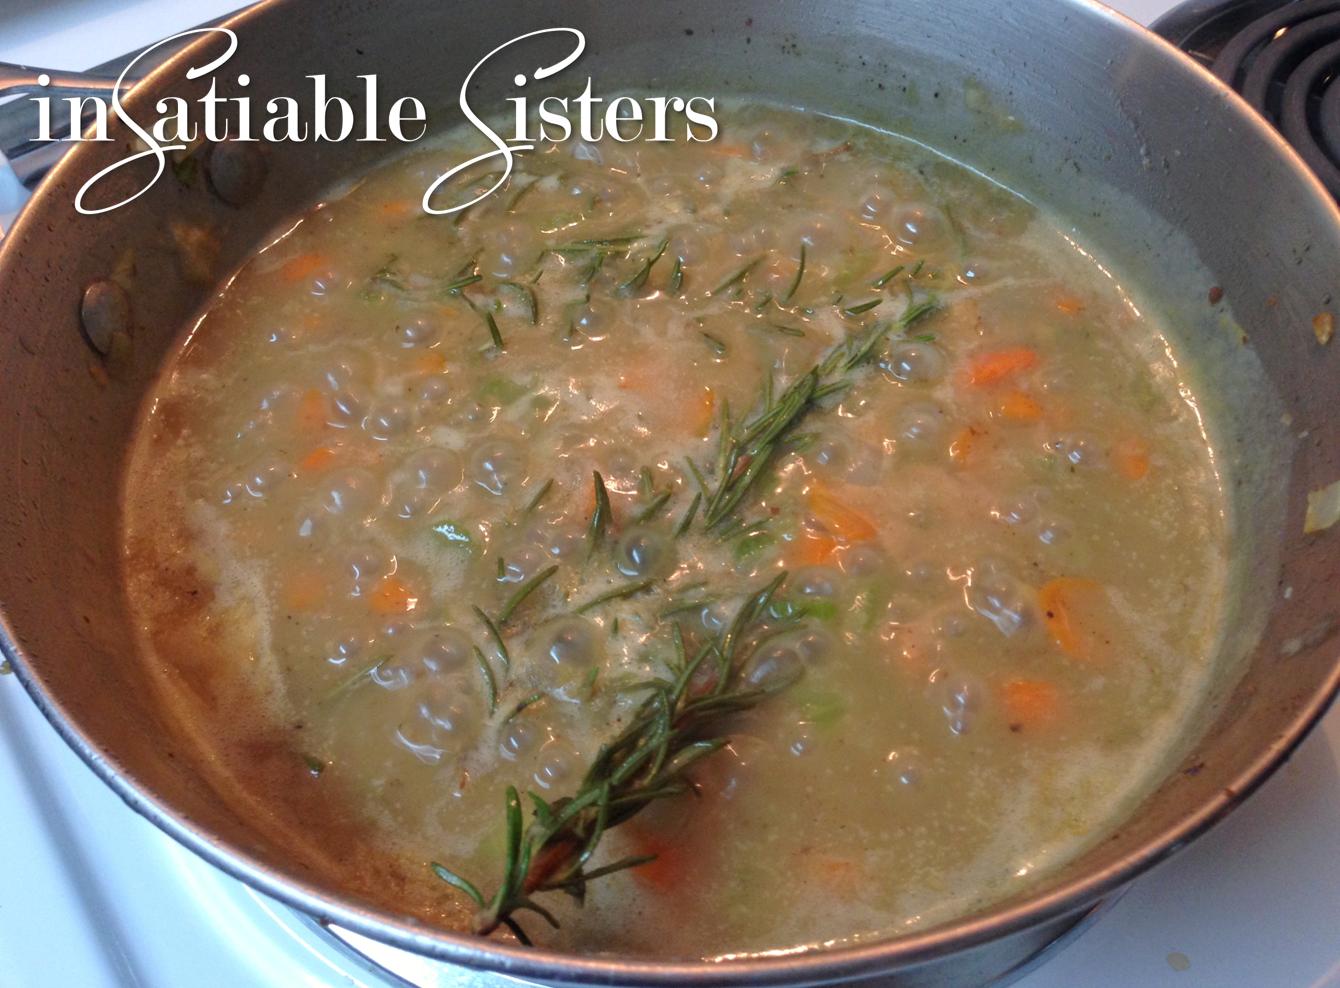
Now would be a good time to pre-heat your oven to 400 degrees.

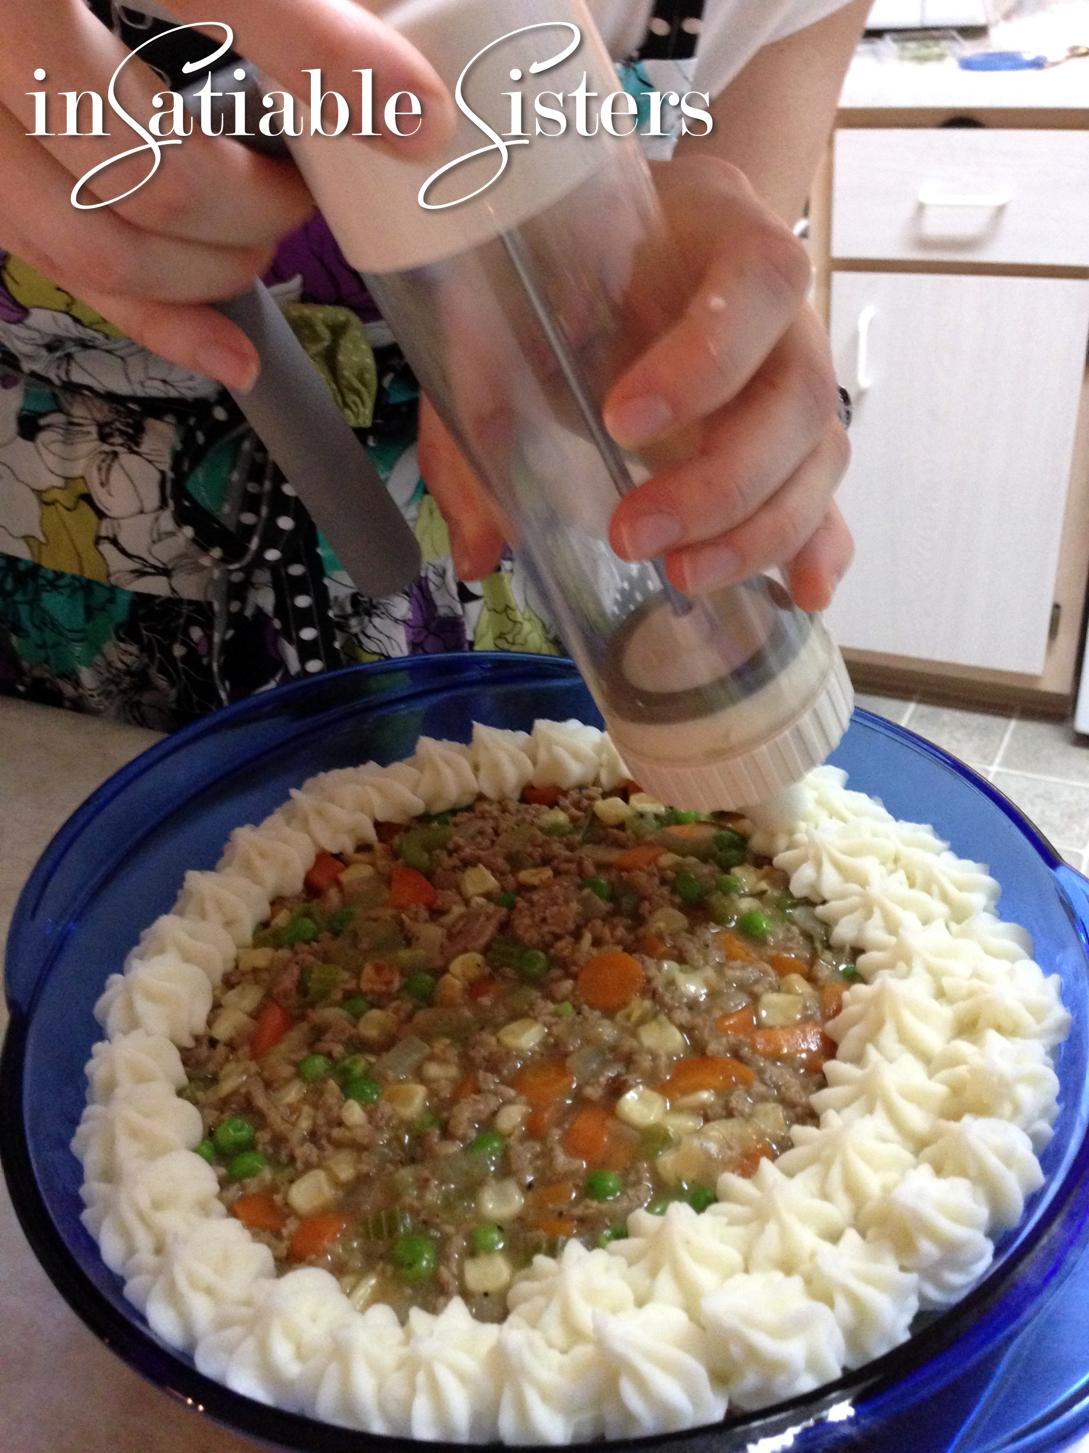
Back to the potatoes: Add the butter, garlic powder, sour cream and salt to the potatoes and whip with a hand mixer on medium speed until just creamy.  Fill your piping bag/tool using a large star tip, if using, and set aside…you’re almost there.

Remove the spent rosemary sprigs from the vegetable filling.  Make sure you get all the woody stems, those are no fun to chomp down on!  Add the browned turkey and the caramelized corn to the vegetable filling.  Filling.jpg

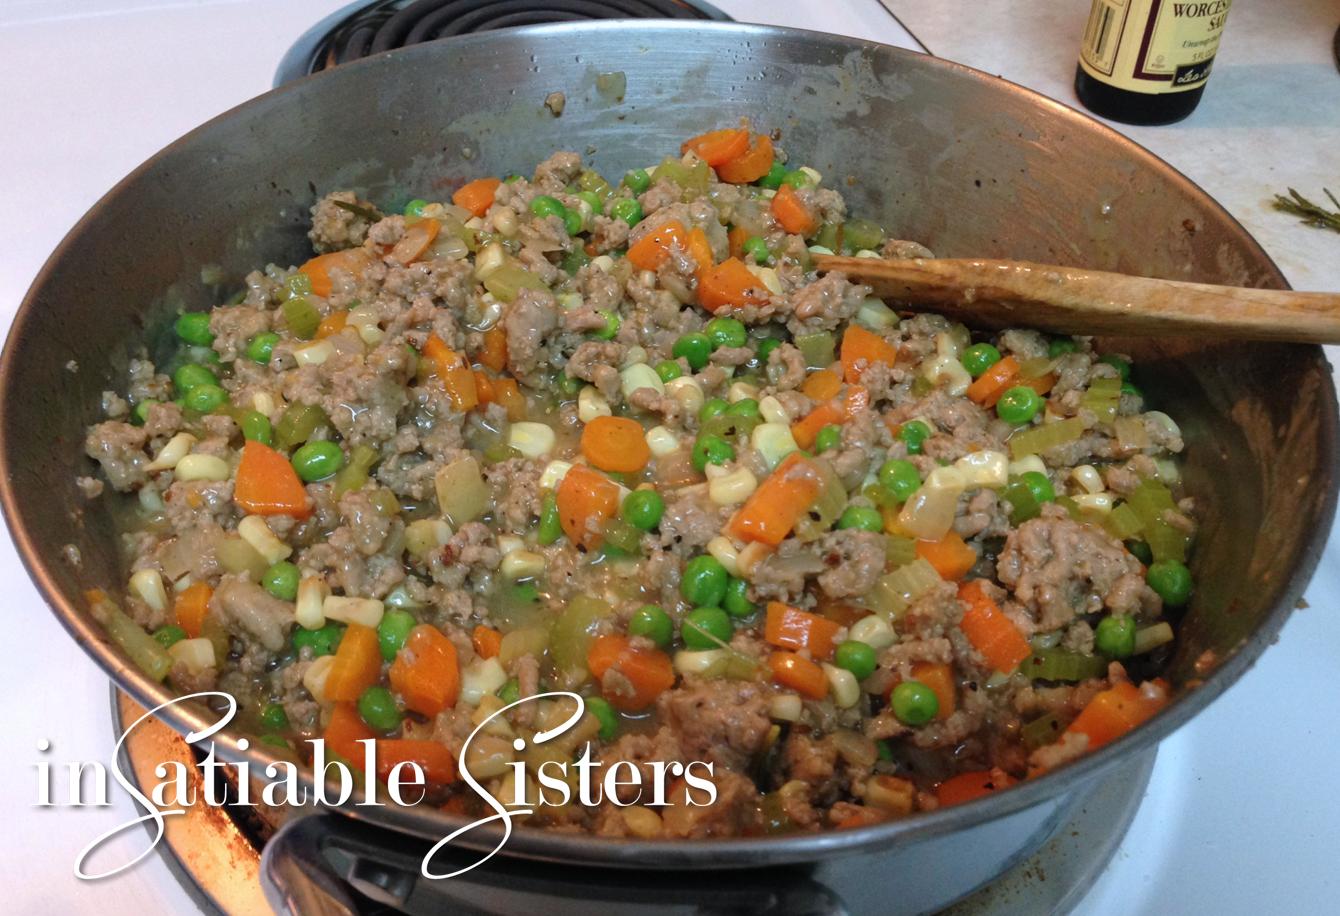
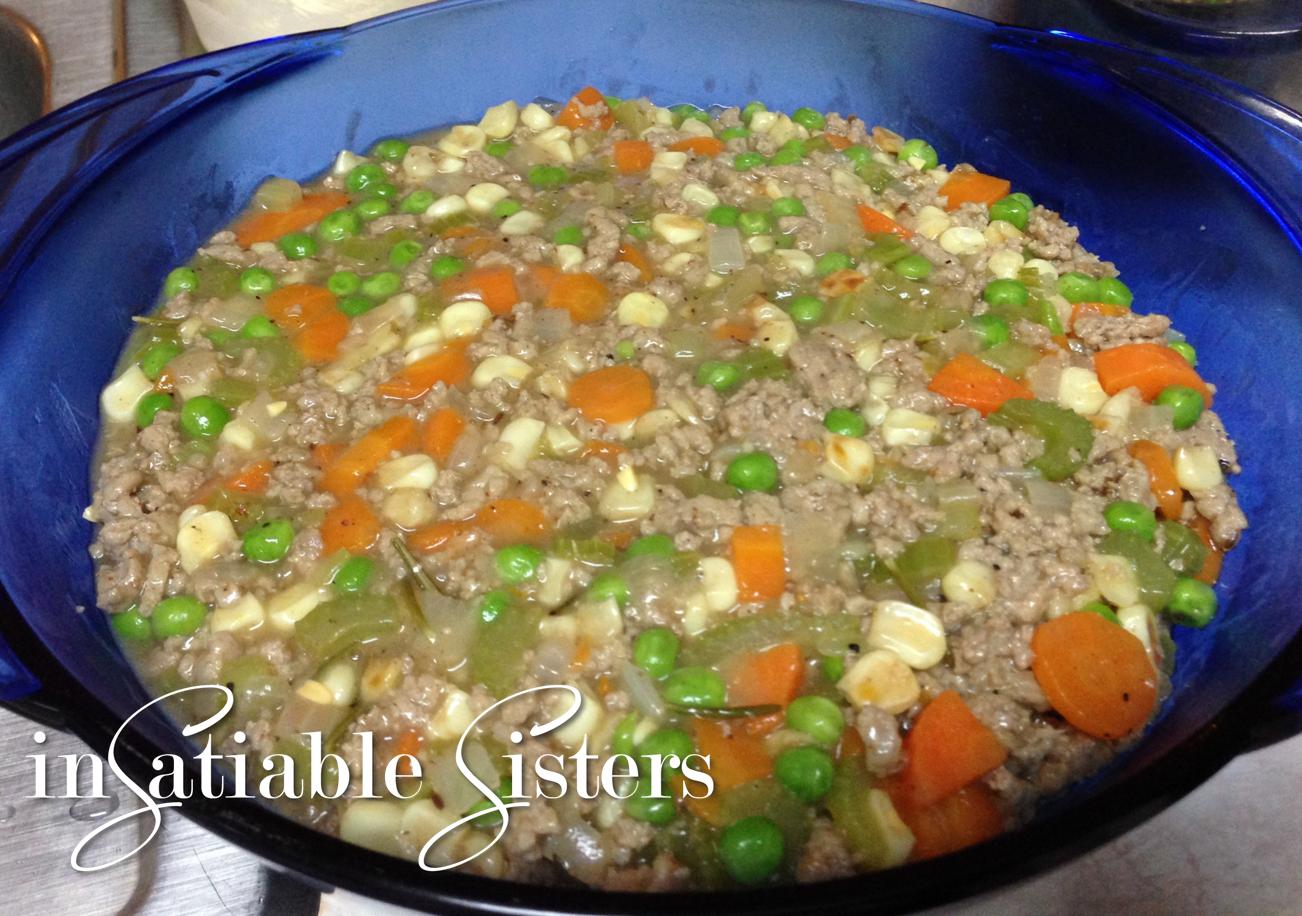
Transfer mixture to an oven safe baking dish, making sure to leave about an inch of clearance from the top.  I used a 2 quart round dish.  This would also be really cute in individual-sized cast iron pans, but I don’t have those.  Yet.
Oven Safe.jpg

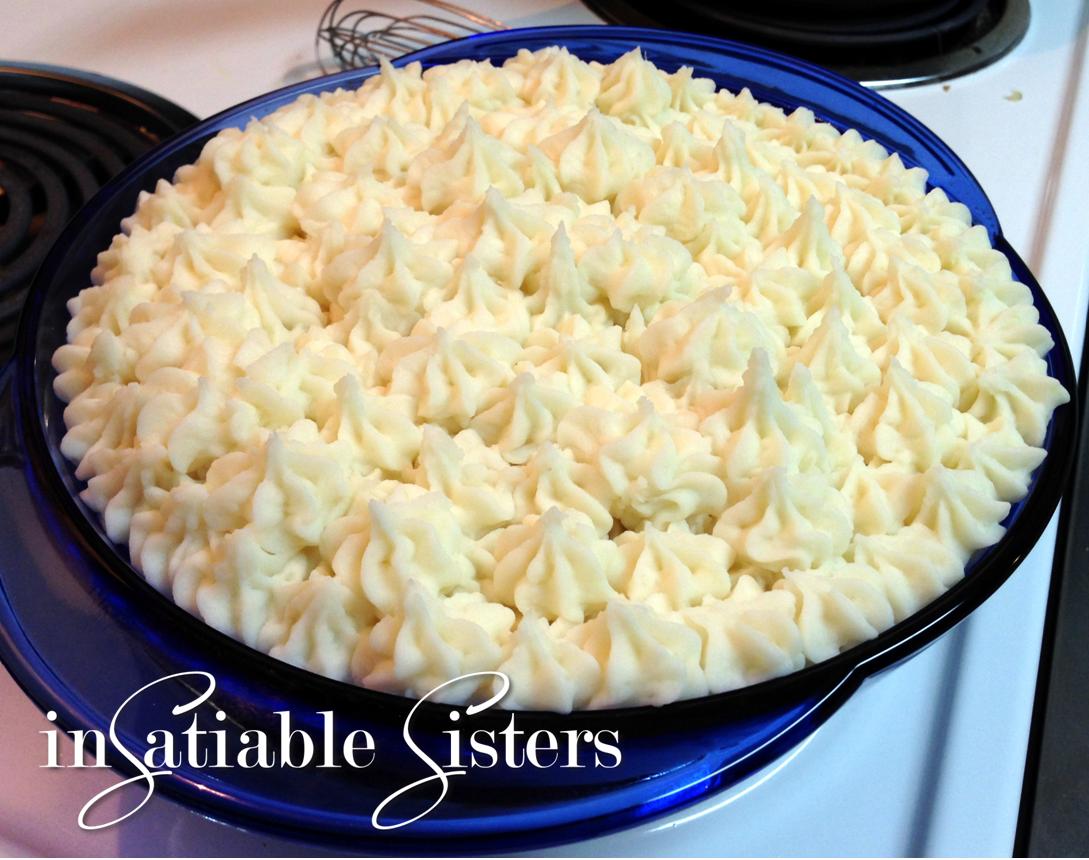
Pipe the potatoes onto the top of the filling.  If you don’t have a piping bag, smooth individual spoonfuls of potatoes onto the filling mixture, starting around the edges and working your way to the center.  Whether you’re using the piping or spooning method, make sure the potatoes create a good seal over the filling.
Pipe Potatoes.jpg

Potatoes.jpg

Into your 400 degree oven it goes, MAKE SURE to put a cookie sheet or piece of foil under it because it will most likely drip…mine does every time.  =)
In the Oven.jpg

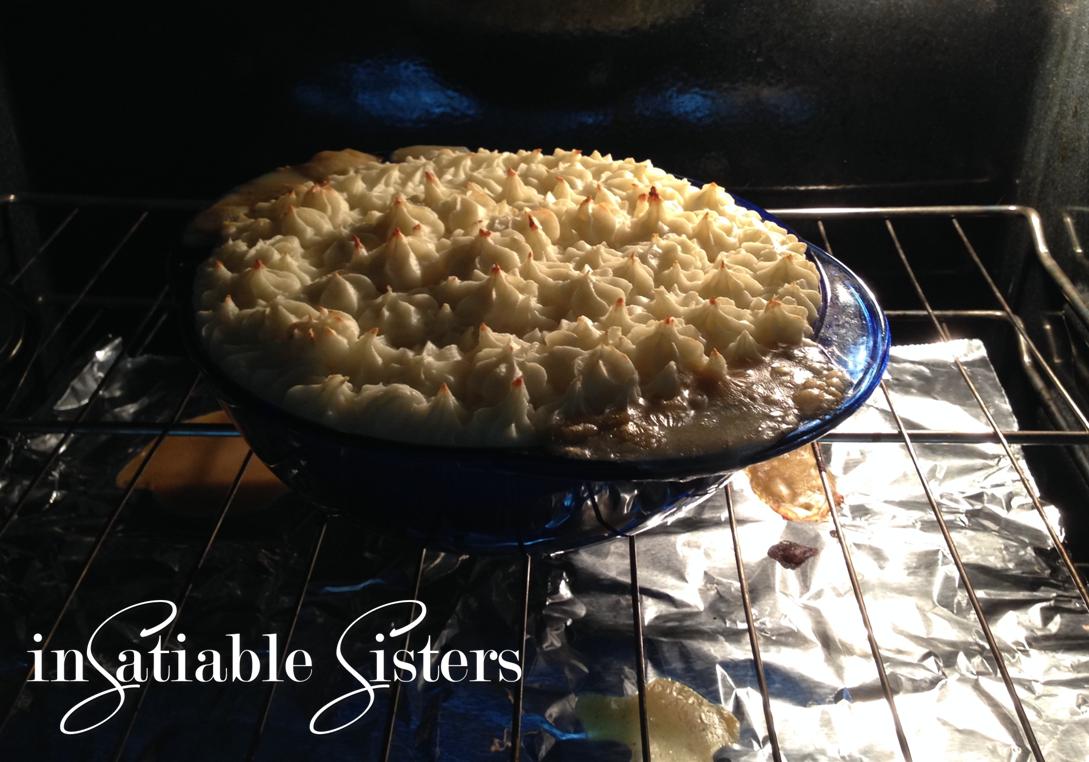
Bake for about 20 minutes or until potatoes are golden brown.  If it’s bubbling around the edges but the potatoes aren’t the color you want, you can broil it for 1-2 minutes but watch it very, very, very carefully!

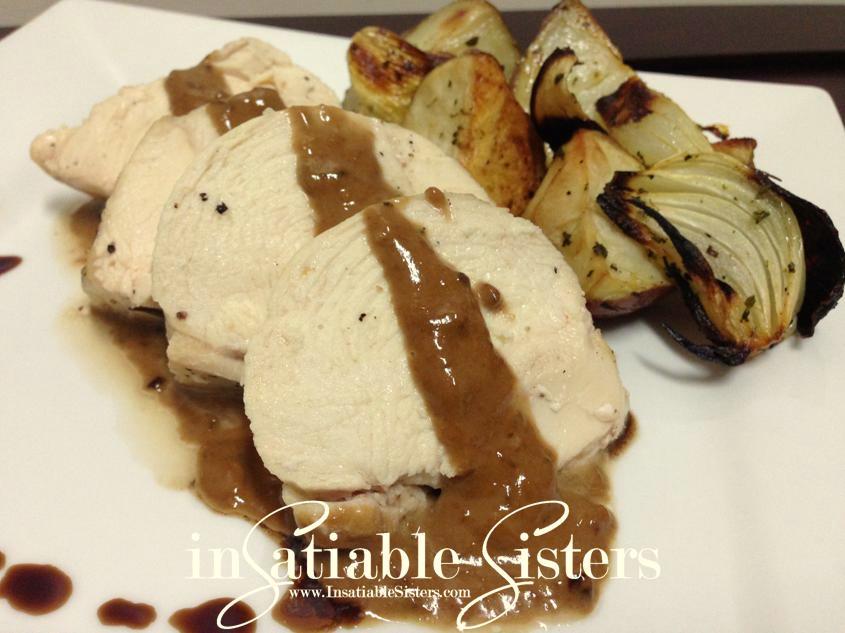
The insides will be scorching hot, so let it cool and set up for at least 5 minutes before serving.  Dish up and enjoy!  This one makes great leftovers too!
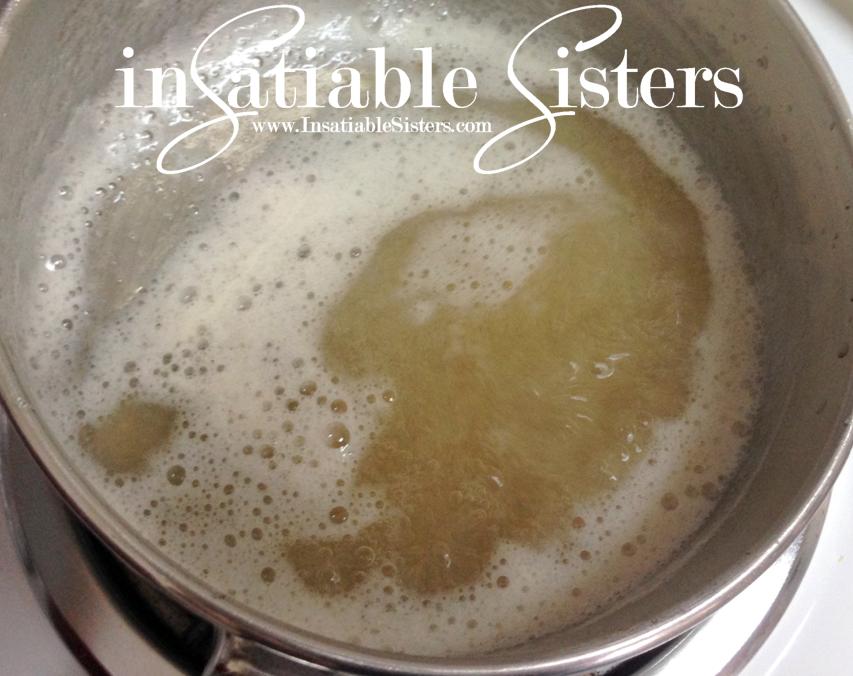
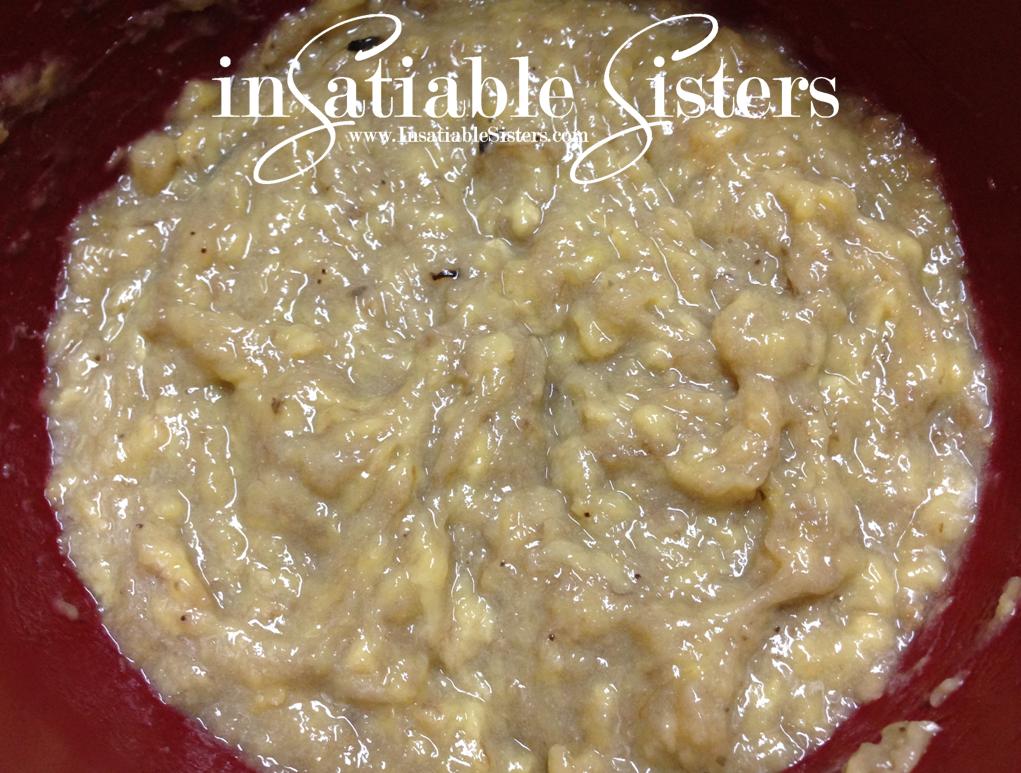
Finish 2 with Title.jpg

America’s Test Kitchen Banana Bread

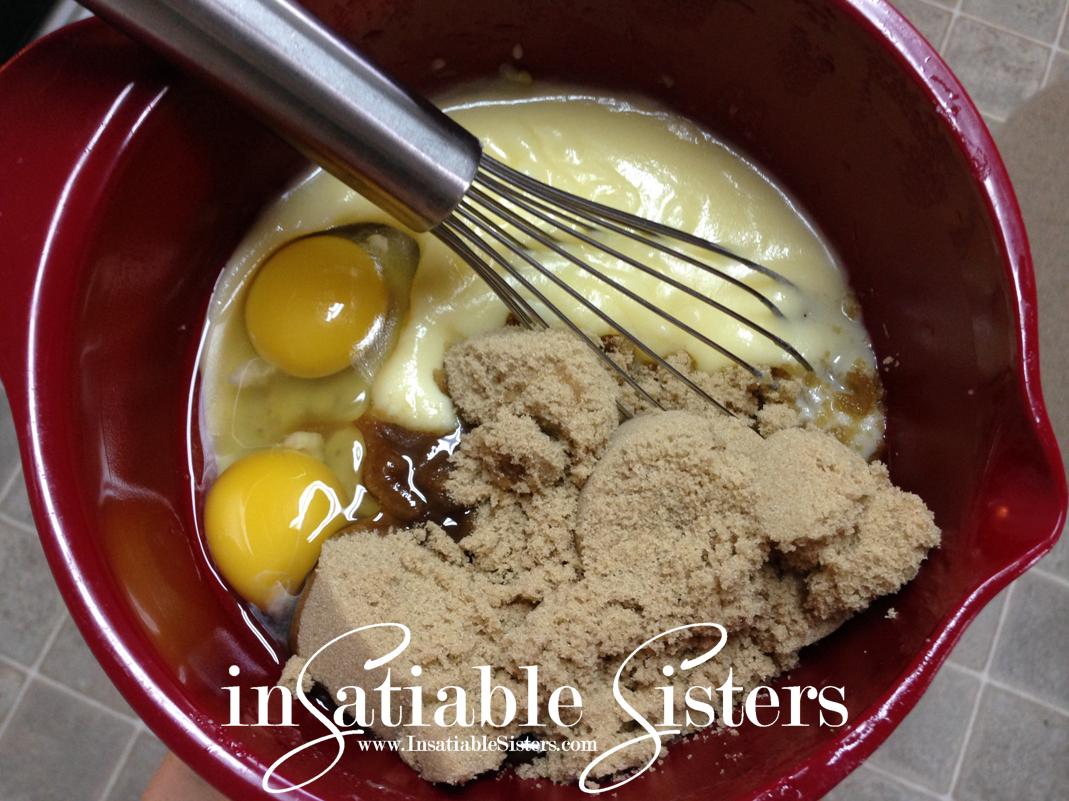
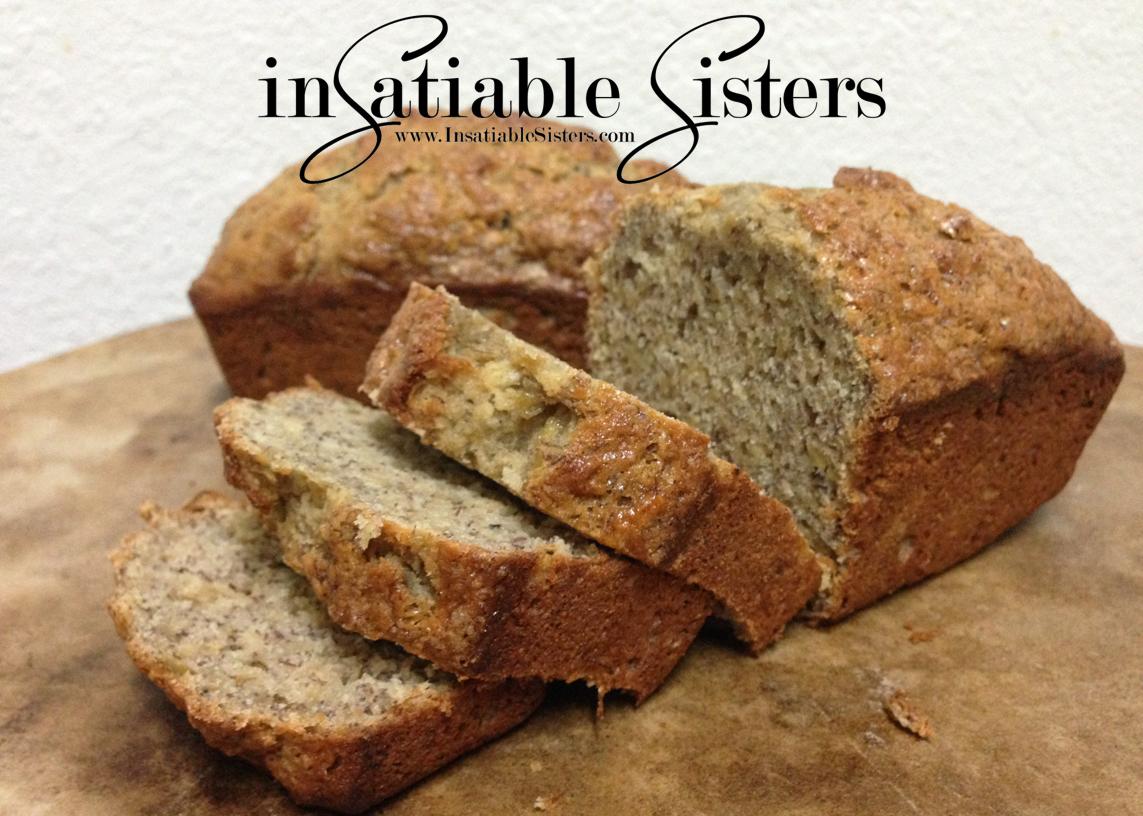
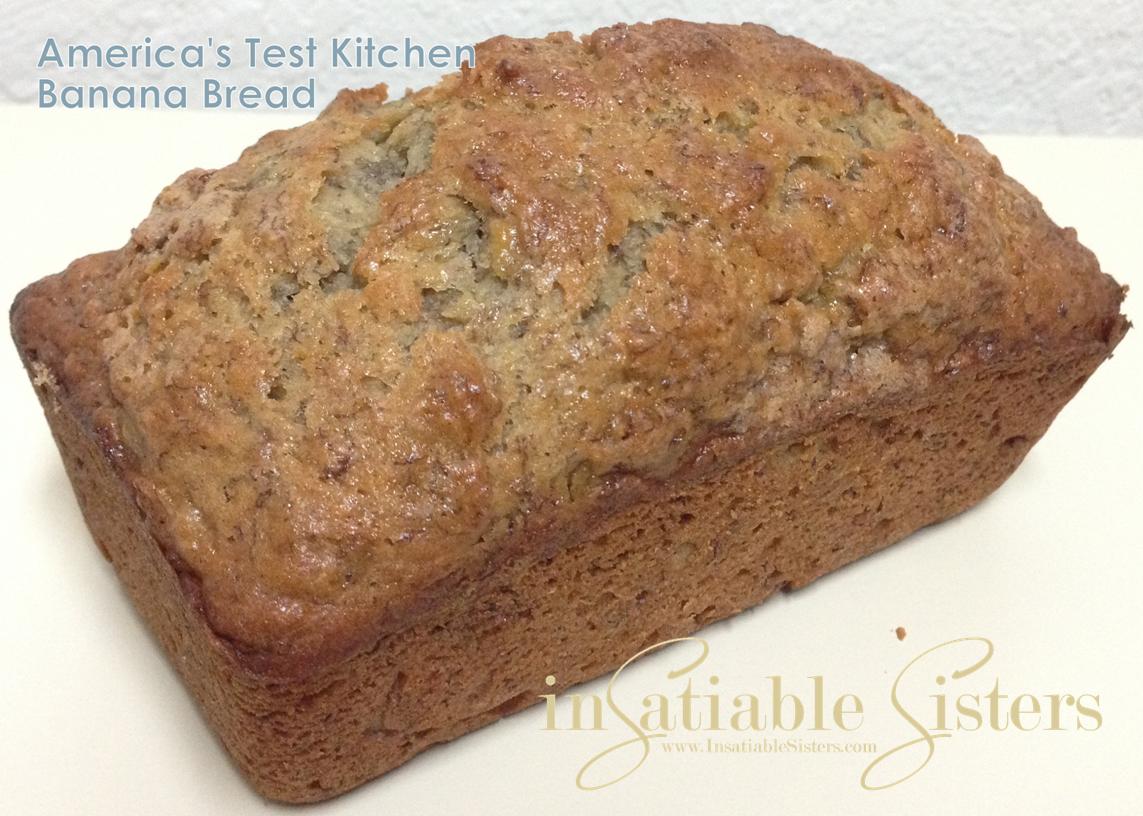
I have been baking banana bread as far back as I can remember.  It was one of the first things I learned how to make by myself when I was a kid.  I remember pulling the steaming loaves out of the oven and being so proud of my creation!  They never lasted long, and to this day, banana bread is one of my favorite comfort foods.

This recipe is not the same recipe I used growing up.  It is a creation of America’s Test Kitchen and was introduced to me through a foodie friend at work who generously shared the banana bread she had made with the rest of the office.  Although I wasn’t fast enough to snag a piece out of her bread from the break room, she did provide me with the recipe.  After hearing the comments around the office, I knew I had to make it for myself. Seriously, this is the most banana-y banana bread I’ve ever had and it is so incredibly moist!  Don’t scoff at the little bit of extra work with the bananas because THAT is what makes it so incredible.  Just do it, you will be rewarded!

When selecting bananas, be sure to use those that are heavily speckled, or even black.  If you are one of those people who freezes bananas, this is YOUR recipe!! The darker the banana, the sweeter and more developed the banana taste will be.  A lot of grocery stores will even sell these “overripe” bananas at a deeply discounted price.  Yes, those mushy, black banana’s seem really gross, but trust me, you’ll be hoarding them in your freezer like they are gold once you’ve seen (and tasted) what they can do.

Ingredients:

1 ¾ Cups unbleached all purpose flour
1 tsp baking soda
½ tsp table salt
5 large very ripe bananas, peeled
8 Tbsp (1 stick) unsalted butter, melted and cooled slightly
2 Large eggs
¾ cup packed light brown sugar
1 tsp vanilla extract
½ cup walnuts, toasted and coarsely chopped (optional)
2 tsp granulated sugar

**Note:  The photo below shows baking powder, which is NOT in the recipe…my mistake!

Directions:

Preheat oven to 350 degrees.

Spray an 8 ½  by 4 ½ inch loaf pan with nonstick cooking spray.

Whisk flour, baking soda, and salt together in a large bowl.

Place bananas in a microwave safe bowl.  I used a round casserole dish with a lid.  You can use plastic wrap with a few cut steam vents to cover if you don’t have a lid, but personally I avoid putting plastic in the microwave.  

Microwave on high power until bananas are soft and have released most of their liquid, about 5 minutes.Transfer bananas to a fine mesh strainer placed over a bowl and allow them to drain, turning the bananas occasionally for about 15 minutes.  You should end up with ½ – ¾ cup of liquid.  

Transfer liquid to a small saucepan and cook over medium-high heat until reduced to about ¼ cup.  Liquid should be light caramel color and thick, almost as thick as syrup.  I stirred mine pretty vigorously and ended up with some bubbles, but you get the idea.

Remove from the heat and stir this reduced liquid back into your mashed bananas and mash everything together with a potato masher.  The original recipe says “mash until fairly smooth” but mine never made it to that point…it stayed semi-lumpy.  I’m sure whatever stage of lumpiness your bananas end up is just fine.

Whisk in melted butter, eggs, brown sugar, and vanilla.


Pour banana mixture into your flour mixture and stir until just combined.  Do not over stir. Some flour streaks are okay.  Gently fold in walnuts if you’re using them.

Scrape batter into prepared pan and sprinkle granulated sugar evenly over the surface.

Bake until a toothpick inserted into the center of the loaf comes out clean, approx 55-75 minutes.  Cool bread in the pan on a wire rack for about 15 minutes, then remove loaf from pan and continue to cool on a wire rack.

**Note:  I used a mini loaf pan and a muffin pan instead of the larger, single loaf pan.  I started checking them at 30 minutes.  The muffins were slightly drier than the loaf and I would probably turn the oven down a few degrees the next time.

***Variation:  I added ½ cup of flaked coconut to the muffins and they were SO good!

Slice loaf and serve slightly warm or room temperature.  Enjoy!

Hearty Beef Stew

This beef stew is the best beef stew you will ever have!  It’s loaded with delicious meat potatoes, veggies and fresh herbs. It’s slow simmered to get a thick, silky broth that is perfect for sopping up with a crusty piece of French bread with homemade butter.  This is one of those times when I wish I still lived in a cabin in the woods in Alaska.  I’m sure fresh moose steak or caribou would be fabulous in this stew.  I can just imagine the stew simmering away all day while I’m out shoveling snow or bringing in fire wood.  I envision my husband’s soggy coat and gloves hanging by the wood stove to dry after a hard days work.  The sun is going down, making way for a frosty evening, the perfect accompaniment to a bowl of hearty stew.  Is your mouth watering yet?  Mine is.

Beef Stew Ingredients

Ingredients:

1lb Stew beef chunks or any beef steak cut into bite sized chunks
4 Tbs butter
2 Tbs flour
1 sprig of fresh rosemary
2 sprigs of fresh thyme
2 bay leaves
1/2 tsp dried parsley
Freshly ground black pepper
3 cloves of garlic, finely chopped
1 1/2 cups of pearl onions, or any onion
1 cup of chopped celery
2 cups of chopped carrot
3 cups of marble potatoes or any potatoes cut into bite sized chunks
4 cups of beef stock
1 cup red wine (I used syrah)
2 Tbs Worcestershire sauce

Method:

Brown beef in a skillet.
Beef Stew Beef

In a large stew pot, melt butter on low heat, when melted add the flour a little at a time and whisk until you make a paste called a roux.  Add the garlic, onion, celery, carrot, thyme, rosemary, black pepper, bay leaves and cook on low for a few minutes.
Beef Stew Roux

Add the beef stock, cooked beef, potatoes, wine and Worcestershire sauce.  Simmer on low/med heat for 2-3 hours, stirring occasionally.  If stew isn’t as thick as you like, make a thickener by whisking 1/2 cup of cold water with 2 Tbs flour, pour into soup and stir.
Beef Stew in Crock

Ladle into bowls, serve with crusty bread slathered with homemade butter and enjoy!
Hearty Beef Stew 2

Roasted Chicken Breast with Balsamic Cream

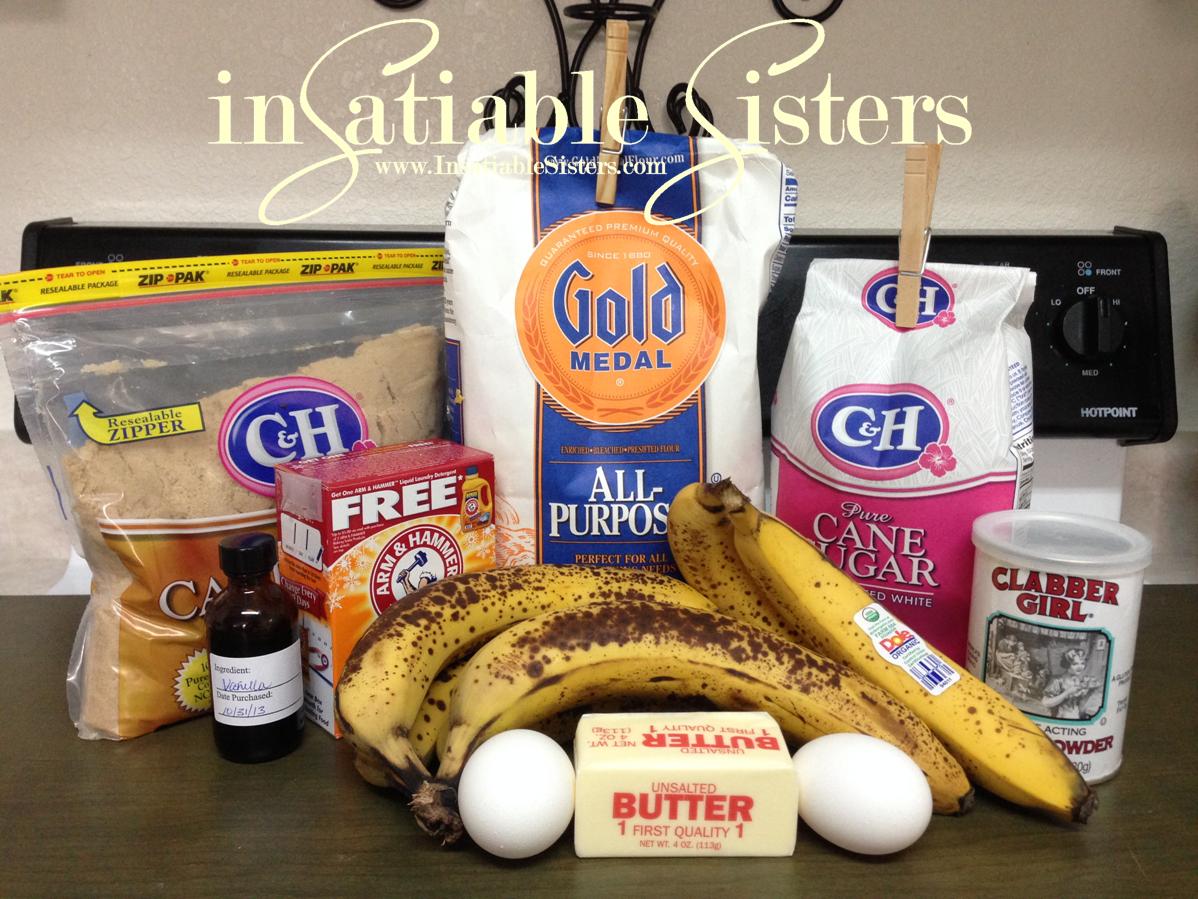
A foody friend of mine gave me this recipe for a balsamic cream sauce and it sounded so delicious and simple that I tried it that very night with a roasted chicken breast. I was not disappointed.  In fact, that rich, creamy sauce immediately landed among my favorite recipes, not only because it is delicious, but also because the ingredients are ones that I generally have on hand, and preparation is incredibly simple.  And, although I have this paired with chicken, I think it would go incredibly well with any cut of steak or a pasta dish.

Ingredients:

Chicken:
2 chicken breast halves, bone in
2 Tbs butter, divided
Drizzle of Olive Oil
Salt & Pepper

Balsamic Cream Sauce:
2 Tbs Olive Oil
2 Tbs Butter
¼ cup minced sweet onion (Mayan or Vidalia work well)
1 Cup heavy Cream
2 tsp chicken bouillon granules
2 Tbs Balsamic vinegar
½ Cup grated parmesan cheese (the kind in the can works best)

Directions:

Preheat oven to 375 degrees.  Rinse the chicken breasts and pat dry.  Gently loosen the skin to create a pocket, but don’t pull it off.  Cut the butter into 8 chunks and slip it under the chicken skin, 4 chunks for each breast.  Season the skin of the chicken well with salt and pepper and any additional herbs you prefer.  Place breasts in an oven-safe dish and drizzle with olive oil.

Roast the chicken for about 40 minutes, or until the internal temperature reaches a safe 165 degrees.
While the chicken is roasting, heat the olive oil and butter in a saucepan over medium-low heat.  Stir in the minced onion and cook until it has caramelized, about 15 minutes.  Stir in the balsamic vinegar and cook for 1 minute, then stir in the bouillon and cream.  Bring to a simmer, then remove from heat and stir in the parmesan cheese until melted.

Note: I used fresh parmesan in this picture, which tasted great but left the sauce a little chunky.  For a smoother sauce, use the pre-grated parm in a can, the stuff you sprinkle over spaghetti.

When the chicken is done roasting, allow it to rest for about 10 minutes.  Serve it whole or slice it up, but either way, be sure to serve with a generous portion of the balsamic cream.  I LOVE this combination with Oven Roasted Potatoes.  Enjoy!

Strawberry Shortcake Scones

These scones were a very happy accident. Fresh strawberries are in abundance this fall and I wanted to use them in a simple recipe that really elevated the strawberry flavor without adding a ton of sugar.  I remembered the basic scone recipe that my friend Dani game me and, hence, these babies were born.  They only take about 30 minutes from start to finish, so not only are they delicious, they’re easy!


Ingredients:

2 Cups Flour
2 Tbs Sugar
2 tsp baking powder
1 tsp kosher salt
½ tsp baking soda
5 Tbs butter, cold and cubed
1 egg, separated
8 oz plain greek yogurt
2 Cups chopped strawberries (sweetened slightly with 1 tsp sugar, if desired)
3 oz cream cheese, cubed and frozen (or VERY firm)
1 Tbs raw sugar

Glaze (optional):
5 Tbs powdered sugar
½ tsp milk
⅛ tsp vanilla
*This amount only makes a TINY amount of glaze…just a few “stripes” for each scone.  If you want a heavier glaze, just double the recipe.

Directions:

Put all dry ingredients into a bowl and whisk to combine.  Add cold butter in chunks and stir into the flour mixture.  Add egg yolk and greek yogurt and cut it into the flour mixture using a pastry blender.  Dough will be crumbly.  Add strawberries and cream cheese and gently fold them into the dough.Lightly flour your counter top and form the dough into a flat disk.  If the dough seems moist, due to the juicy strawberries, press a little extra flour into the top and sides of the disk.  Cut into 10 even triangles. 

Place the triangles on a sprayed baking sheet, about 1 inch apart.  Brush with the egg whites and sprinkle with raw sugar, if desired.  I use Sugar in the Raw.
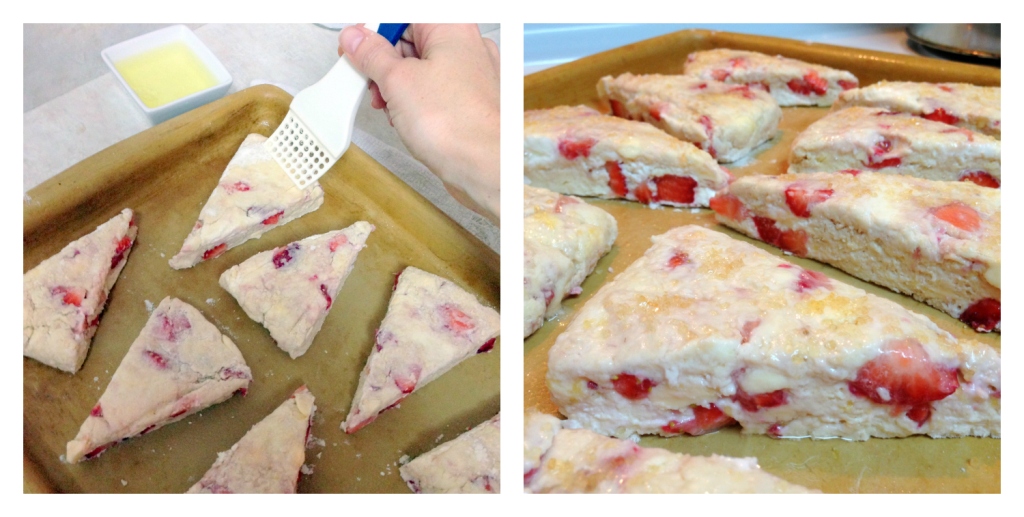
Bake in a 400 degree oven for 15 minutes.  Tops should be golden brown.  Drizzle a small amount of glaze over each scone.  Serve immediately.
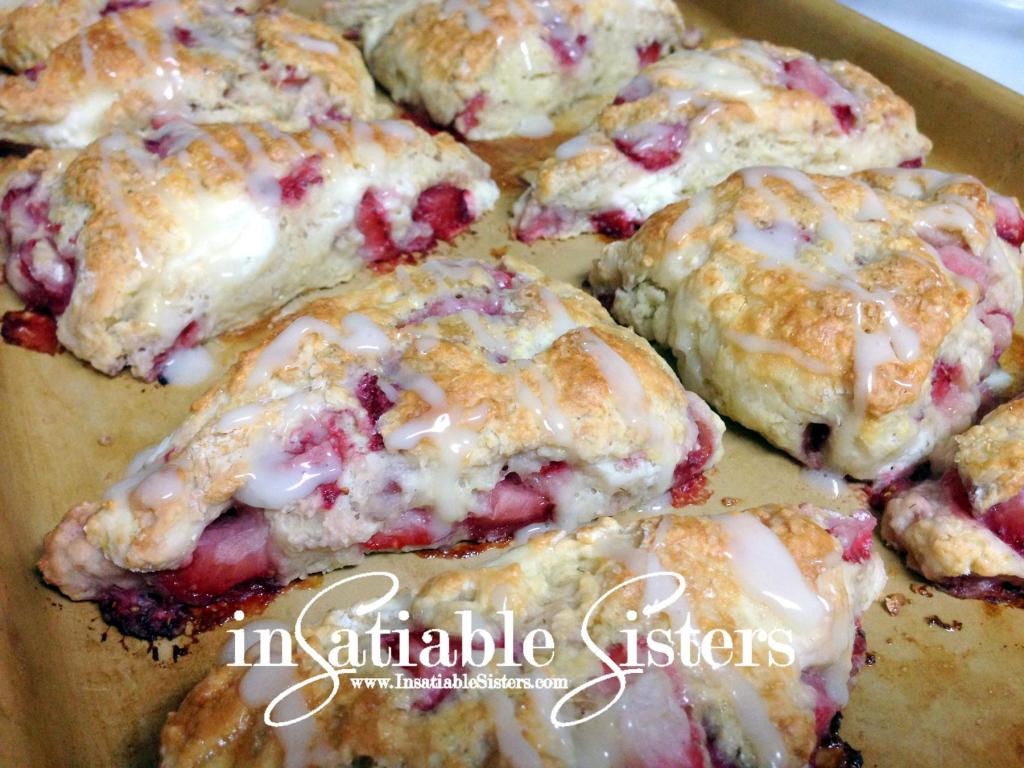
*Due to the short shelf life of strawberries, these scones need to be eaten within a day of baking…if they last that long.

White Chip Coconut Cookies

If you love coconut as much as I do, this is the cookie for you!  Sweet and chewy, they stay soft, AND they freeze incredibly well.  Just bake a batch and you will see.  ~Joanie

Ingredients:
1 ⅔ cups all-purpose flour
¾ tsp baking powder
½ tsp baking soda
½ tsp salt
¾ (1 ½ sticks) butter, softened
⅔ cup packed brown sugar
¼ cup granulated sugar
1 tsp vanilla extract
1 large egg
1 ½ cups white baking chips
1 ½ cups flaked coconut plus extra for topping
1 cup chopped candied pineapple (optional)

Directions:
Preheat oven to 350 F. 

In a small bowl, combine flour, baking powder, baking soda, and salt.  Set aside.

In a large mixing bowl, beat butter, sugars and vanilla until creamy.  Beat in the egg, then gradually stir in the flour mixture.  Stir in white chips, coconut and chopped pineapple (if desired).
 

Drop by rounded tablespoon onto un-greased cookie sheet.  Mine were about 1 inch.  Top with a pinch of coconut.

Bake approx 10 minutes or until edges are slightly brown and coconut is toasted.  Consume by the handful.  Makes about 4 dozen.