Zesty Fried Pickles

pickleAnyone who knows me knows that pickles are one of my favorite foods.  I’m obsessed with pickles, so I’m always looking for new and fun ways to incorporate them into my meals.  These fried pickles are addictive and are a fun finger food!  Who needs utensils, right?  Everytime I make them they are gone in a matter of minutes!  These go perfectly with my hot wings on game day, GO SEAHAWKS!!!!  Or my pretzels and beer cheese!  Fried pickles and beer cheese?  I think I’m on to something!!
~JannaDSC_0119

Ingredients:

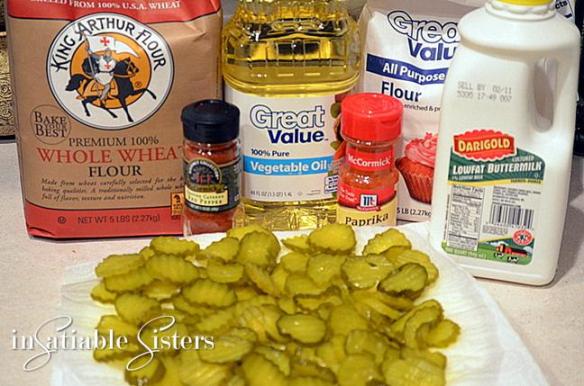
About 3 cups of dill pickle chips, drain on paper towels.
1 cup all purpose flour
1 cup whole wheat flour
1 tsp salt
1 tsp paprika
½ tsp cayenne pepper
¾ tsp dill weed or fresh chopped dill
1 cup of buttermilk
1 qt vegetable, (canola or peanut oil works too) oil for frying

Directions:

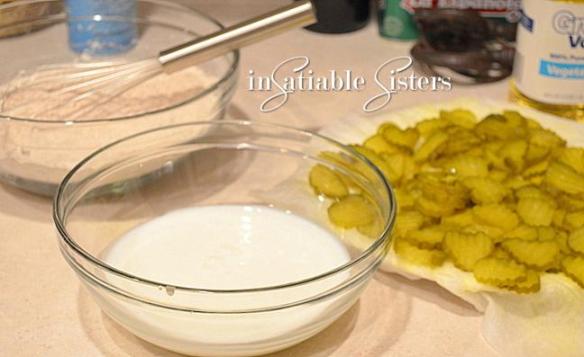
Combine all dry ingredients into a bowl, put buttermilk into separate bowl.  Make sure your pickles are well drained.DSC_0122

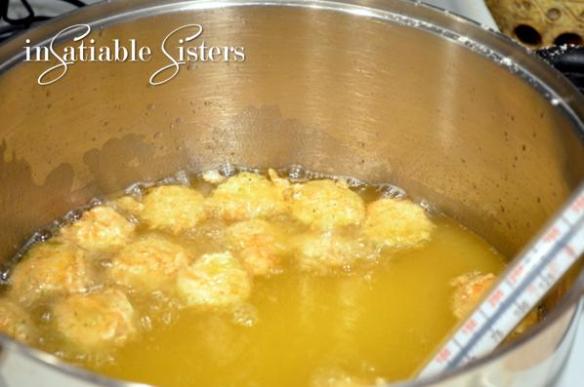
Heat oil in a 4 to 6 quart heavy bottomed pot to about 350 degrees F.  Dunk ½ a cup or so of pickles into the buttermilk, coating all sides.  Shake off excess buttermilk and put into the flour mixture, toss the pickles around so they are all coated.
DSC_0124

Fry in the hot oil until golden (2-3 minutes) and let them drain on paper towels for a few minutes.  Repeat with the remainder of the pickles.
DSC_0125

Enjoy as they are or for an added kick of flavor dip them in ranch or bleu cheese dressing spiked with hot sauce!!  These go fabulous with a cold beer!

Southwest Enchiladas

Taco salad is a staple in my household.  We probably have it 3-4 times a month.  I cook and season the meat and make a bean salad, then it’s a free-for-all where we each get to build our own salad.  The only problem is we ALWAYS have leftover meat and beans and, even though we love it, we get kind of bored after the 2nd day of taco salad leftovers.  That in mind, I decided to work on a dish that would use all those leftovers and turn it into something new.  SUCCESS!  Those same savory southwestern spices carry over beautifully into this dish, but in the form of a hot, gooey, delicious enchilada.  And the best part is, they are so easy, even if you don’t have a bunch of leftovers to use up.  Prep takes about 20 minutes and baking is minimal since the filling is already hot.  We still love Taco Salad, but now we also look forward to “leftover” enchiladas.

This full recipe makes a about 18 enchiladas.

Ingredients:
1 lb ground beef or turkey, or pre-cooked shredded chicken*
2 Tbs taco season
1 can black beans, drained and rinsed
1 cup frozen corn**
3 green onions, chopped
¼ cup fresh diced tomato
½ cup fresh cilantro
1 Tbs lime juice
1 Tbs cumin
1 tsp garlic powder
1 tsp salt
3 +/- Tbs coconut or canola oil
18 +/- corn enchiladas
2 10 oz cans red enchilada sauce
1 1/2 cups shredded mexican blend cheese

*If you want to make this a vegetarian dish, simply replace the meat with an additional can of beans or about 1 1/2 cups cooked quinoa.

**You can also use grilled sweet corn when it’s in season, which is what I prefer.  The grill adds so much flavor!

Directions:

Preheat oven to 375 degrees Fahrenheit.

If using ground beef or turkey, brown meat in a skillet.

Add taco season and 1/4 cup water to meat and allow to simmer about 5 minutes.

To the skillet add beans, corn, tomatoes, 2 of the onions, cilantro, lime juice and spices. Reduce heat to medium low and allow the mixture to heat through.

In a separate small frying pan, heat oil on medium-high heat.  Once it’s hot, fry the tortillas one-by-one, about 10 seconds on each side.  Drain on paper towels and allow tortillas to cool enough to handle.

Coat the bottom of a 9×13 pan (or 2 8×8′s as I did) with a few tablespoons of enchilada sauce.

Spoon about ¼ cup of filling mixture into each tortilla plus a pinch of cheese.  Fold over filling and place enchiladas seam-side-down in the pan.

Top with remaining enchilada sauce.

Cover with remaining cheese and green onion.

Bake for about 20 minutes or until cheese is melted and starts to brown.  

Pile on sour cream, diced avocado, shredded lettuce, black olives, jalapeno’s or whatever toppings your prefer.  Eat up!

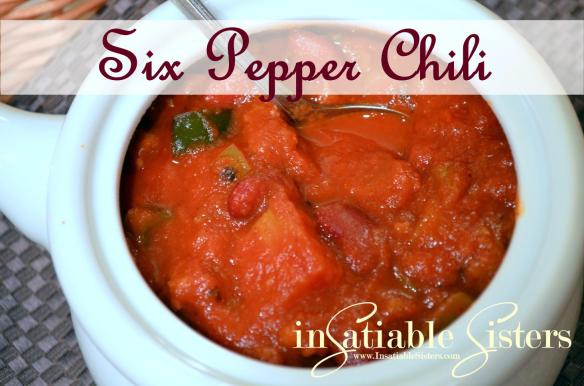
Six Pepper Chili

I love chili! Probably partly because I like spicy food and I put a lot of kick into my chili.  In our house, when Joanie and I were kids, chili was a staple and it was always homemade. Sometimes we would even make moose chili but that’s a whole other blog!

Over the years I’ve tried many different chili styles adding this or that, making it spicy or mild, or trying different meat or beans.  I even made it cheesy a time or two, which essentially turned out to be a chili dip that went perfectly with nacho cheese Doritos!  I finally perfected this chili on a crisp autumn evening up at our cabin in the mountains.  I also recently used it to win a chili cook-off!  One thing I would change in this recipe is I would fire roast all of the peppers to bring out all of the flavors in the different varieties.  This one is a little spicy, fair warning.  If you don’t want as much spice, omit the cayenne pepper and jalapeno.  ~Janna

Serves: 12

Ingredients:

1 lb sweet Italian pork sausage
10-12oz of pearl onions, whole (or 1 medium yellow onion roughly chopped)
1 red or green bell pepper, diced
2 Serrano peppers, diced
2 jalapeno peppers, diced
2 poblano peppers, diced
12 oz bottle of beer
2 cans 15oz tomato sauce
1 can 12oz tomato paste
1 can, 14.5oz fire roasted diced tomatoes
2 cans 15.25oz each of dark kidney beans, drained but not rinsed
Cayenne pepper
1 Tbs Chili powder
2 tsp garlic powder
2 Tbs Worcestershire sauce
1/2 Tbs sugar
black pepper
salt to taste

Method:

Brown pork in a skillet on med/high heat.

In large stock pot, sauté onions and all peppers. Once tender, (about 5-7 minutes) add the bottle of beer and stir a couple of minutes.

Add the tomato paste, tomato sauce, diced tomatoes and beans, stir to combine and bring back to a simmer.

Add the pork without draining (unless there is tons of grease) and all of the spices.  Stir to combine and Simmer at least 1 hour.  Salt to taste and enjoy on a cold winter evening!6 Pepper Chili with Title

America’s Test Kitchen Banana Bread

I have been baking banana bread as far back as I can remember.  It was one of the first things I learned how to make by myself when I was a kid.  I remember pulling the steaming loaves out of the oven and being so proud of my creation!  They never lasted long, and to this day, banana bread is one of my favorite comfort foods.

This recipe is not the same recipe I used growing up.  It is a creation of America’s Test Kitchen and was introduced to me through a foodie friend at work who generously shared the banana bread she had made with the rest of the office.  Although I wasn’t fast enough to snag a piece out of her bread from the break room, she did provide me with the recipe.  After hearing the comments around the office, I knew I had to make it for myself. Seriously, this is the most banana-y banana bread I’ve ever had and it is so incredibly moist!  Don’t scoff at the little bit of extra work with the bananas because THAT is what makes it so incredible.  Just do it, you will be rewarded!

When selecting bananas, be sure to use those that are heavily speckled, or even black.  If you are one of those people who freezes bananas, this is YOUR recipe!! The darker the banana, the sweeter and more developed the banana taste will be.  A lot of grocery stores will even sell these “overripe” bananas at a deeply discounted price.  Yes, those mushy, black banana’s seem really gross, but trust me, you’ll be hoarding them in your freezer like they are gold once you’ve seen (and tasted) what they can do.

Ingredients:

1 ¾ Cups unbleached all purpose flour
1 tsp baking soda
½ tsp table salt
5 large very ripe bananas, peeled
8 Tbsp (1 stick) unsalted butter, melted and cooled slightly
2 Large eggs
¾ cup packed light brown sugar
1 tsp vanilla extract
½ cup walnuts, toasted and coarsely chopped (optional)
2 tsp granulated sugar

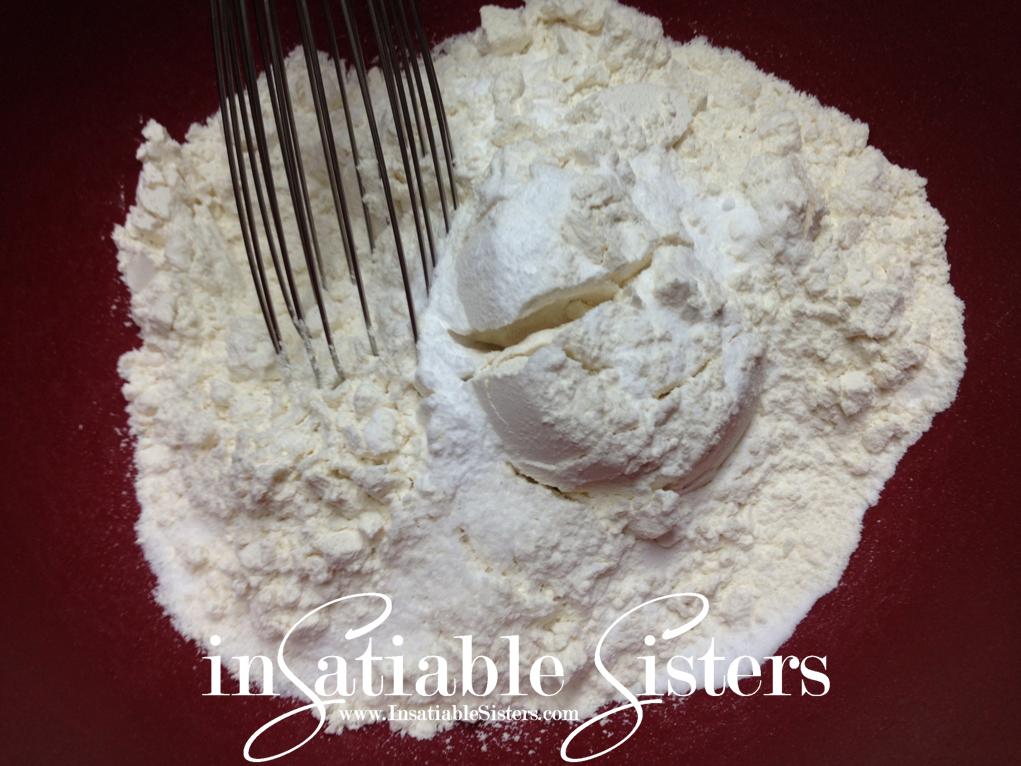
**Note:  The photo below shows baking powder, which is NOT in the recipe…my mistake!

Directions:

Preheat oven to 350 degrees.

Spray an 8 ½  by 4 ½ inch loaf pan with nonstick cooking spray.

Whisk flour, baking soda, and salt together in a large bowl.
Place bananas in a microwave safe bowl.  I used a round casserole dish with a lid.  You can use plastic wrap with a few cut steam vents to cover if you don’t have a lid, but personally I avoid putting plastic in the microwave.  

Microwave on high power until bananas are soft and have released most of their liquid, about 5 minutes.Transfer bananas to a fine mesh strainer placed over a bowl and allow them to drain, turning the bananas occasionally for about 15 minutes.  You should end up with ½ – ¾ cup of liquid.  

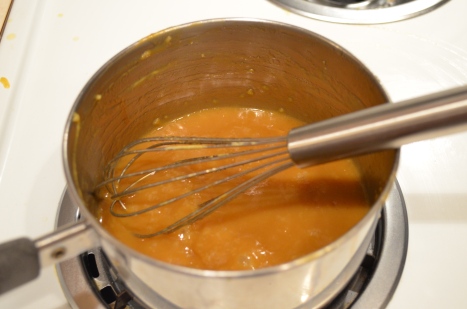
Transfer liquid to a small saucepan and cook over medium-high heat until reduced to about ¼ cup.  Liquid should be light caramel color and thick, almost as thick as syrup.  I stirred mine pretty vigorously and ended up with some bubbles, but you get the idea.

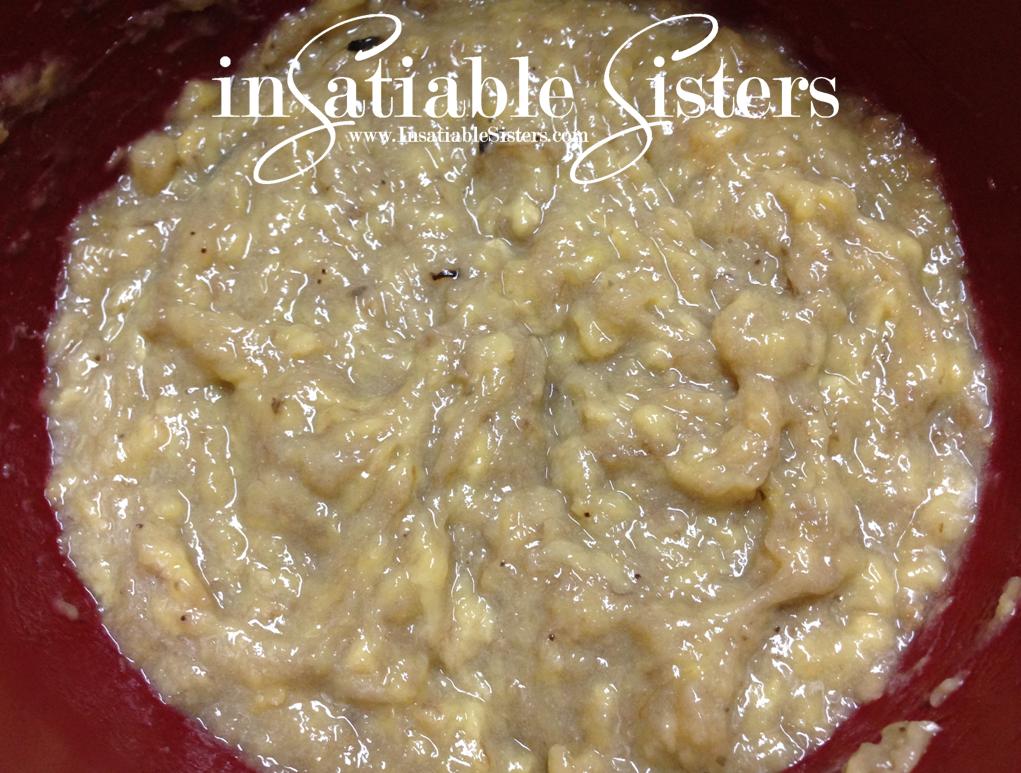
Remove from the heat and stir this reduced liquid back into your mashed bananas and mash everything together with a potato masher.  The original recipe says “mash until fairly smooth” but mine never made it to that point…it stayed semi-lumpy.  I’m sure whatever stage of lumpiness your bananas end up is just fine.
Whisk in melted butter, eggs, brown sugar, and vanilla.
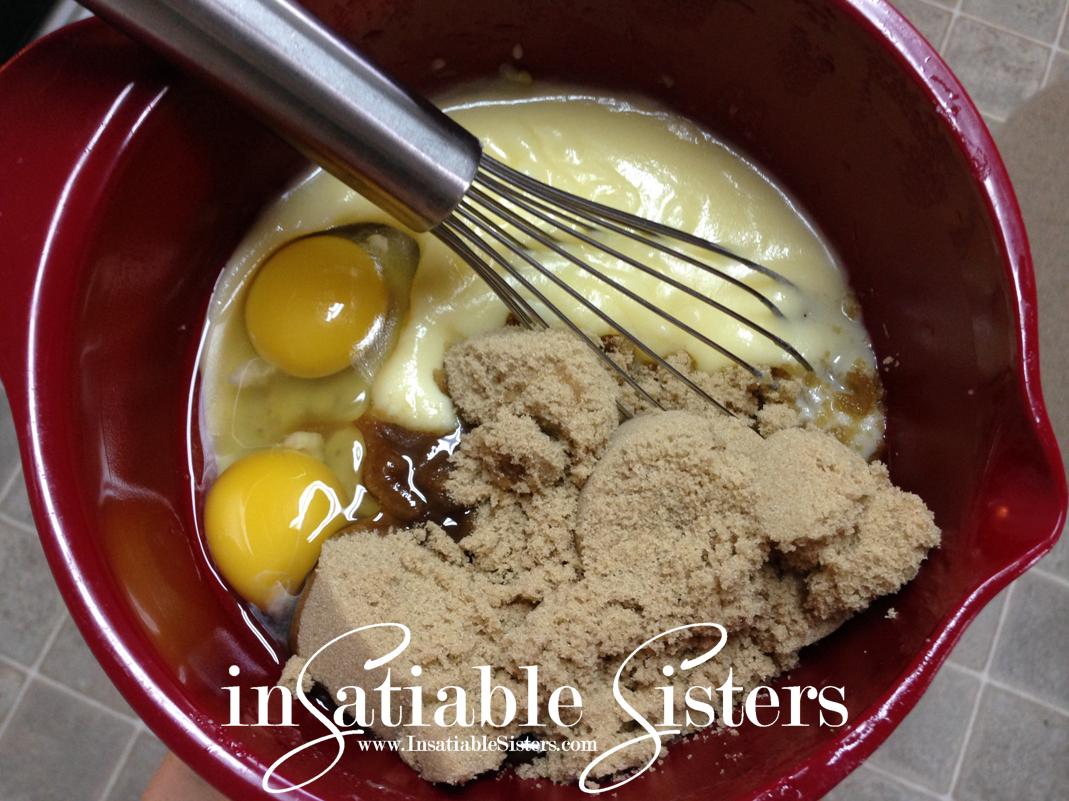

Pour banana mixture into your flour mixture and stir until just combined.  Do not over stir. Some flour streaks are okay.  Gently fold in walnuts if you’re using them.

Scrape batter into prepared pan and sprinkle granulated sugar evenly over the surface.

Bake until a toothpick inserted into the center of the loaf comes out clean, approx 55-75 minutes.  Cool bread in the pan on a wire rack for about 15 minutes, then remove loaf from pan and continue to cool on a wire rack.

**Note:  I used a mini loaf pan and a muffin pan instead of the larger, single loaf pan.  I started checking them at 30 minutes.  The muffins were slightly drier than the loaf and I would probably turn the oven down a few degrees the next time.

***Variation:  I added ½ cup of flaked coconut to the muffins and they were SO good!

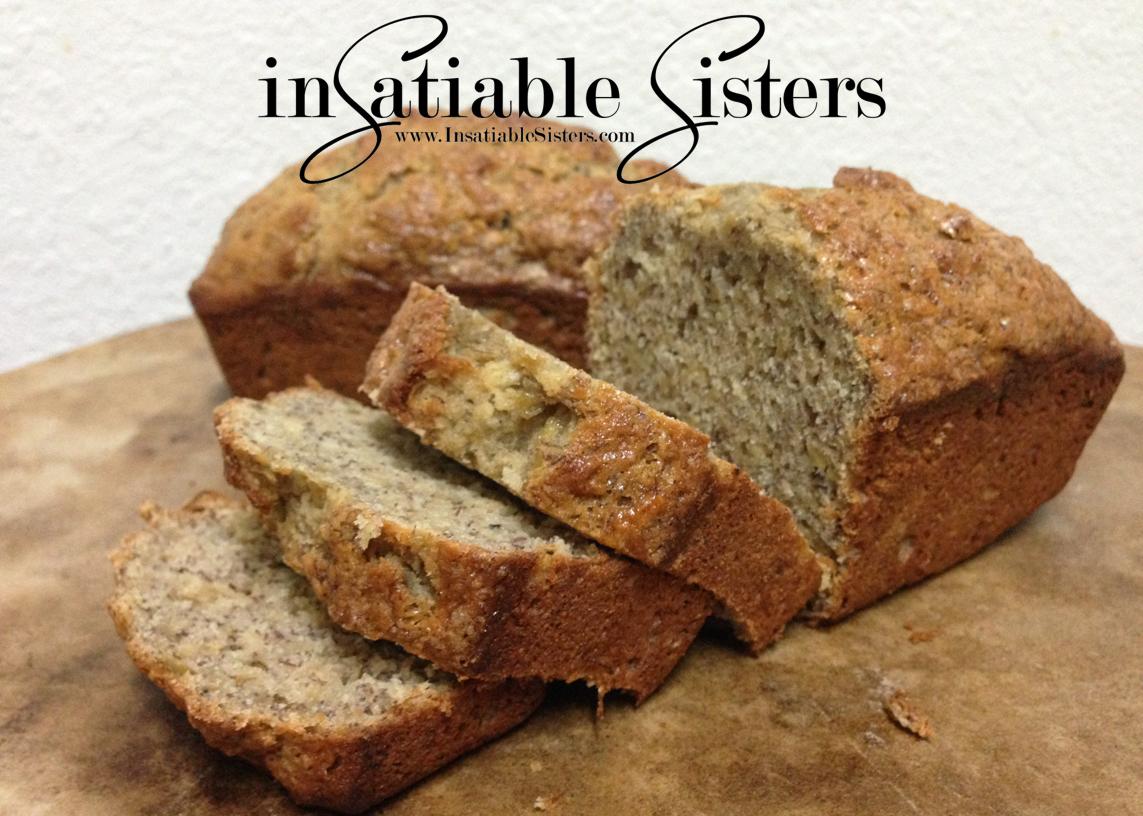
Slice loaf and serve slightly warm or room temperature.  Enjoy!
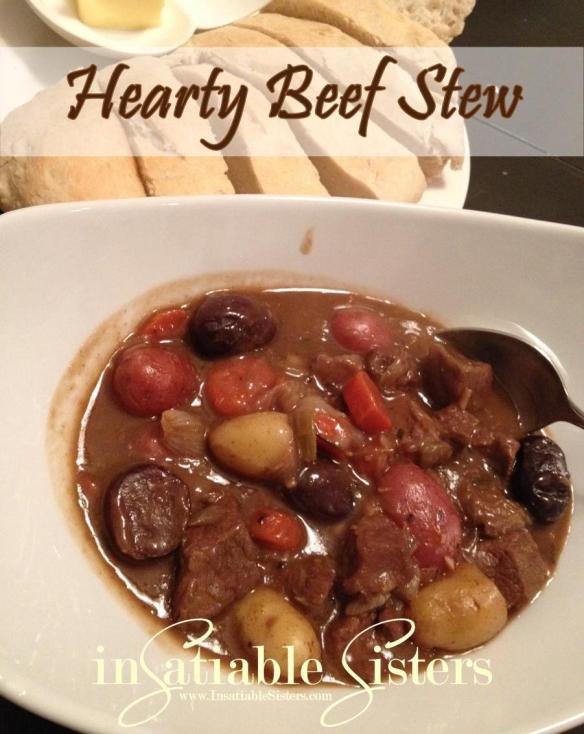
Hearty Beef Stew

This beef stew is the best beef stew you will ever have!  It’s loaded with delicious meat potatoes, veggies and fresh herbs. It’s slow simmered to get a thick, silky broth that is perfect for sopping up with a crusty piece of French bread with homemade butter.  This is one of those times when I wish I still lived in a cabin in the woods in Alaska.  I’m sure fresh moose steak or caribou would be fabulous in this stew.  I can just imagine the stew simmering away all day while I’m out shoveling snow or bringing in fire wood.  I envision my husband’s soggy coat and gloves hanging by the wood stove to dry after a hard days work.  The sun is going down, making way for a frosty evening, the perfect accompaniment to a bowl of hearty stew.  Is your mouth watering yet?  Mine is.

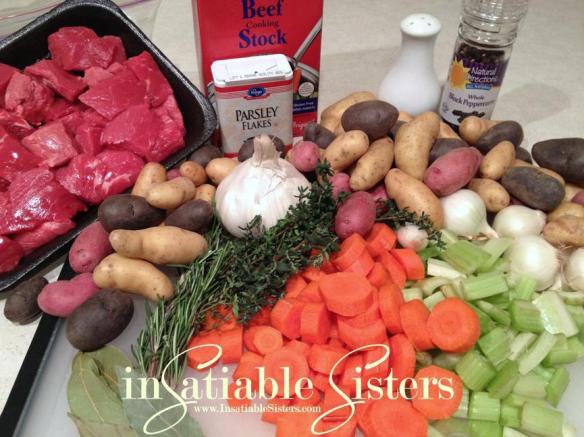
Beef Stew Ingredients

Ingredients:

1lb Stew beef chunks or any beef steak cut into bite sized chunks
4 Tbs butter
2 Tbs flour
1 sprig of fresh rosemary
2 sprigs of fresh thyme
2 bay leaves
1/2 tsp dried parsley
Freshly ground black pepper
3 cloves of garlic, finely chopped
1 1/2 cups of pearl onions, or any onion
1 cup of chopped celery
2 cups of chopped carrot
3 cups of marble potatoes or any potatoes cut into bite sized chunks
4 cups of beef stock
1 cup red wine (I used syrah)
2 Tbs Worcestershire sauce

Method:

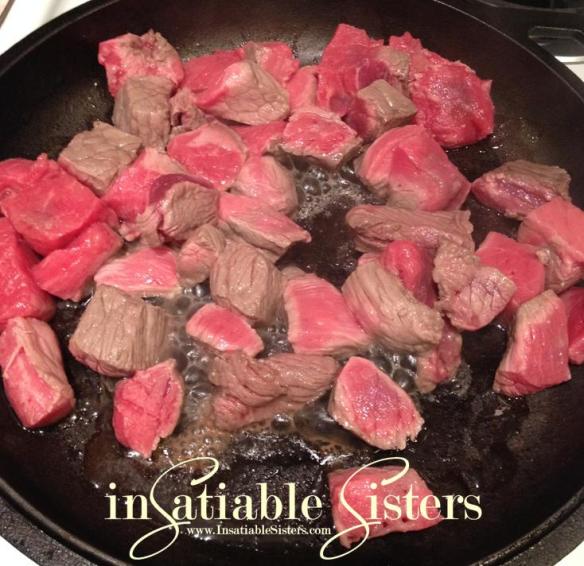
Brown beef in a skillet.
Beef Stew Beef

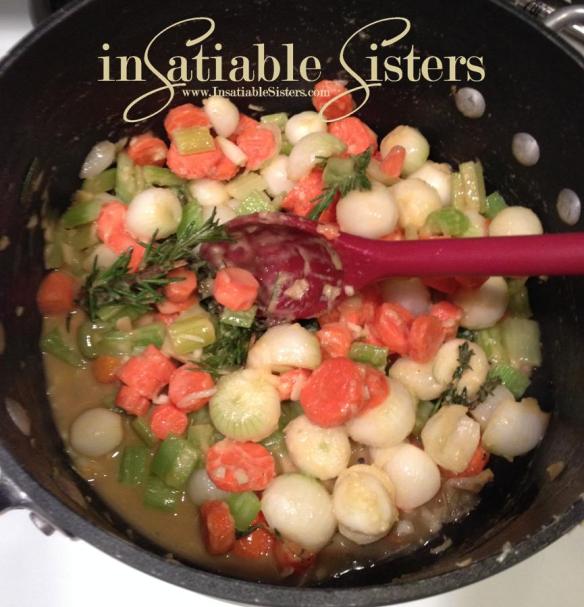
In a large stew pot, melt butter on low heat, when melted add the flour a little at a time and whisk until you make a paste called a roux.  Add the garlic, onion, celery, carrot, thyme, rosemary, black pepper, bay leaves and cook on low for a few minutes.
Beef Stew Roux

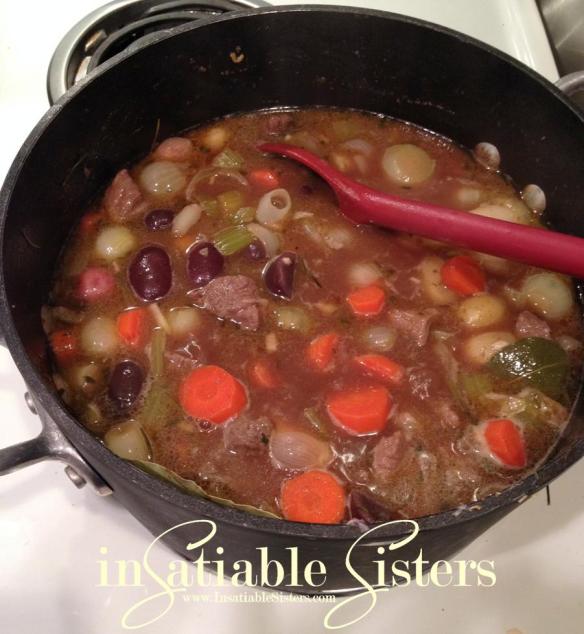
Add the beef stock, cooked beef, potatoes, wine and Worcestershire sauce.  Simmer on low/med heat for 2-3 hours, stirring occasionally.  If stew isn’t as thick as you like, make a thickener by whisking 1/2 cup of cold water with 2 Tbs flour, pour into soup and stir.
Beef Stew in Crock

Ladle into bowls, serve with crusty bread slathered with homemade butter and enjoy!
Hearty Beef Stew 2

Roasted Chicken Breast with Balsamic Cream

A foody friend of mine gave me this recipe for a balsamic cream sauce and it sounded so delicious and simple that I tried it that very night with a roasted chicken breast. I was not disappointed.  In fact, that rich, creamy sauce immediately landed among my favorite recipes, not only because it is delicious, but also because the ingredients are ones that I generally have on hand, and preparation is incredibly simple.  And, although I have this paired with chicken, I think it would go incredibly well with any cut of steak or a pasta dish.

Ingredients:

Chicken:
2 chicken breast halves, bone in
2 Tbs butter, divided
Drizzle of Olive Oil
Salt & Pepper

Balsamic Cream Sauce:
2 Tbs Olive Oil
2 Tbs Butter
¼ cup minced sweet onion (Mayan or Vidalia work well)
1 Cup heavy Cream
2 tsp chicken bouillon granules
2 Tbs Balsamic vinegar
½ Cup grated parmesan cheese (the kind in the can works best)

Directions:

Preheat oven to 375 degrees.  Rinse the chicken breasts and pat dry.  Gently loosen the skin to create a pocket, but don’t pull it off.  Cut the butter into 8 chunks and slip it under the chicken skin, 4 chunks for each breast.  Season the skin of the chicken well with salt and pepper and any additional herbs you prefer.  Place breasts in an oven-safe dish and drizzle with olive oil.

Roast the chicken for about 40 minutes, or until the internal temperature reaches a safe 165 degrees.
While the chicken is roasting, heat the olive oil and butter in a saucepan over medium-low heat.  Stir in the minced onion and cook until it has caramelized, about 15 minutes.  Stir in the balsamic vinegar and cook for 1 minute, then stir in the bouillon and cream.  Bring to a simmer, then remove from heat and stir in the parmesan cheese until melted.

Note: I used fresh parmesan in this picture, which tasted great but left the sauce a little chunky.  For a smoother sauce, use the pre-grated parm in a can, the stuff you sprinkle over spaghetti.

When the chicken is done roasting, allow it to rest for about 10 minutes.  Serve it whole or slice it up, but either way, be sure to serve with a generous portion of the balsamic cream.  I LOVE this combination with Oven Roasted Potatoes.  Enjoy!

Roasted Pumpkin Seeds

IMG_3747You’ve carved your pumpkin, now don’t throw out those seeds!  Pumpkin seeds are a great, healthy snack as they’re full of zinc, vitamin E, and healthy fats.  They are simply delicious with just a little salt, or you can get creative and try some different herbs and spices.

Ingredients:
Pumpkin Seeds
Olive Oil
Salt and/or Desired Seasoning

Directions:

Preheat oven on to 300 degrees.

Remove the seeds from the flesh and wash thoroughly.  Lay them out on a clean towel and pat dry.  They will stick to your towel…this is okay.  Spread seeds out evenly on a lightly greased (or sprayed) baking sheet and roast them plain for 30 minutes.

Remove roasted seeds and toss them in a bowl with a drizzle of olive oil, salt and/or whatever seasonings you have chosen.  Put them back in the oven for another 20 minutes.  Enjoy!  (See variations below.)

Variations:

The sky is the limit with flavor combinations!  In addition to standard salted seeds, here’s what I used:

1.  1 Tbs Olive Oil, 1 Tbs Cinnamon Sugar
2.  1 Tbs Olive Oil, ½ tsp Garlic Powder, ½ tsp Oregano, 1 Tbs Grated Parmesan, ½ tsp Himalayan Pink Salt
3.  1 Tbs Sesame Oil, tiny pinch of Cumin, ½ tsp Himalayan Pink Sea Salt

Our pumpkin masterpieces:

Zucchini Latkas

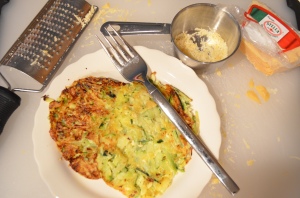
Every August there is an abundance of zucchini in my father in law’s garden.  I get tired of the same ol sautéed or oven roasted zucchini so I thought I would try something different.  I came up with zucchini latkas.  Latkas are a traditional Jewish dish made from mashed or grated potatoes, flour and egg.  I substituted zucchini for potatoes and added some parmesan cheese and a few spices.  They turned out amazing and it’s basically a full meal in itself!  You won’t be able to eat just one!  Try your own variation!  ~Janna

DSC_0246

Ingredients:

4 cups shredded zucchini (about 4 medium zucchini)
1/2 cup shredded parmesan cheese
1 egg, plus 1 egg yolk (beaten)1/2 tsp garlic powder
1/2 tsp salt
1/4 tsp black pepper
Cooking spray

Method:

In a large mixing bowl combine shredded zucchini, eggs, parmesan, garlic powder, salt and pepper, mix to combine.  Heat an electric skillet to 325 degrees and spray with cooking spray.  Using your hands measure out about 1/2 cup of the mixture and press it into a patty squeezing some of the liquid out.  Cook on skillet until golden brown, flip to brown other side (about 4-5 minutes on each side).  Be careful flipping because these are delicate and will break apart if your not careful.  After they are cooked sprinkle with a little more parmesan cheese if desired. Makes approx. 6 latkas.  Enjoy!!

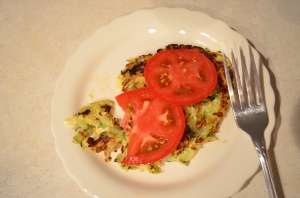
*One variation I’ve tried and found amazing is topping the latka with a slice of fresh garden tomato and a pinch of sea salt from oldcitysalts.com

DSC_0247

Hearty Chicken Noodle Soup

I didn’t really have much appreciation for homemade chicken noodle soup, until my niece, Lindsie, asked me to make it for her wedding.  I don’t know what changed, but ever since then it has been one of my favorite soups to make, maybe because it reminds me of her and that special day.  Now, there’s nothing more comforting to me than a big, steaming bowl, freshly made from (mostly) scratch. 
For convenience sake, I’ve opted to use canned broth and a hot & ready rotisserie chicken from the grocer.  Rotisserie chickens also (generally) happen to be cheaper than buying a whole, fresh chicken, so not only are you saving time, you’re saving money.  Of course, you can roast your own chicken and make your own chicken stock, but that’s another recipe in itself.  ~Joanie

Ingredients:

4 cans of chicken or vegetable broth
5 or 6 sprigs EACH of fresh rosemary, sage, & thyme, OR 1 pack fresh Poultry Medley herbs (usually found in your grocer’s refrigerated produce section.)
1 large onion, chopped
2 cloves garlic, minced
2 tsp salt
4 large carrots, chopped
3 large stalks of celery, chopped
1 whole rotisserie chicken, or 1 lb cooked chicken of your choice
8 oz Egg Noodles
Salt & Pepper
Large stock pot

*  *  *  *  *  *  *  *  *  *  *  *  *  *

Directions:
In a large stock pot, add broth and herbs.  Let herbs simmer on med heat for about 20 minutes or until they’re limp and have given up their flavor.  Fish out the herbs and discard.

Add onion and garlic and salt.  Let simmer while you chop carrots and celery.  Add remaining vegetables and turn heat to low.

Next, deconstruct your chicken.  Start by removing the breast meat, then the legs & thighs and last, the wings and any remaining meat sticking to the bones.  Don’t let any go to waste!  Chop up any large pieces and add all meat to the pot.  Add meat to the stock pot.  (Save the bones and skin for making chicken stock.)   

In a separate pot, cook egg noodles using package directions, until texture is al dente (slightly firm).  Add cooked noodles to the soup.  If needed, add salt/pepper to taste and garnish with chopped green onions.  Serve immediately and enjoy.

**This soup freezes really well and is perfect for lunch on the go!

Maple Glazed Salmon

My family LOVES salmon so I’m always trying to find different and intriguing ways to prepare it.  This recipe is a take on my Brown Sugar Glazed Salmon, but since I was out of brown sugar I used real maple syrup and the outcome was amazing!

**Please try to find fresh, wild caught salmon.  It does make a difference and farmed salmon is really gross!!  (If you have ever visited a salmon farm you know what I’m talking about…Blech!!)

I could not find fresh, never frozen salmon so I used a frozen filet, which is fine as long as you thaw it thoroughly before you cook or you’ll get soggy, watery salmon!  Enjoy!  ~Janna

Ingredients:
1 Salmon filet (any kind of Salmon will work), skin on.   (My fillet was about 2 lbs and I cut it into 6 large pieces which gave me 6 5 1/2 oz portions.)
2 Tbs olive oil
2 Tbs real maple syrup OR brown sugar
3 Tbs Dijon mustard
1/2 tsp soy sauce
1 Tbs fresh grated ginger
1 Tbs water
Salt and pepper

Directions: 

Combine all ingredients, except salmon, into a small saucepan and whisk. Bring to a low boil, stirring constantly so the bottom doesn’t scorch.  Turn down and keep warm.
DSC_0176

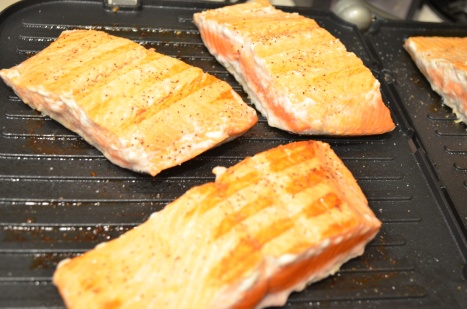
After cutting salmon into desired portions, pre-heat an electric grill (George Foreman type) and spray with non-stick cooking spray.  You can also use an outdoor grill, if desired.  Rub each salmon portion with a little olive oil and sprinkle with salt and pepper.  Grill salmon about 7 minutes on each side.  Once you put salmon on grill, refrain from moving it around!  It may break up the salmon and you wont get those pretty grill marks!DSC_0177

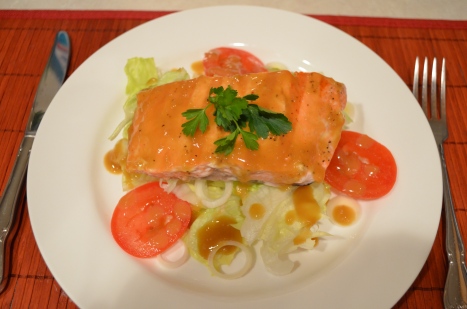
I plated my salmon on top of a simple green salad of iceberg lettuce, chopped green onion and tomato.  Add the warm glaze to salmon and drizzle some on the salad just before serving.  It’s that simple!!  ~Janna
DSC_0182