Basic Buttercream Frosting

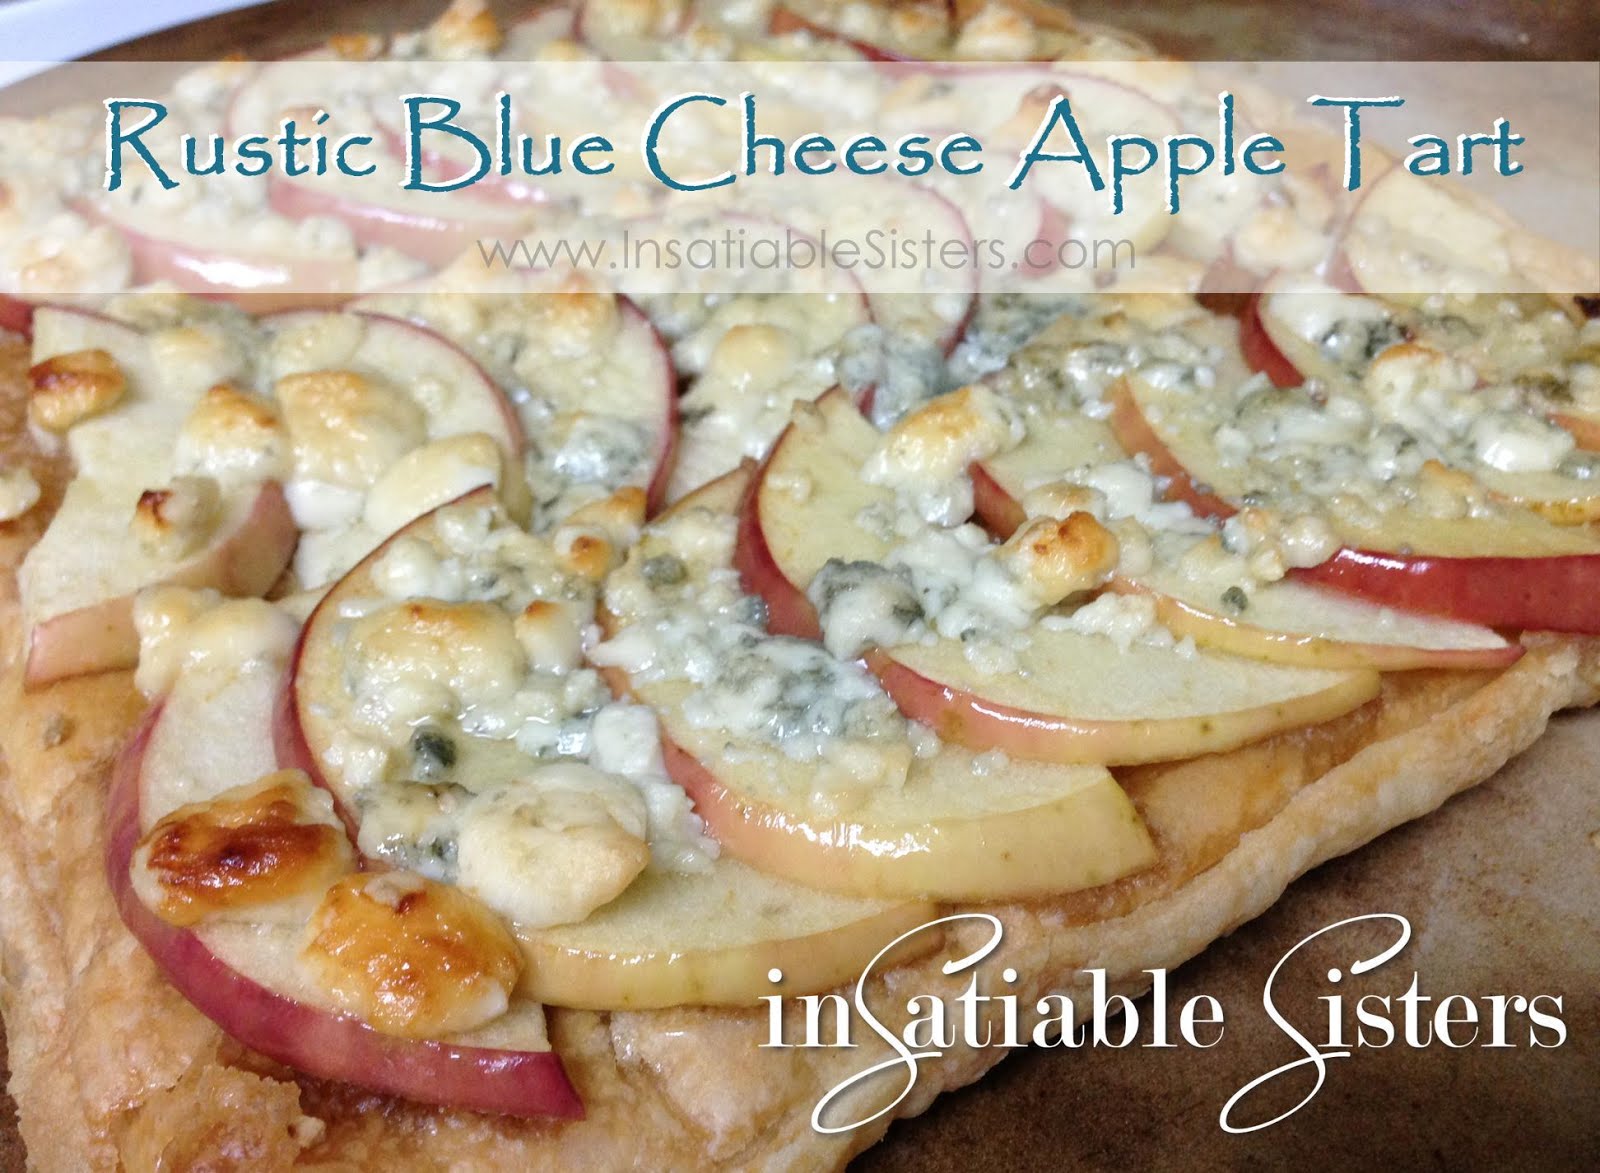
I remember when I was growing up, my mom was always baking these big, gorgeous wedding cakes for friends and family.  It was so exciting to sit and watch her frost the cake and stack the tiers high, then decorate it with perfect frosting roses and embellishments. She always made the most perfectly white, fluffy vanilla buttercream frosting to frost it with.  She would spread leftover frosting on graham crackers for Joanie and I.

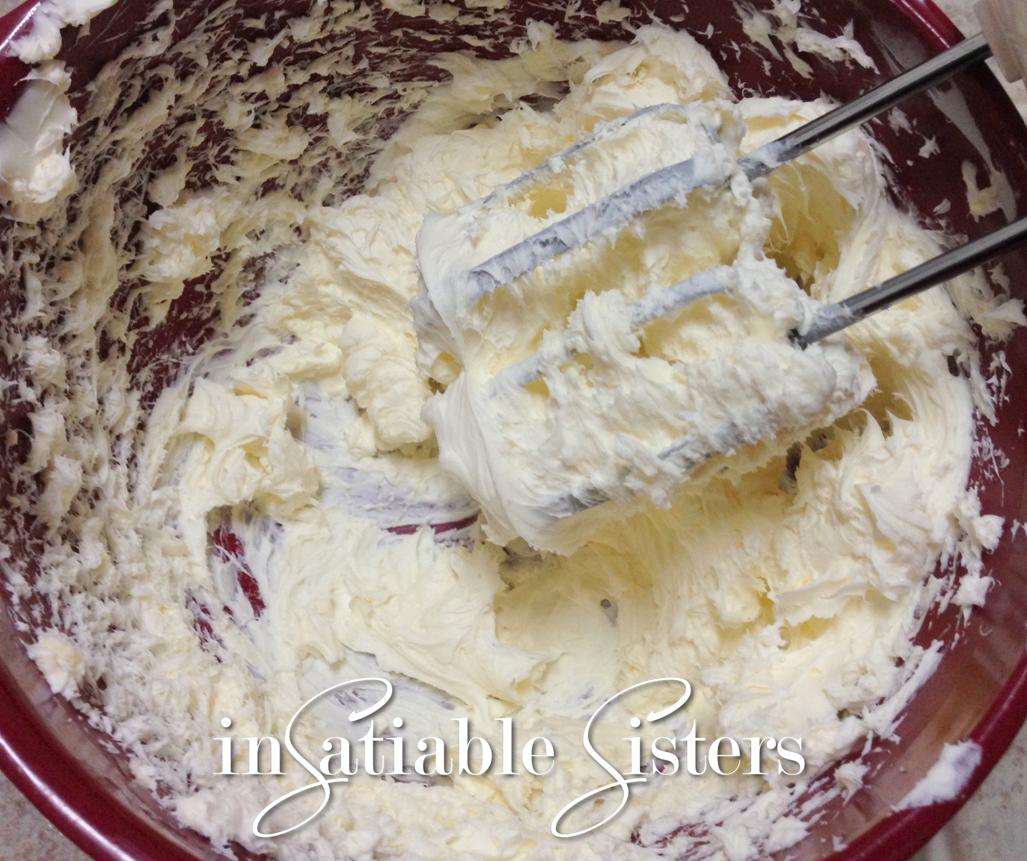
When I started baking cakes and cupcakes several years ago, I couldn’t get the consistency of my buttercream frosting right.  The frosting would never be fluffy enough and would never hold up when I piped it through a tip.  I didn’t understand what I was doing wrong until finally I had my mom walk me through it.  Turns out there is a very simple trick to getting the fluffiest frosting that’ll stay where you put it.  The trick is, you beat the crap out of it!  My mom told me to whip the butter in the mixer on high for no less than 7 minutes!  So here is my buttercream frosting recipe based on my mom’s recipe, but I don’t use shortening like she did because I just don’t like the mouth feel.
cupcake2
cupcake5

Ingredients:

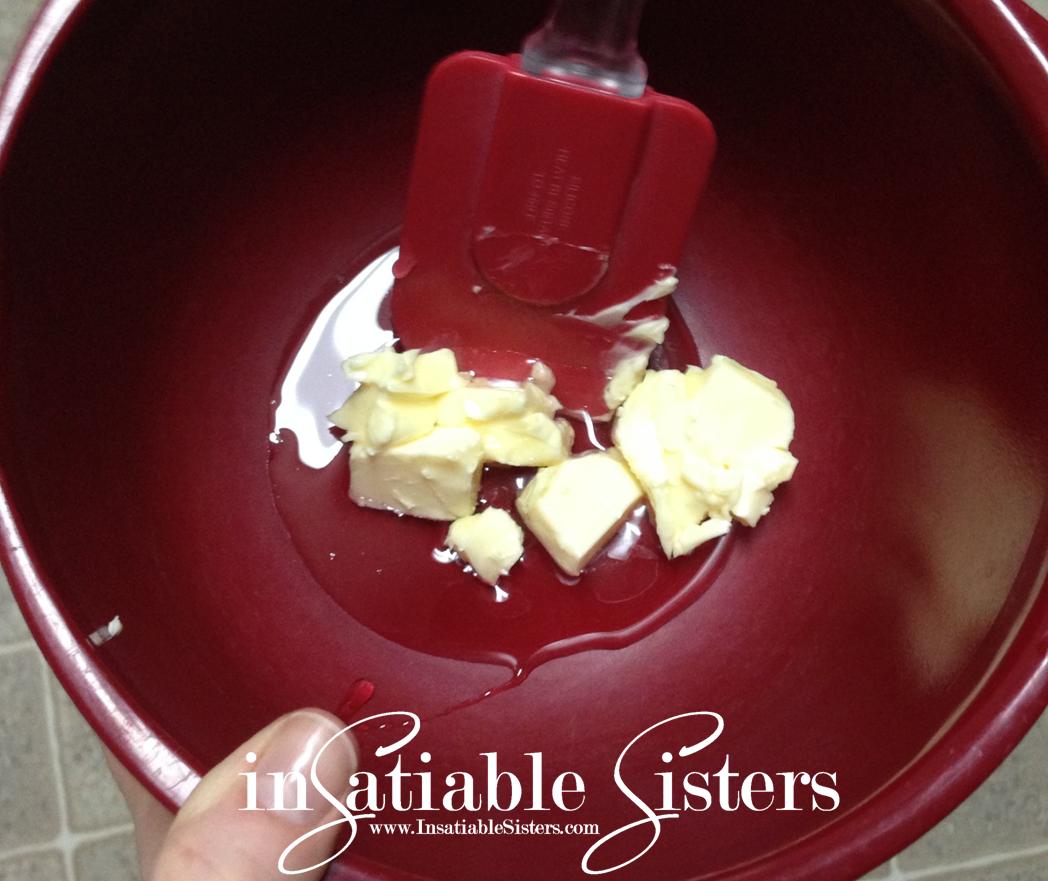
1 cup unsalted butter at room temperature.  (This is VERY important, if your butter is too soft or melted it won’t fluff up.  I would err on the side of too cold if anything.  Let your butter set on the counter over night if you can.)

4-5 cups powdered sugar
2 tsp real vanilla extract
5-6 Tbs milk

Method:

With an electric mixer with a whisk attachment, beat the butter on high for 10 minutes.  You can periodically stop the mixer to scrape down sides of the bowl.  The butter will get fluffy and almost white in color.
cupcake4

When butter is very light and fluffy (after 10 minutes of whipping) turn mixer off and add the vanilla and two cups of the powdered sugar.  Turn mixer on low until the sugar is combined and then turn it on medium speed and add 2 tablespoons of the milk.
Turn mixer back to low and add the rest of the powdered sugar and a couple more tablespoons of milk until you have a fluffy, light, spreadable consistency.

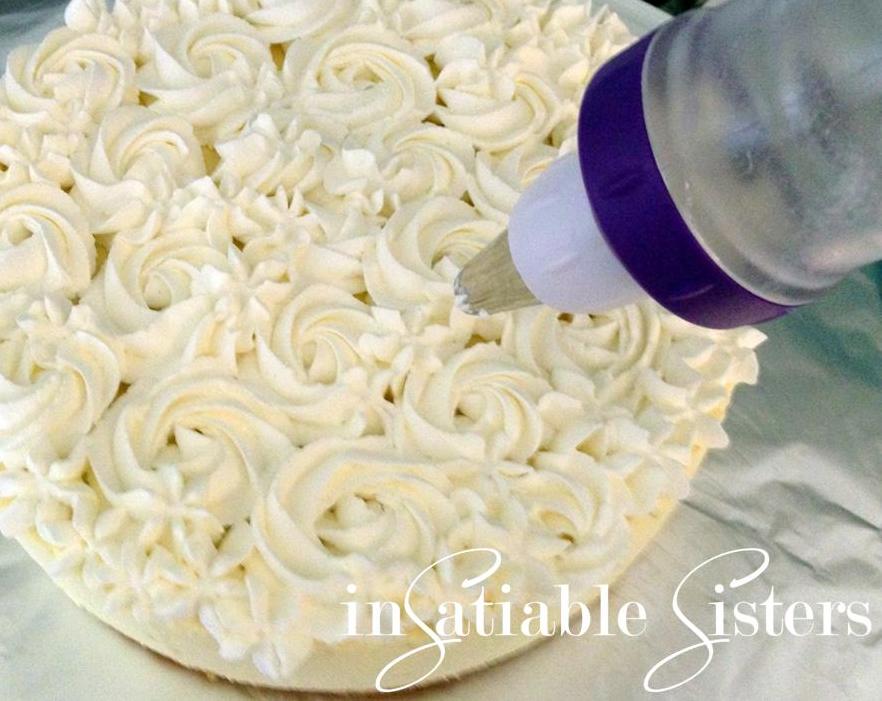
You are now ready to spread the frosting onto cakes or cupcakes.  This can be done using an off-set spatula or pastry bag and tip.  If you don’t have either of these, the back-side of a butter knife works just fine.  This recipe will frost approximately 24 cupcakes or 1 9×13 cake or a two layer 8 inch round cake.  Happy frosting!!

~Janna
cupcake1

Grapefruit Pie

I love citrus and grapefruit is one of my favorites.  It reminds me of being at my grandparents house in Florida and picking the tart fruit right from the tree!  As I was testing my key lime pie last year I started thinking about the possibility of grapefruit pie.  I’ve tried different variations of grapefruit pie over the last year and finally came up with one that I think is perfect.  As I researched grapefruit pie, I realized that they all use the actual wedges, and made a fruit pie, while I wanted more of a custard.  So I juiced the grapefruit and simmered it and reduced it by half so it was super sweet and super tart.  I also used the zest of one whole grapefruit to make sure it had tons of flavor.  Then I took the custard base that I use for the key lime pie and used the grapefruit juice and zest instead.  I couldn’t be more happy with the results and I hope you like it too!

~Jannawhipped-cream-birdie 3

Ingredients for filling:

1 cup grapefruit juice, I used Ruby Red but any variety will do (One very large grapefruit will give you about 1 cup)
Zest from your grapefruit
1 14oz can of sweetened condensed milk
3 large egg yolks
1 9″ graham cracker crust  (or you can use a ready made crust)

Ingredients for crust:

2 cups of graham cracker crumbs
2 Tbs granulated sugar
5 Tbs unsalted butter, melted

Ingredients for whipped cream:

2 cups heavy whipping cream
1 cup powdered sugar
1 vanilla bean
1 tsp vanilla extract
*If you don’t have a vanilla bean you can double your vanilla extract.
grapefruitpie1

Method:

Pre-heat oven to 350 degrees Fahrenheit.

In a 9 inch pie plate mix the graham cracker crumbs with the sugar.  Pour the butter into the dish and mix with a fork until all the graham cracker is coated.  Press mixture onto the sides of the dish and then press into the middle making an even thickness throughout.  Set aside.

To make the whipped cream, put the heavy cream into a cold mixer bowl (I stick mine in the freezer beforehand for a few minutes).  Using the whisk attachment and the mixer on high, whip the cream until it thickens up and forms peaks (3-4 minutes).  Turn the mixer off and add your vanilla and powdered sugar.  Turn the mixer on medium to incorporate the sugar and vanilla.  Once finished, put the whipped cream into a lidded air-tight container and store in refrigerator.  You will need your bowl and whisk attachment again so you’ll need to wash it.
whipped-cream

Squeeze grapefruit juice into a small bowl or sauce pot.  Strain out seeds and big clumps of pulp.

grapefruit8

Simmer in sauce pot on med/high heat to reduce by half.  This will take approximately 10-15 minutes.  Keep an eye on it and stir occasionally.  You will end up with 1/2 a cup of reduced juice.  Add the zest and cool in an ice bath.  (Don’t skip the ice bath!  You do this so you don’t cook the eggs by adding hot juice.)

grapefruit7

Once the juice isn’t hot to the touch (it’s okay if it’s warm) add it, the sweetened condensed milk, and egg yolks to a mixer bowl.  Using your whisk attachment again, blend on high until well incorporated, 1-2 minutes.

grapefruit6

Pour the filling into the pie crust and bake for 15 minutes.  grapefruit5

Let pie rest out of the oven for 10 minutes before chilling it in the fridge.  Top with homemade whipped cream and serve cold.
grapefruit4

grapefruit3

Gooey Marshmallow Treats

Picture11
Also known as Rice Krispies Treats, these simple squares are a fun finger food that will instantaneously transport you back to childhood.  Rice Krispies Treats were invented in 1939 by Malitta Jensen and Mildred Day at the Kellogg Company home economics department as a fund raiser for Camp Fire Girls. (source: Wikipedia)
And what’s not to love?  Crispy rice cereal is generously coated in fluffy sugary marshmallows so it’s bound to be delicious.  Best of all, they are fast, easy and inexpensive.  Yes, they are full of carbs, sugar and delicious full-fat butter.  But that’s what dessert is all about!  Indulge a little….

Ingredients:
16 oz mini marshmallows, divided
4 oz butter + some for greasing (Coconut oil can be used for a dairy-free treat.)
1/4 tsp salt
6 cups crisp rice cereal
OPTIONAL: 1 cup chocolate chips, mini chips, mini m&m’s, caramel chips, etc.

Directions:

Generously grease a 9×13 pan with butter.

In a large pot, melt butter on medium-low heat.  Stir in HALF the mini marshmallows and continue to stir until they are completely melted and form a gooey cream.

Add salt and stir.  Remove from heat immediately.

Pour cereal into the pot and fold it into the melted marshmallows until all cereal is thoroughly coated with marshmallow.
Picture12

Add the additional whole marshmallows and any optional chips that you want.  Quickly fold them into the cereal.  You don’t want this second addition of marshmallows to melt, it’s so delicious when you bite into a fluffy whole marshmallow!

Turn the mixture out into your buttered pan and press it flat with clean, buttered hands.  It’s delicious when it’s warm, but they will cut much more easily if you allow them to cool completely.  RC

*Tip: If you have leftover chips, consider melting them and drizzling over the top of the cut squares.  Yum!
Gooey Marshmallow Treats

Zesty Fried Pickles

pickle
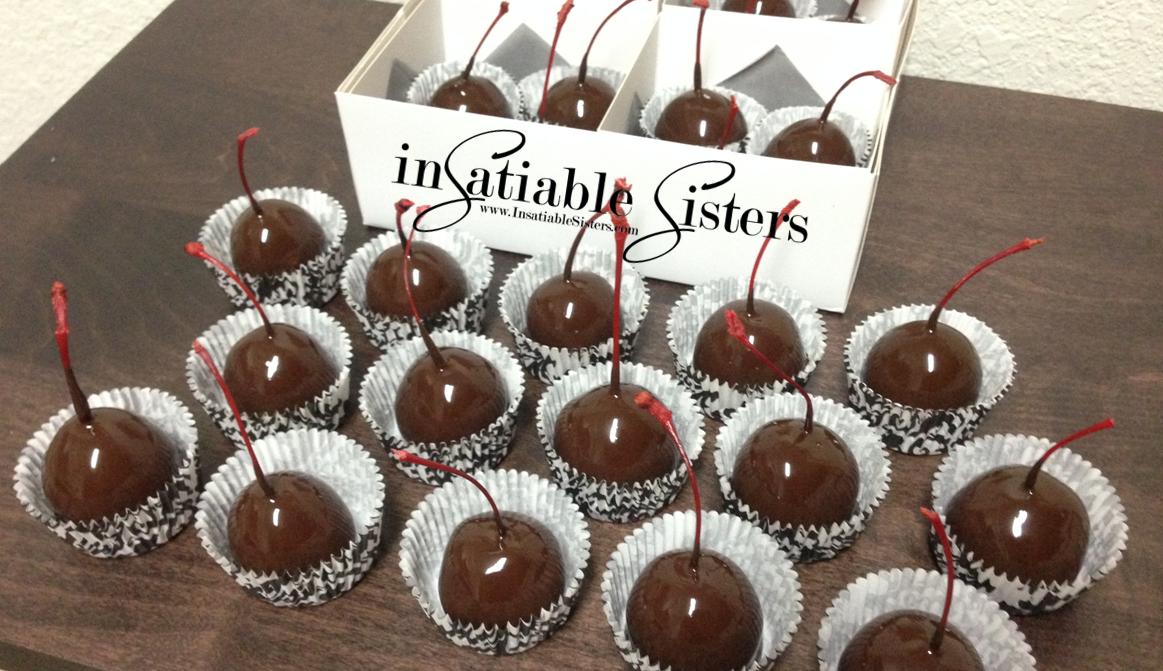
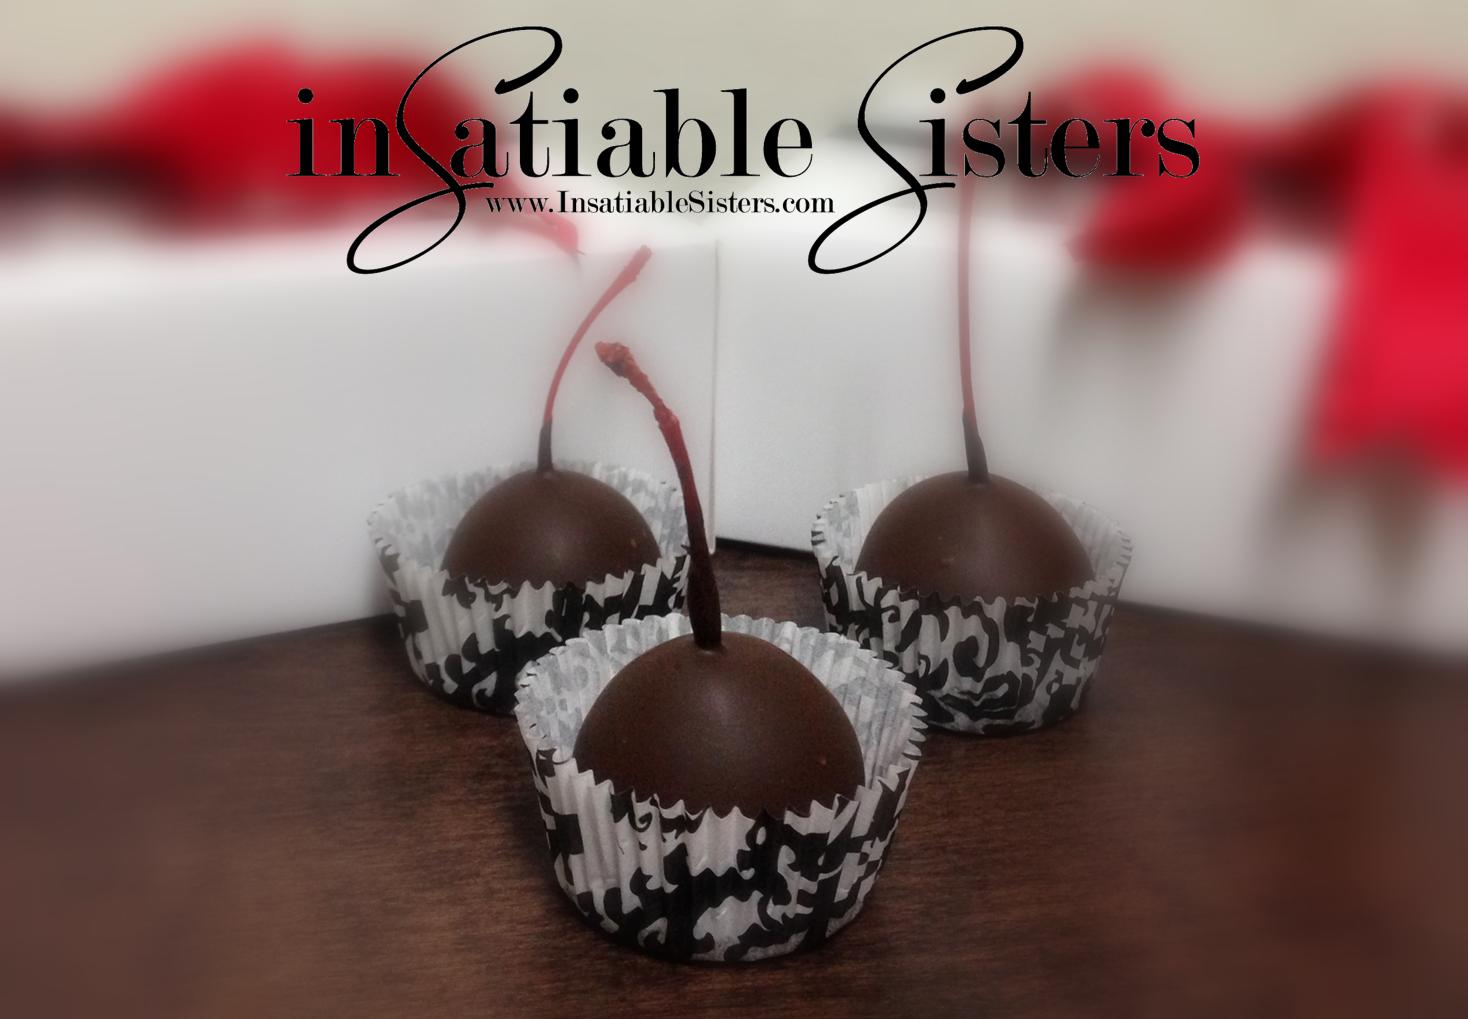
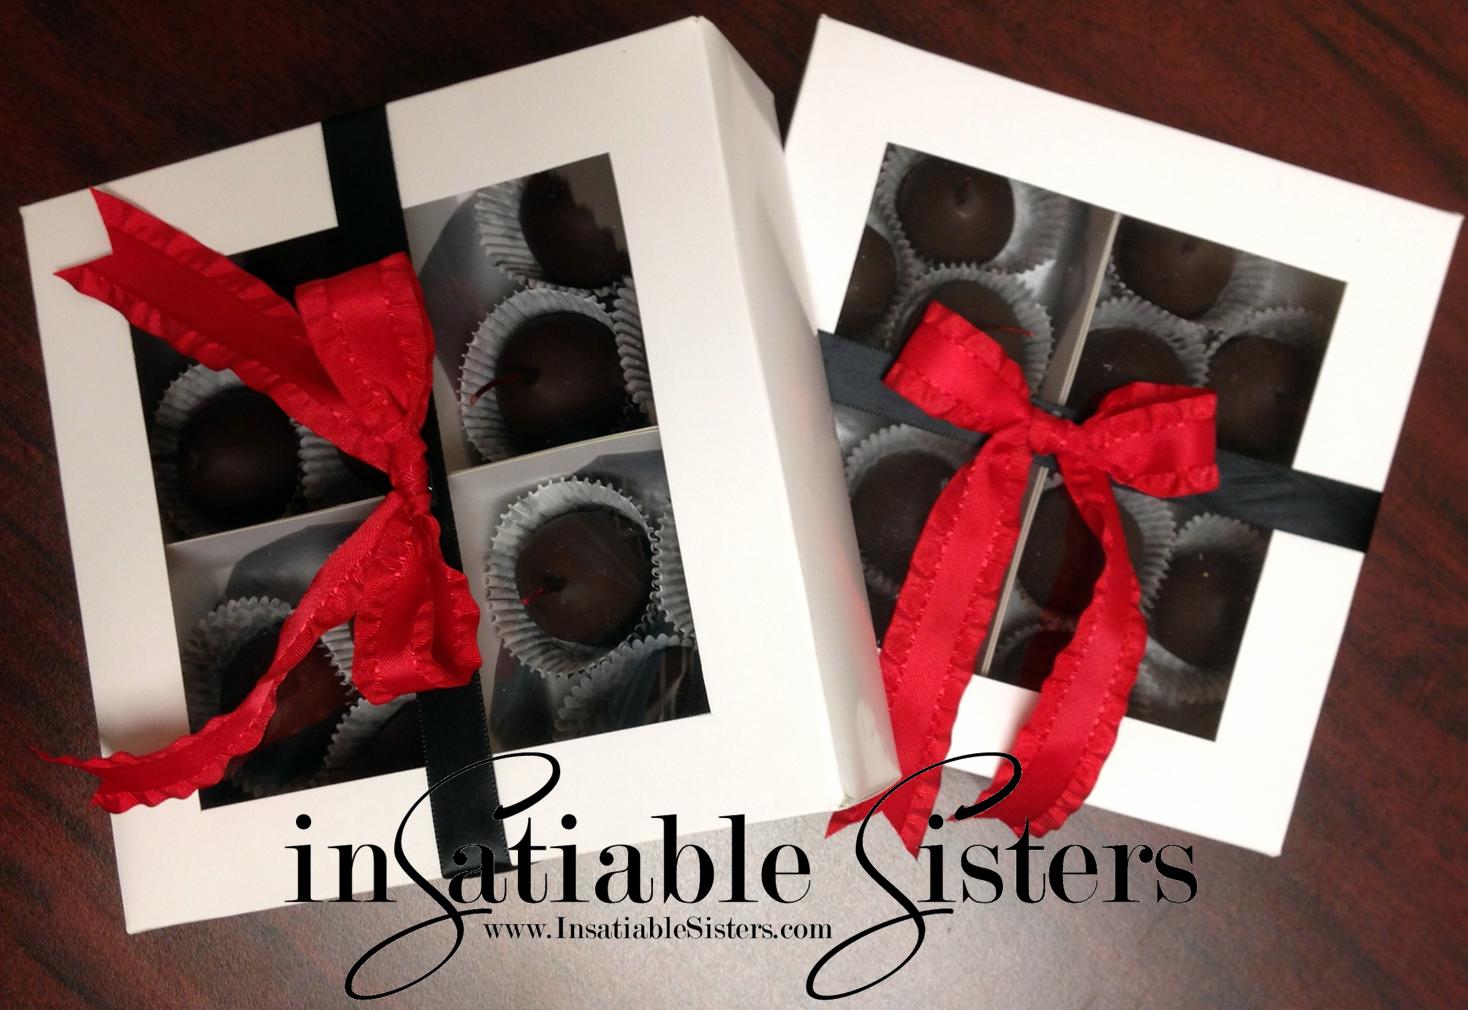
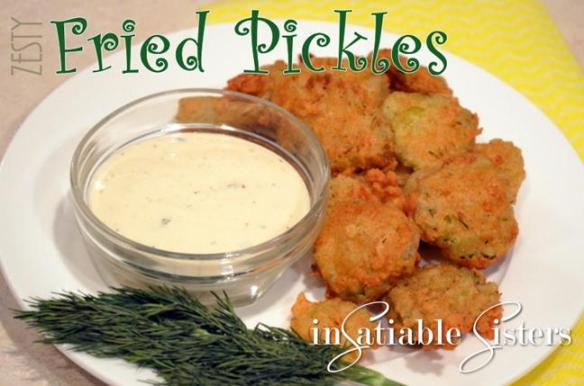
Anyone who knows me knows that pickles are one of my favorite foods.  I’m obsessed with pickles, so I’m always looking for new and fun ways to incorporate them into my meals.  These fried pickles are addictive and are a fun finger food!  Who needs utensils, right?  Everytime I make them they are gone in a matter of minutes!  These go perfectly with my hot wings on game day, GO SEAHAWKS!!!!  Or my pretzels and beer cheese!  Fried pickles and beer cheese?  I think I’m on to something!!
~JannaDSC_0119

Ingredients:

About 3 cups of dill pickle chips, drain on paper towels.
1 cup all purpose flour
1 cup whole wheat flour
1 tsp salt
1 tsp paprika
½ tsp cayenne pepper
¾ tsp dill weed or fresh chopped dill
1 cup of buttermilk
1 qt vegetable, (canola or peanut oil works too) oil for frying

Directions:

Combine all dry ingredients into a bowl, put buttermilk into separate bowl.  Make sure your pickles are well drained.DSC_0122

Heat oil in a 4 to 6 quart heavy bottomed pot to about 350 degrees F.  Dunk ½ a cup or so of pickles into the buttermilk, coating all sides.  Shake off excess buttermilk and put into the flour mixture, toss the pickles around so they are all coated.
DSC_0124

Fry in the hot oil until golden (2-3 minutes) and let them drain on paper towels for a few minutes.  Repeat with the remainder of the pickles.
DSC_0125

Enjoy as they are or for an added kick of flavor dip them in ranch or bleu cheese dressing spiked with hot sauce!!  These go fabulous with a cold beer!

Key Lime Cheesecake

Final.jpg

Imagine a dessert that’s sweet, tart, silky, crunchy, rich and fluffy all at once.  Are you imagining Key Lime Cheesecake?  This sweet treat is one that will awaken all your senses…and is quite possibly my favorite dessert!  It’s so refreshing when it’s served ice cold on a hot day.  

Occasionally, I take orders for baked goods/desserts and this one is the one that’s most requested.  Don’t be intimidated by all the steps, it’s really quite simple!  You can even prepare the crust ahead of time or, if you’re really in a pinch, you can purchase prepared graham cracker crusts (this recipe fills 2!).  That being said, I highly recommend making your own crust with the addition of the unsweetened coconut.  The coconut really adds something special!  You can usually find it in the bulk section of the grocery store.  If not, ask!  Want to present your cheesecake in a more festive way?  Scroll to the bottom for a fun variation: cheesecake mini’s!

Go ahead, try this one!!  Your time and effort will be rewarded!  

Ingredients:

Crust
1 package Graham Crackers (about 1 ½ cups, crushed)
½ cup unsweetened coconut
⅓ cup granulated sugar
6 tbs butter, melted
½ tsp cinnamon
*If you choose not to use coconut, just increase your graham cracker crumbs to 2 cups.

Cheesecake
1 cup Nelly & Joe’s Key Lime Juice
¼ cup water
2 envelopes unflavored Knox gelatin
1 ½ cups granulated sugar
5 eggs
zest from 1 lime
½ cup butter, softened
2 8-oz packages cream cheese, softened
1 cup heavy whipping cream

Optional: additional heavy whipping cream to decorate plus granulated sugar to taste.

Special Equipment: Springform PanIngredients w Logo.jpg

Method:

Preheat oven to 375* F.

In a food processor, process graham crackers until they turn to coarse crumbs, add in coconut and pulse until combined.  Crumbs w Logo.jpg

Transfer to a bowl, add melted butter, sugar and cinnamon.  Stir until thoroughly combined and mixture clumps.
Crumbs 2 w Logo.jpg

Press crumbs firmly into the bottom of an ungreased springform pan.  Bake for 7 minutes.  Remove and allow to cool completely.
Pressed w Logo.jpg

In a 2 qt saucepan, combine lime juice, water and gelatin.  Let stand 5 minutes.  Add sugar, eggs, and lime zest.  Lime Zest w Logo.jpg

Add Eggs w Logo.jpg

Whisk up the mixture until completely combined and cook over medium heat, stirring constantly until it just begins to bubble.  DO NOT allow it to boil.  Remove from heat and set aside.

In a large mixing bowl, beat butter and cream cheese together until well combined.Cream Cheese & Butter w Logo.jpg

Pour the hot lime mixture into the cream cheese mixture.  Beat with an electric mixture until thoroughly combined, approximately 2 minutes.

Refrigerate for about an hour, stirring occasionally.  You want the mixture to cool down, but not set up.

In a separate bowl, whip heavy cream until stiff peaks form.  (DO NOT add sugar.)

Once lime mixture is cool, fold in the whipped cream.  Make sure you combine it well, but some marbling is okay.

Pour mixture into the prepared crust, smooth out the top and refrigerate for several hours to allow cheesecake to firm up.
Set the Pie w Logo.jpg

Once cheesecake has set, run a knife around the edge of the springform pan to loosen the edges.  Slowly release the clasp and press the cake up out of the pan.  You can remove the bottom piece of the pan by putting a sheet of parchment over the top of the cheesecake, putting a cutting board (or other flat surface) over the parchment, then flipping the whole cake over.  Insert a butter knife between the pan and crust and the crust should pop right off.  Place your serving platter on top of the crust and flip the cheesecake back over.  Carefully remove parchment from the top.

You can serve your cheesecake naked, or decorate with whipped cream.

Whip approximately 1 ½ cups heavy whipping cream in a metal bowl until stiff peaks form.  Add in sugar to taste, one tablespoon at a time, until desired sweetness is reached.

Use the whipped cream in a piping bag or frosting gun to create all sorts of designs.  My favorite is the roses and stars (pictured), which is created by using a 2D star tip.  Decorate w Logo.jpg

Variation:
You can create cheesecake mini’s, which is my personal favorite way to prepare this dessert, and it’s a lot easier to serve.  Fill cupcake pans with paper or foil liners.

Note:  You cannot prepare the mini’s in batches, they must all be done at once.  If you don’t have at least 24 spaces in cupcake pans you can purchase disposables at any dollar store/grocery store.

Press about 1 tablespoon of the crumb mixture into the bottom of each.  I like to fill all the cups before pressing to ensure the mixture is spread evenly.  Bake about 7 minutes at 375.

Fill each cupcake with the prepared lime mixture, you should have more than enough to fill each cupcake to the very top (any excess can be refrigerated and enjoyed without crust).  Refrigerate until cooled and set, at least 2 hours.  Garnish with whipped cream and lime zest.

Serve ice cold and enjoy!

Mini w Logo.jpg

Rustic Blue Cheese Apple Tart

Rustic Blue Cheese Apple Tart.jpg

I can’t recall the day I decided that I actually like blue cheese.  For years I considered it a disgusting, smelly hunk of mold, hardly classifiable as food.  Then one day, it was like someone flipped a switch and now, I crave the stuff!

This delicate recipe is a little twist on a blue cheese pizza that was prepared during a cheese class at my favorite local produce store, Chuck’s Produce.  Their resident “Cheese Whiz,” Andrew, allowed us to taste several varieties of blue cheese in various different ways.  One of the cheeses he sprinkled over his apple pizza and topped with agave syrup.  It was delicious!  For my version, I replaced the pizza dough with the lighter puff pastry, which I think lends itself better for a breakfast item, and used organic clover honey as the drizzle.

Aside from the incredible sweet & savory combination, you’ll love this recipe because it uses minimal, common ingredients and it is really quick and easy to prepare, while still being impressive in both flavor and presentation.

Are you a blue cheese lover?  If not, maybe this recipe will change your mind.  If you already love it, enjoy!

Ingredients:

1 sheet puff pastry
1-2 fresh apples, sliced (Honey Crisp or Pink Ladies taste great!)
½ cup blue cheese crumbles
Honey (enough to drizzle)

Ingredients.jpg

Directions:

Follow thawing directions on the puff pastry box.  Lay pastry sheet out flat on a baking sheet.  Bake in a 350 degree oven for approx 15 minutes, or until golden brown.  Pastry will puff up…a lot!  It’s okay, it,s puff pastry, that’s what it’s supposed to do!  Once golden, remove from oven.  Puff.jpg

Slice and core apples and arrange evenly on the cooked pastry.  Top with blue cheese crumbles and drizzle with honey.4 pix.jpg

Bake for about 15 minutes or until blue cheese is golden and apples are soft.

Serve warm.Picture2.jpg

Chocolate Dipped Cherries

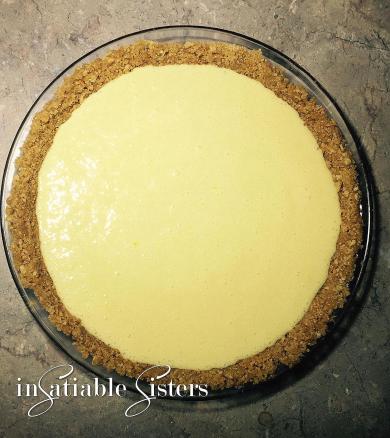
This post is dedicated to our beautiful Mama.  She always worked hard to make life special for each one of her 6 children.  We lived in “the woods” in Talkeetna, Alaska, a very small town that is an hours drive from the nearest suburban town.  For us, the finer things in life did not come from a store, but from Mom’s hands.  She made a lot of our clothes (and our doll clothes!), cooked and baked from scratch, and always let us help even though I’m sure our “helping” just made more work for her.
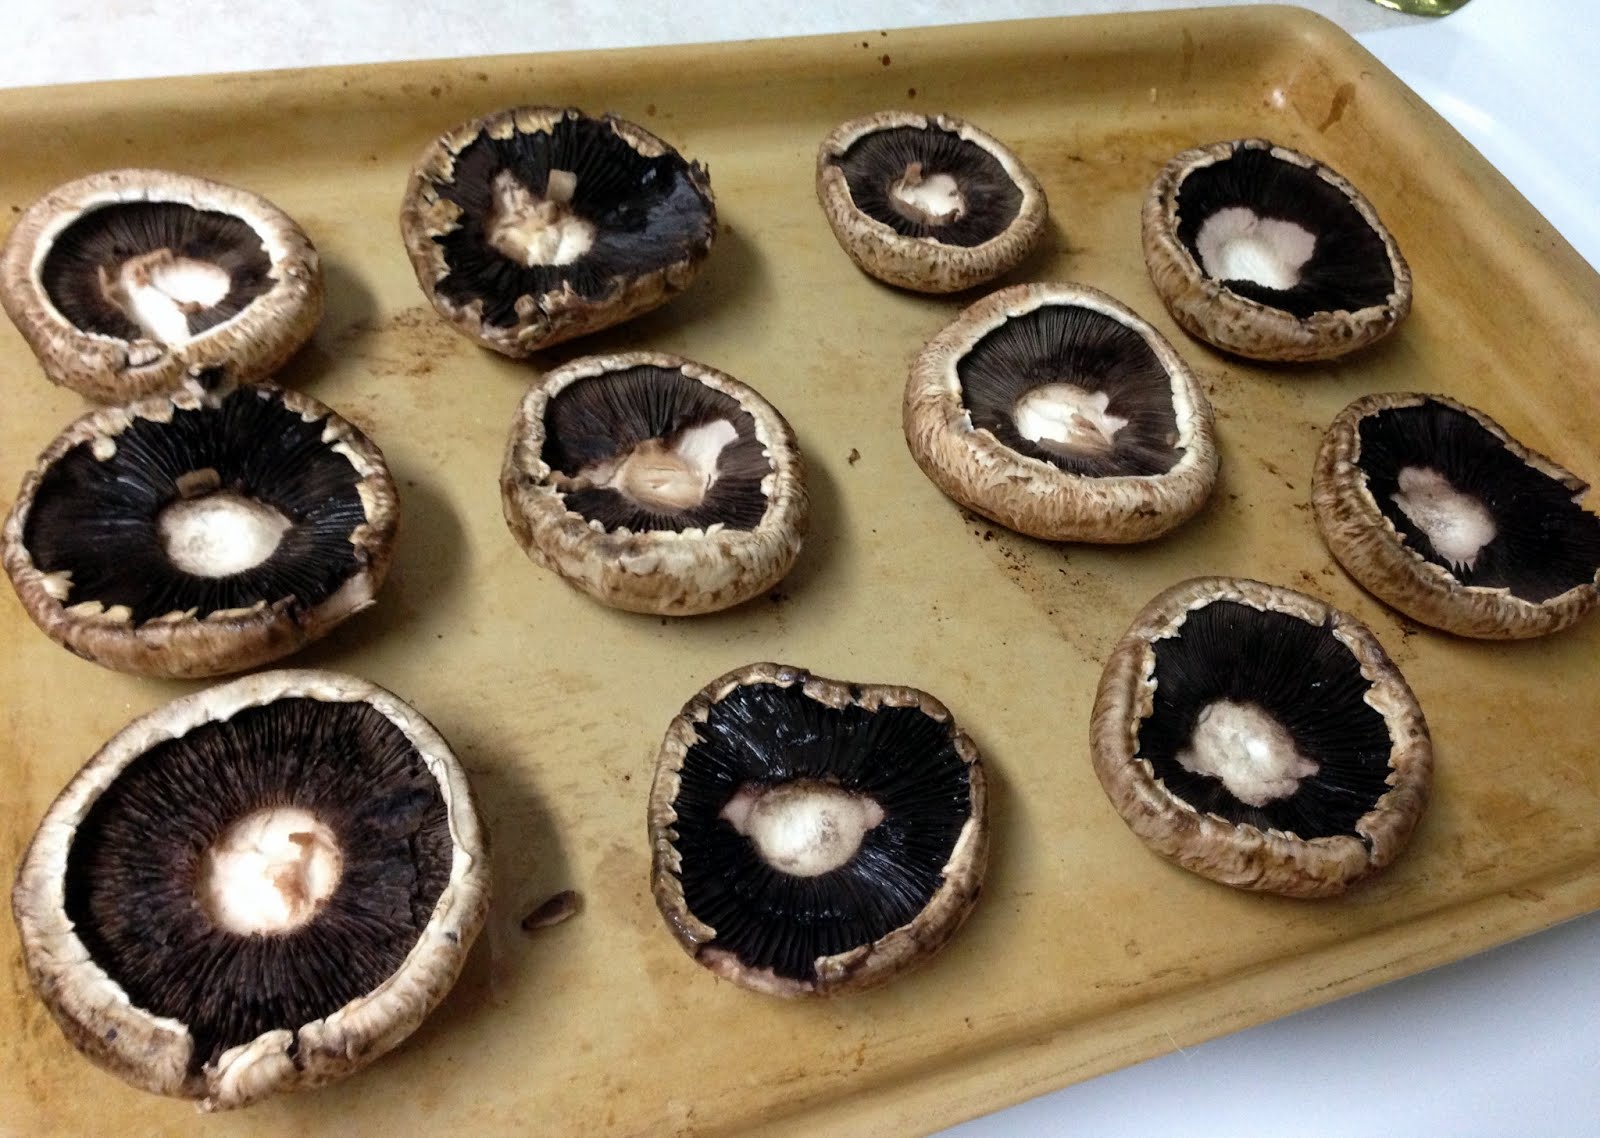
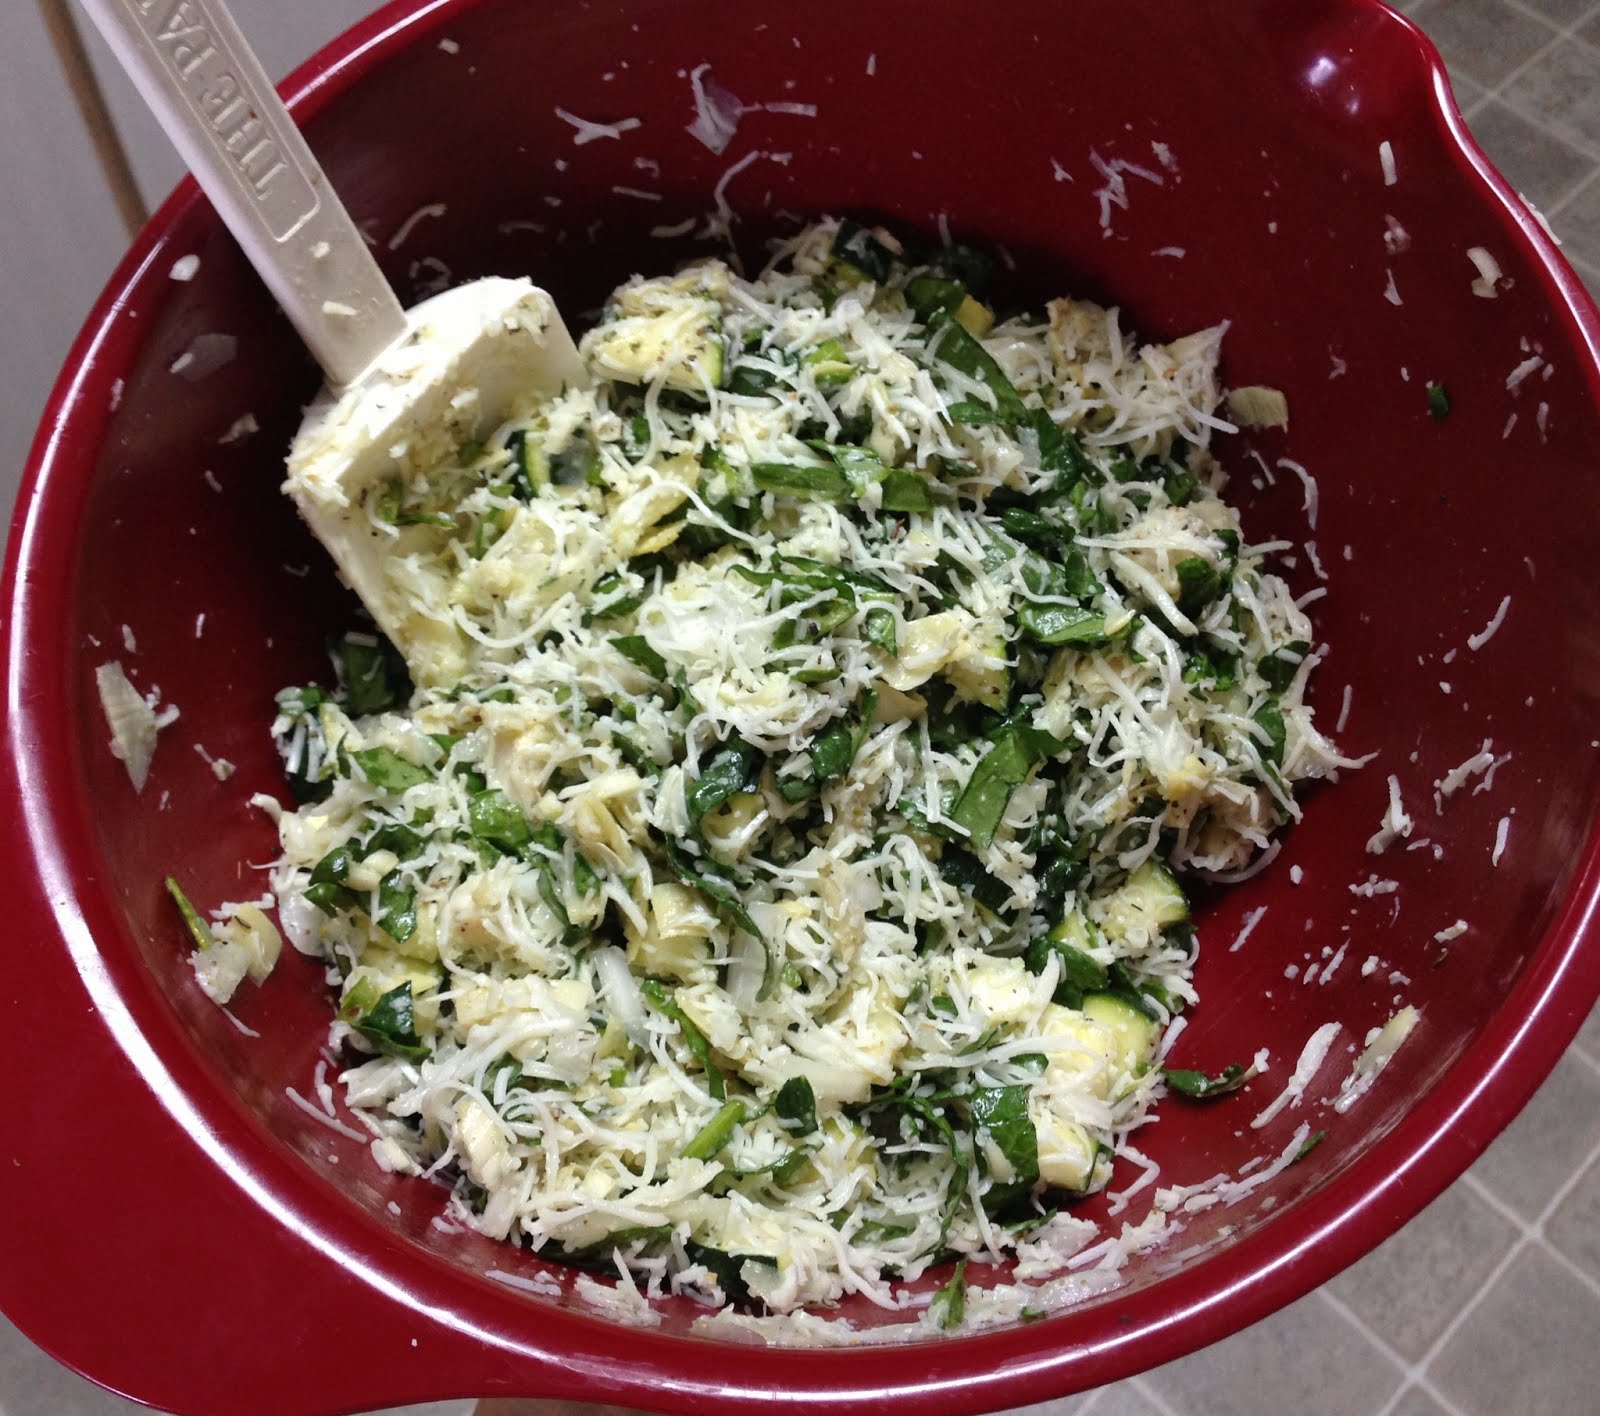
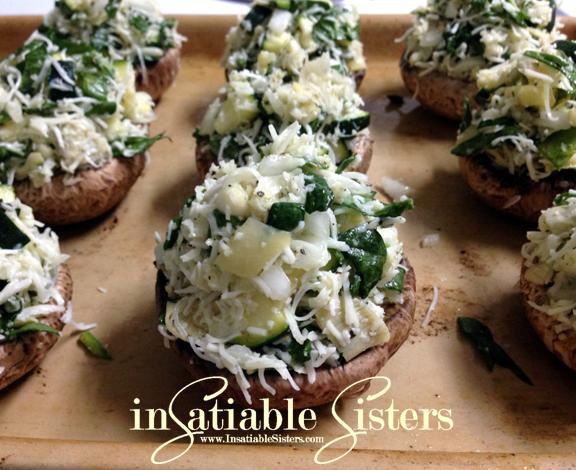
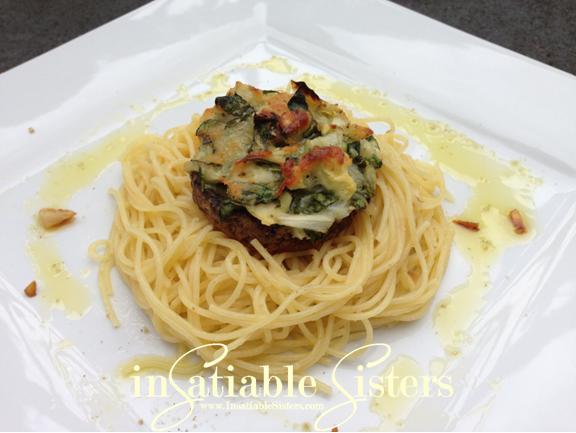
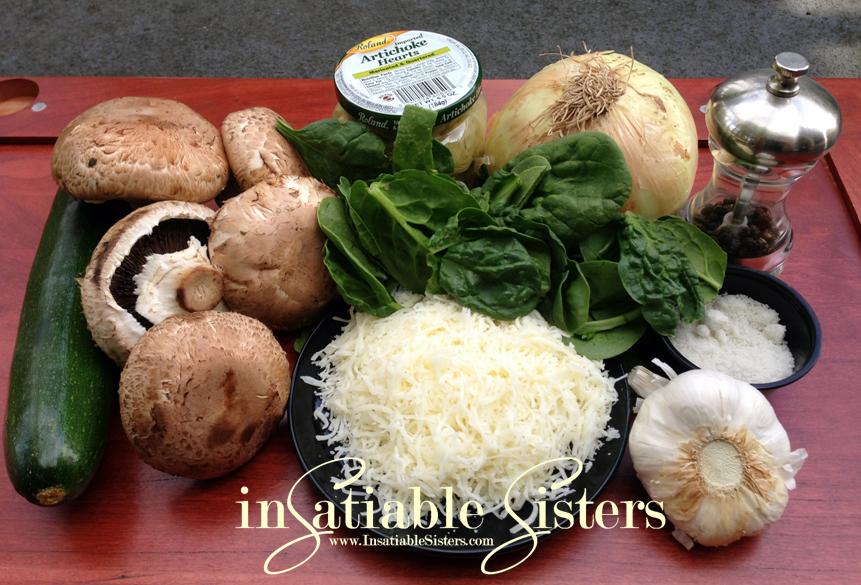
Chocolate dipped cherries were one of Mom’s special Christmas tradition.  I remember watching her make them step-by-step, anticipating when we could FINALLY partake in this gooey, sweet treat.  It was always worth the wait.  I have continued this cherished tradition into my adult life…and I even like to indulge once in a while and make them on non-Christmas occasions. =)

And what better occasion to make these beautiful candies than Valentines Day!!!  A day filled with love and flowers and romance pretty much demands an accompanying sweet treat.  The fact that you put the time and effort into hand making each cherry makes them than much sweeter.  Your Valentine, or whomever you are making these for, will taste the love.  ❤

Ingredients:
25-35 Maraschino cherries WITH stems
3 Tbs unsalted butter, room temperature
3 Tbs light corn syrup
2 cups powdered sugar (+extra for kneading), sifted
1 lb (approx) melting chocolate
double boiler
Optional: decorative mini candy cups

Directions:
Start by draining your cherries on paper towels.  You can do this a couple hours ahead of time, just don’t let your cherries get shriveled!  Four hours is probably the max time you want to leave them out.  I usually set mine out about ½ hour before I begin, change the towels once and blot the tops when I’m ready to work with them.  If your cherries are too wet on the outside, the juice will begin to break down the dough before you’ve had a chance to dip them.

Next, prepare your sweet dough, the gooey filling of the cherry.  Mix butter and corn syrup together to form a paste.  

Add in the sifted powdered sugar and stir until combined.  If your “dough” looks like a crumbly mess, perfect!  Now get your clean hands in there and start squishing until the dough will stick together.  Knead it on a clean counter top until it forms a smooth dough.

Optional:  To ensure you have enough dough, divide it into portion sizes (about 1 tsp) for the amount of cherries you need.

Shape your dough around each cherry and set aside on wax/parchment paper.


Next, break up your chocolate block into small, uniform pieces.  This helps it melt quickly and evenly.

**You can use chocolate chips instead, but they have an additive to help them keep their shape which affects the tempering process.  You can also use chocolate melting wafers, but a lot of the time those aren’t made of real chocolate and you can definitely taste the difference!

Measure out your chocolate.  About 1 lb should do.  You will have extra in the end, but you need the chocolate to be deep enough in your pan to be able to dip the cherry in.

Add water to the bottom of your double boiler and turn the heat on LOW.  The steam from this water will heat  your chocolate pan at a gentler temperature.  Chocolate tempering is not hard to do, but it does take patience.  Don’t be tempted to turn the heat  up, lest you end up with grainy chocolate.  Low and slow is the key!

If you don’t have a double boiler (I don’t) you can improvise…sometimes I use a metal milk steaming pitcher set on a steam basket in a sauce pan.  This time I balanced a saucepan over a slightly smaller one.  Sounds a little precarious, but it worked great!  The thing to remember is that you don’t want direct heat and you don’t want ANY steam vapor or water droplets to get into the chocolate.  Heed my warning, water in your chocolate will ruin it.  For more on tempering chocolate, check out this article.
Using a candy thermometer, monitor the temperature of your chocolate.  You don’t want it to get above 110 degrees Fahrenheit.  Stir frequently but gently to make sure you aren’t getting any hot spots. 

While you’re patiently waiting you can set out your candy cups if you’re using them, or spread out a sheet of wax paper for the dipped cherries to dry on.

Holding the cherries by the stem, dip them one at a time into the prepared chocolate, making sure to completely seal them, paying special attention to the base of the stem.  Any holes or breaks will allow the filling to ooze out  You don’t want that.  Allow any excess chocolate to drip off.

Place the dipped cherries stem side up in your candy cups or wax paper and chill until firm (but don’t freeze!).

Now, here’s the thing…you can eat these now, they are incredible!  OR, you can allow them to “ripen” in the refrigerator for a week to allow the cherry juice and the sugar dough to meld together to form that ooey-gooey filling that makes traditional cherries oh-so-messy to eat.  Personally, I like them fresh, but I’m not picky.  =)

Happy Valentine’s Day!!  

Bacon Cheddar Sliders

Sliders, the little brother to the burger.  But just as flavorful and you don’t feel guilty having more than one!  Not that I could eat more than one hamburger in one sitting but just the thought of being able to have two of these delightful little buggers makes me feel powerful!  Like I can do anything I want, like have fries with it!  No not really but they are very satisfying.  This is my latest and best recipe for beef sliders.  I usually use Hawaiian sweet rolls because they are sweet and fluffy.  They provide a really good palate-pleasing flavor when combined with the salty, tangy and spiciness of the meat.  This time however, I didn’t us Hawaiian sweet rolls, I used regular hamburger buns and used a canning jar ring as a cutter to cut them down to size.  My husband says these are the best burgers he’s ever had, and that includes regular sized burgers.  These are definitely kid friendly as well, even with the added jalapeno! Which is really amazing because my kids think ketchup is spicy!! ~Janna
Slider Ingredients

Makes 10 sliders

Ingredients:

1 Lb lean ground beef (don’t go too lean, the fat is where the FLAVA is)!!  I usually use
85/15 beef for burgers
6 slices of bacon, cooked crisp and crumbled
1 1/2 oz finely shredded medium or sharp cheddar cheese (you could also use pepper jack or really any shreddable, meltable cheese that you like) plus more if you want cheese on top of sliders.

1 1/2 Tbs Ketchup
2 tsp yellow or Dijon mustard
1/2 tsp Worcestershire sauce
1/4 tsp garlic powder
Dash of salt
Dash of freshly ground black pepper
1/8 c pickled jalapenos, finely diced
Hawaiian sweet rolls or hamburger buns, cut to size

Method:

Combine all ingredients in a large bowl, mix the mixture around with your hands to fully integrate and disperse the ingredients.
Slider Mixture

Take some of the meat mixture and form a ball about the size of a golf ball, each ball of meat should be about 1.6 oz.  You should get about 10 meat balls.
Slider Ball 1

Heat an electric griddle or skillet to 325 degrees Fahrenheit.  Once the skillet is heated place the meat balls a couple inches apart, let cook for a few minutes (don’t flatten them yet), when browned on bottom, smash each meatball with a spatula and flip over to cook the other side.  Cook until desired doneness.
Slider Ball
Slider grill

When cooked through, add the remaining shredded cheese (this part is optional).  Remove from heat and drain on paper towels.  Scrape grease off griddle and place buns on to warm them (or you can just toast them).  Top your sliders with whatever condiments you like and enjoy!
Sliders with Title

Zucchini Latkas

Every August there is an abundance of zucchini in my father in law’s garden.  I get tired of the same ol sautéed or oven roasted zucchini so I thought I would try something different.  I came up with zucchini latkas.  Latkas are a traditional Jewish dish made from mashed or grated potatoes, flour and egg.  I substituted zucchini for potatoes and added some parmesan cheese and a few spices.  They turned out amazing and it’s basically a full meal in itself!  You won’t be able to eat just one!  Try your own variation!  ~Janna

DSC_0246

Ingredients:

4 cups shredded zucchini (about 4 medium zucchini)
1/2 cup shredded parmesan cheese
1 egg, plus 1 egg yolk (beaten)1/2 tsp garlic powder
1/2 tsp salt
1/4 tsp black pepper
Cooking spray

Method:

In a large mixing bowl combine shredded zucchini, eggs, parmesan, garlic powder, salt and pepper, mix to combine.  Heat an electric skillet to 325 degrees and spray with cooking spray.  Using your hands measure out about 1/2 cup of the mixture and press it into a patty squeezing some of the liquid out.  Cook on skillet until golden brown, flip to brown other side (about 4-5 minutes on each side).  Be careful flipping because these are delicate and will break apart if your not careful.  After they are cooked sprinkle with a little more parmesan cheese if desired. Makes approx. 6 latkas.  Enjoy!!

*One variation I’ve tried and found amazing is topping the latka with a slice of fresh garden tomato and a pinch of sea salt from oldcitysalts.com

DSC_0247

Vegetable Stuffed Portobello’s

I’ve been trying to cook lighter lately, and sometimes that can be challenging when cooking for a man too.  Both John and I love mushrooms, but they are usually “in” something.  This time, I decided to make them the star.  This dish is incredibly simple, with fresh, clean ingredients.  The meaty mushrooms are hearty and filling, and the fact that this dish is primarily vegetables is pleasing to the health-conscious individual.
I’ve included directions for a simple garlic pasta, but there are many things that would pair well with these mushrooms, or even use younger crimini mushrooms and serve as an appetizer.
By the way, these are delicious for lunch the next day!  🙂

Ingredients:

Mushrooms:
●10 (or so) 3-inch portobello mushrooms, wiped clean, stems removed
1 zucchini, chopped
●1 cup fresh spinach, chopped
●1 6-oz jar of artichokes in brine, drained and chopped
●1/2 cup onion, chopped
5 cloves of garlic, minced
1 ½ cups mozzarella
●1 tsp dried oregano
●sea salt and fresh ground pepper to taste

Garlic Pasta:
●Angel Hair Pasta (about 4-5 servings)
●3 cloves of garlic, minced
●3 tablespoons extra virgin olive oil

Directions:

Preheat oven to 375.

Arrange mushroom caps upside down on a lightly sprayed baking sheet.
In a medium bowl, combine remaining ingredients, adding salt and pepper to taste.    

Mound the filling into the mushroom caps, distributing evenly.  Try to use all the filling, it will cook down quite a bit.

Bake for about 25 minutes, or until heated through and golden brown.

Meanwhile…

Cook angel hair pasta according to package directions.  In a saute pan, cook garlic in olive oil on medium heat until golden brown.  Toss pasta and garlic oil together and salt to taste.  Serve immediately with hot mushrooms.