Gooey Marshmallow Treats

Picture11
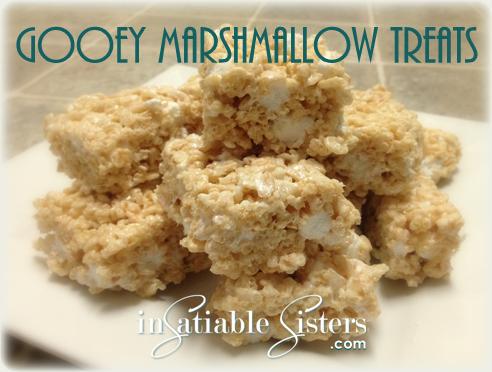
Also known as Rice Krispies Treats, these simple squares are a fun finger food that will instantaneously transport you back to childhood.  Rice Krispies Treats were invented in 1939 by Malitta Jensen and Mildred Day at the Kellogg Company home economics department as a fund raiser for Camp Fire Girls. (source: Wikipedia)
And what’s not to love?  Crispy rice cereal is generously coated in fluffy sugary marshmallows so it’s bound to be delicious.  Best of all, they are fast, easy and inexpensive.  Yes, they are full of carbs, sugar and delicious full-fat butter.  But that’s what dessert is all about!  Indulge a little….

Ingredients:
16 oz mini marshmallows, divided
4 oz butter + some for greasing (Coconut oil can be used for a dairy-free treat.)
1/4 tsp salt
6 cups crisp rice cereal
OPTIONAL: 1 cup chocolate chips, mini chips, mini m&m’s, caramel chips, etc.

Directions:

Generously grease a 9×13 pan with butter.

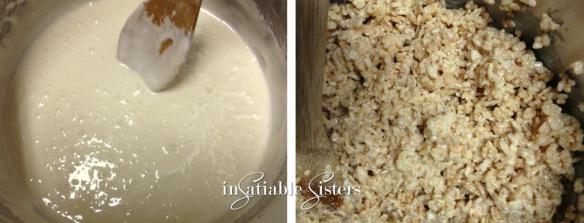
In a large pot, melt butter on medium-low heat.  Stir in HALF the mini marshmallows and continue to stir until they are completely melted and form a gooey cream.

Add salt and stir.  Remove from heat immediately.

Pour cereal into the pot and fold it into the melted marshmallows until all cereal is thoroughly coated with marshmallow.
Picture12

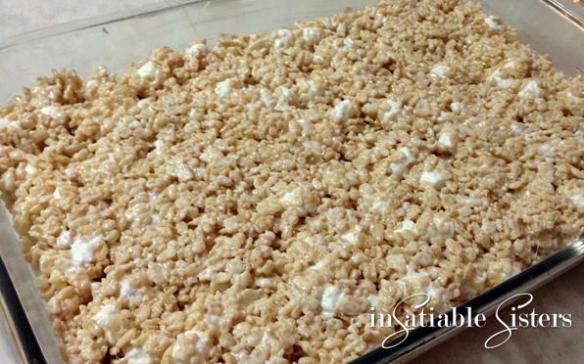
Add the additional whole marshmallows and any optional chips that you want.  Quickly fold them into the cereal.  You don’t want this second addition of marshmallows to melt, it’s so delicious when you bite into a fluffy whole marshmallow!

Turn the mixture out into your buttered pan and press it flat with clean, buttered hands.  It’s delicious when it’s warm, but they will cut much more easily if you allow them to cool completely.  RC

*Tip: If you have leftover chips, consider melting them and drizzling over the top of the cut squares.  Yum!
Gooey Marshmallow Treats

Southwest Enchiladas

Taco salad is a staple in my household.  We probably have it 3-4 times a month.  I cook and season the meat and make a bean salad, then it’s a free-for-all where we each get to build our own salad.  The only problem is we ALWAYS have leftover meat and beans and, even though we love it, we get kind of bored after the 2nd day of taco salad leftovers.  That in mind, I decided to work on a dish that would use all those leftovers and turn it into something new.  SUCCESS!  Those same savory southwestern spices carry over beautifully into this dish, but in the form of a hot, gooey, delicious enchilada.  And the best part is, they are so easy, even if you don’t have a bunch of leftovers to use up.  Prep takes about 20 minutes and baking is minimal since the filling is already hot.  We still love Taco Salad, but now we also look forward to “leftover” enchiladas.

This full recipe makes a about 18 enchiladas.

Ingredients:
1 lb ground beef or turkey, or pre-cooked shredded chicken*
2 Tbs taco season
1 can black beans, drained and rinsed
1 cup frozen corn**
3 green onions, chopped
¼ cup fresh diced tomato
½ cup fresh cilantro
1 Tbs lime juice
1 Tbs cumin
1 tsp garlic powder
1 tsp salt
3 +/- Tbs coconut or canola oil
18 +/- corn enchiladas
2 10 oz cans red enchilada sauce
1 1/2 cups shredded mexican blend cheese

*If you want to make this a vegetarian dish, simply replace the meat with an additional can of beans or about 1 1/2 cups cooked quinoa.

**You can also use grilled sweet corn when it’s in season, which is what I prefer.  The grill adds so much flavor!

Directions:

Preheat oven to 375 degrees Fahrenheit.

If using ground beef or turkey, brown meat in a skillet.

Add taco season and 1/4 cup water to meat and allow to simmer about 5 minutes.

To the skillet add beans, corn, tomatoes, 2 of the onions, cilantro, lime juice and spices. Reduce heat to medium low and allow the mixture to heat through.

In a separate small frying pan, heat oil on medium-high heat.  Once it’s hot, fry the tortillas one-by-one, about 10 seconds on each side.  Drain on paper towels and allow tortillas to cool enough to handle.

Coat the bottom of a 9×13 pan (or 2 8×8′s as I did) with a few tablespoons of enchilada sauce.

Spoon about ¼ cup of filling mixture into each tortilla plus a pinch of cheese.  Fold over filling and place enchiladas seam-side-down in the pan.

Top with remaining enchilada sauce.

Cover with remaining cheese and green onion.

Bake for about 20 minutes or until cheese is melted and starts to brown.  

Pile on sour cream, diced avocado, shredded lettuce, black olives, jalapeno’s or whatever toppings your prefer.  Eat up!

America’s Test Kitchen Banana Bread

I have been baking banana bread as far back as I can remember.  It was one of the first things I learned how to make by myself when I was a kid.  I remember pulling the steaming loaves out of the oven and being so proud of my creation!  They never lasted long, and to this day, banana bread is one of my favorite comfort foods.

This recipe is not the same recipe I used growing up.  It is a creation of America’s Test Kitchen and was introduced to me through a foodie friend at work who generously shared the banana bread she had made with the rest of the office.  Although I wasn’t fast enough to snag a piece out of her bread from the break room, she did provide me with the recipe.  After hearing the comments around the office, I knew I had to make it for myself. Seriously, this is the most banana-y banana bread I’ve ever had and it is so incredibly moist!  Don’t scoff at the little bit of extra work with the bananas because THAT is what makes it so incredible.  Just do it, you will be rewarded!

When selecting bananas, be sure to use those that are heavily speckled, or even black.  If you are one of those people who freezes bananas, this is YOUR recipe!! The darker the banana, the sweeter and more developed the banana taste will be.  A lot of grocery stores will even sell these “overripe” bananas at a deeply discounted price.  Yes, those mushy, black banana’s seem really gross, but trust me, you’ll be hoarding them in your freezer like they are gold once you’ve seen (and tasted) what they can do.

Ingredients:

1 ¾ Cups unbleached all purpose flour
1 tsp baking soda
½ tsp table salt
5 large very ripe bananas, peeled
8 Tbsp (1 stick) unsalted butter, melted and cooled slightly
2 Large eggs
¾ cup packed light brown sugar
1 tsp vanilla extract
½ cup walnuts, toasted and coarsely chopped (optional)
2 tsp granulated sugar

**Note:  The photo below shows baking powder, which is NOT in the recipe…my mistake!

Directions:

Preheat oven to 350 degrees.

Spray an 8 ½  by 4 ½ inch loaf pan with nonstick cooking spray.

Whisk flour, baking soda, and salt together in a large bowl.

Place bananas in a microwave safe bowl.  I used a round casserole dish with a lid.  You can use plastic wrap with a few cut steam vents to cover if you don’t have a lid, but personally I avoid putting plastic in the microwave.  

Microwave on high power until bananas are soft and have released most of their liquid, about 5 minutes.Transfer bananas to a fine mesh strainer placed over a bowl and allow them to drain, turning the bananas occasionally for about 15 minutes.  You should end up with ½ – ¾ cup of liquid.  

Transfer liquid to a small saucepan and cook over medium-high heat until reduced to about ¼ cup.  Liquid should be light caramel color and thick, almost as thick as syrup.  I stirred mine pretty vigorously and ended up with some bubbles, but you get the idea.

Remove from the heat and stir this reduced liquid back into your mashed bananas and mash everything together with a potato masher.  The original recipe says “mash until fairly smooth” but mine never made it to that point…it stayed semi-lumpy.  I’m sure whatever stage of lumpiness your bananas end up is just fine.

Whisk in melted butter, eggs, brown sugar, and vanilla.


Pour banana mixture into your flour mixture and stir until just combined.  Do not over stir. Some flour streaks are okay.  Gently fold in walnuts if you’re using them.

Scrape batter into prepared pan and sprinkle granulated sugar evenly over the surface.

Bake until a toothpick inserted into the center of the loaf comes out clean, approx 55-75 minutes.  Cool bread in the pan on a wire rack for about 15 minutes, then remove loaf from pan and continue to cool on a wire rack.

**Note:  I used a mini loaf pan and a muffin pan instead of the larger, single loaf pan.  I started checking them at 30 minutes.  The muffins were slightly drier than the loaf and I would probably turn the oven down a few degrees the next time.

***Variation:  I added ½ cup of flaked coconut to the muffins and they were SO good!

Slice loaf and serve slightly warm or room temperature.  Enjoy!

Chocolate Dipped Cherries

This post is dedicated to our beautiful Mama.  She always worked hard to make life special for each one of her 6 children.  We lived in “the woods” in Talkeetna, Alaska, a very small town that is an hours drive from the nearest suburban town.  For us, the finer things in life did not come from a store, but from Mom’s hands.  She made a lot of our clothes (and our doll clothes!), cooked and baked from scratch, and always let us help even though I’m sure our “helping” just made more work for her.

Chocolate dipped cherries were one of Mom’s special Christmas tradition.  I remember watching her make them step-by-step, anticipating when we could FINALLY partake in this gooey, sweet treat.  It was always worth the wait.  I have continued this cherished tradition into my adult life…and I even like to indulge once in a while and make them on non-Christmas occasions. =)

And what better occasion to make these beautiful candies than Valentines Day!!!  A day filled with love and flowers and romance pretty much demands an accompanying sweet treat.  The fact that you put the time and effort into hand making each cherry makes them than much sweeter.  Your Valentine, or whomever you are making these for, will taste the love.  ❤

Ingredients:
25-35 Maraschino cherries WITH stems
3 Tbs unsalted butter, room temperature
3 Tbs light corn syrup
2 cups powdered sugar (+extra for kneading), sifted
1 lb (approx) melting chocolate
double boiler
Optional: decorative mini candy cups

Directions:
Start by draining your cherries on paper towels.  You can do this a couple hours ahead of time, just don’t let your cherries get shriveled!  Four hours is probably the max time you want to leave them out.  I usually set mine out about ½ hour before I begin, change the towels once and blot the tops when I’m ready to work with them.  If your cherries are too wet on the outside, the juice will begin to break down the dough before you’ve had a chance to dip them.

Next, prepare your sweet dough, the gooey filling of the cherry.  Mix butter and corn syrup together to form a paste.  

Add in the sifted powdered sugar and stir until combined.  If your “dough” looks like a crumbly mess, perfect!  Now get your clean hands in there and start squishing until the dough will stick together.  Knead it on a clean counter top until it forms a smooth dough.
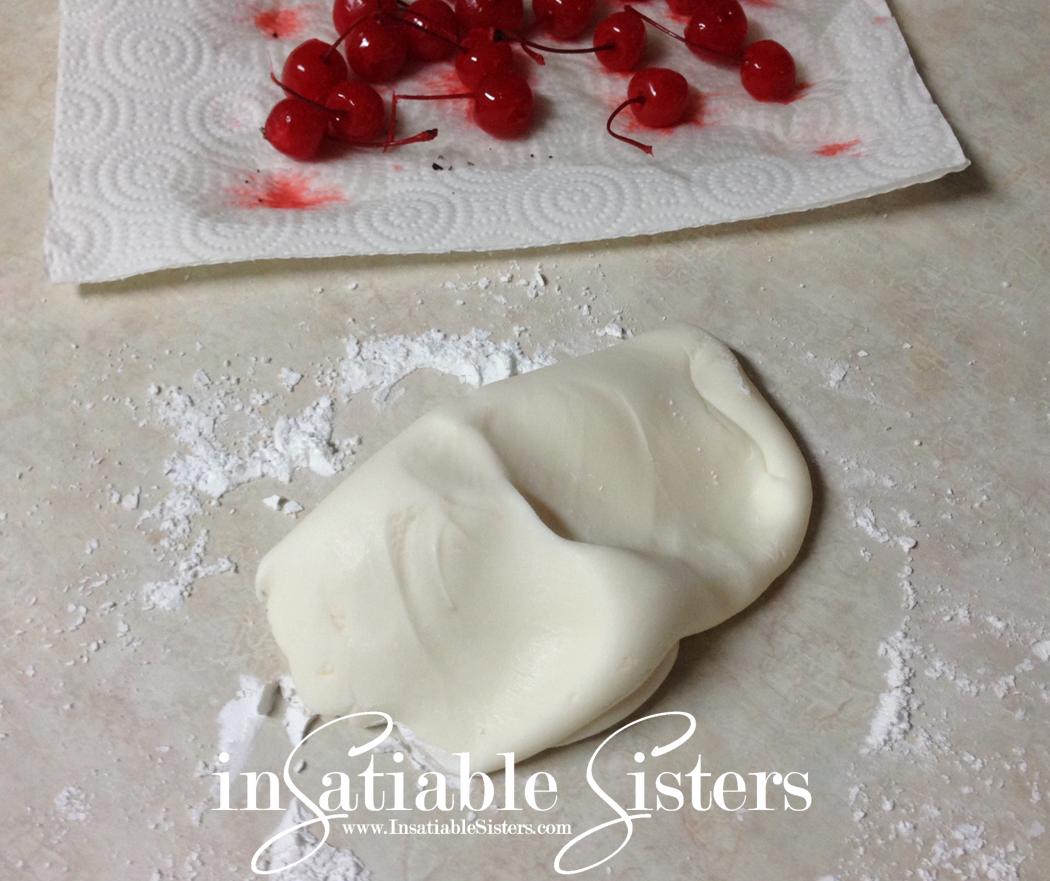
Optional:  To ensure you have enough dough, divide it into portion sizes (about 1 tsp) for the amount of cherries you need.
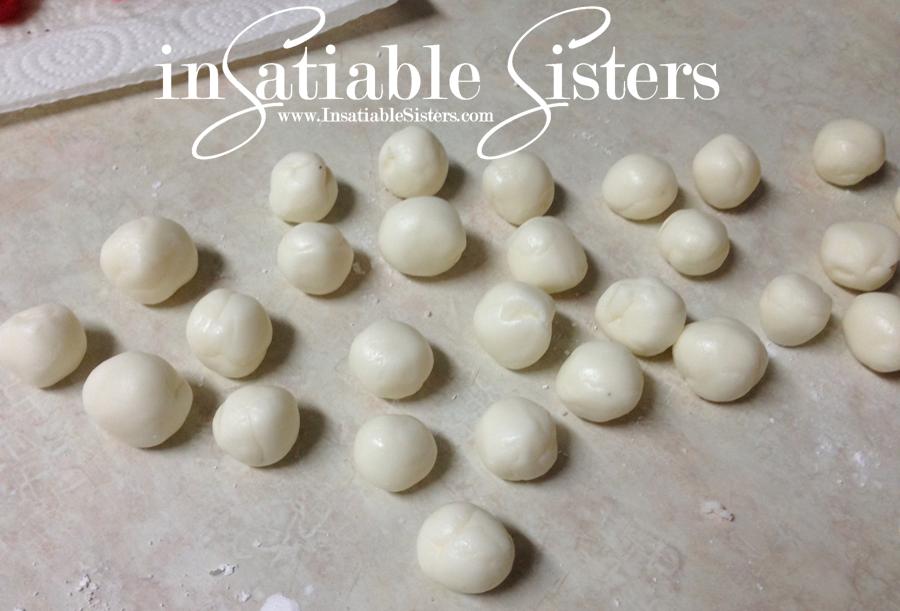
Shape your dough around each cherry and set aside on wax/parchment paper.


Next, break up your chocolate block into small, uniform pieces.  This helps it melt quickly and evenly.
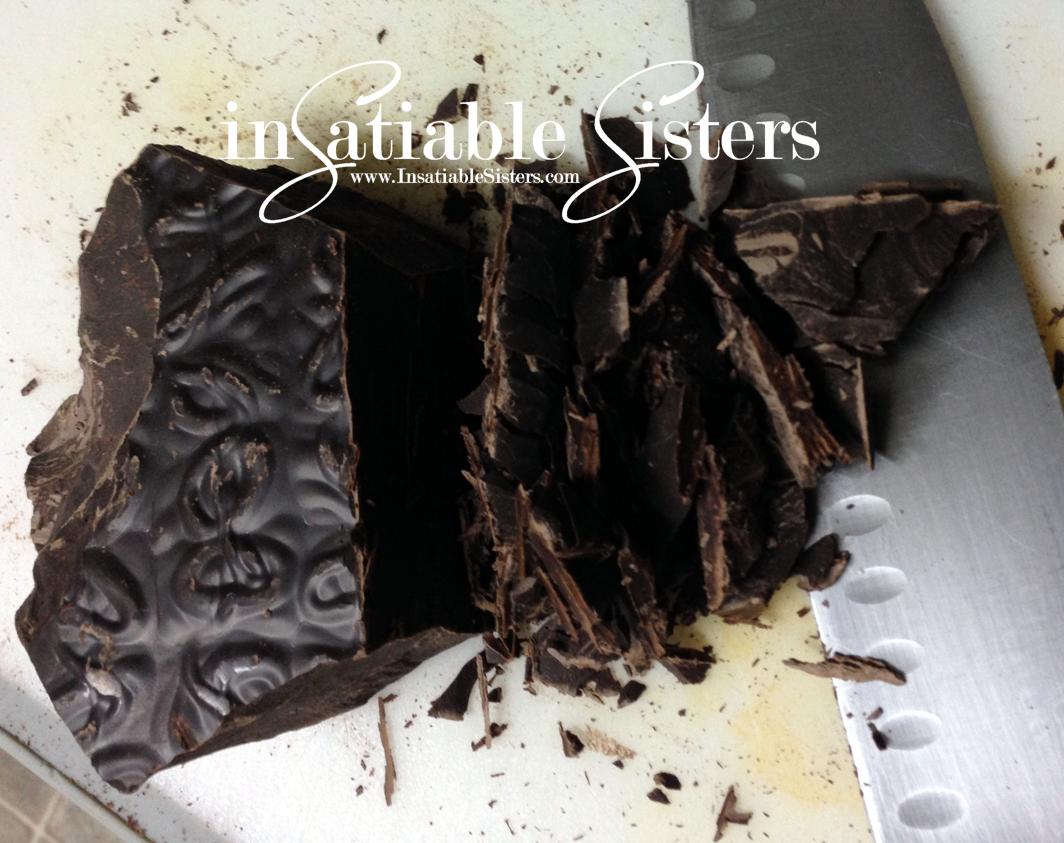
**You can use chocolate chips instead, but they have an additive to help them keep their shape which affects the tempering process.  You can also use chocolate melting wafers, but a lot of the time those aren’t made of real chocolate and you can definitely taste the difference!

Measure out your chocolate.  About 1 lb should do.  You will have extra in the end, but you need the chocolate to be deep enough in your pan to be able to dip the cherry in.

Add water to the bottom of your double boiler and turn the heat on LOW.  The steam from this water will heat  your chocolate pan at a gentler temperature.  Chocolate tempering is not hard to do, but it does take patience.  Don’t be tempted to turn the heat  up, lest you end up with grainy chocolate.  Low and slow is the key!

If you don’t have a double boiler (I don’t) you can improvise…sometimes I use a metal milk steaming pitcher set on a steam basket in a sauce pan.  This time I balanced a saucepan over a slightly smaller one.  Sounds a little precarious, but it worked great!  The thing to remember is that you don’t want direct heat and you don’t want ANY steam vapor or water droplets to get into the chocolate.  Heed my warning, water in your chocolate will ruin it.  For more on tempering chocolate, check out this article.
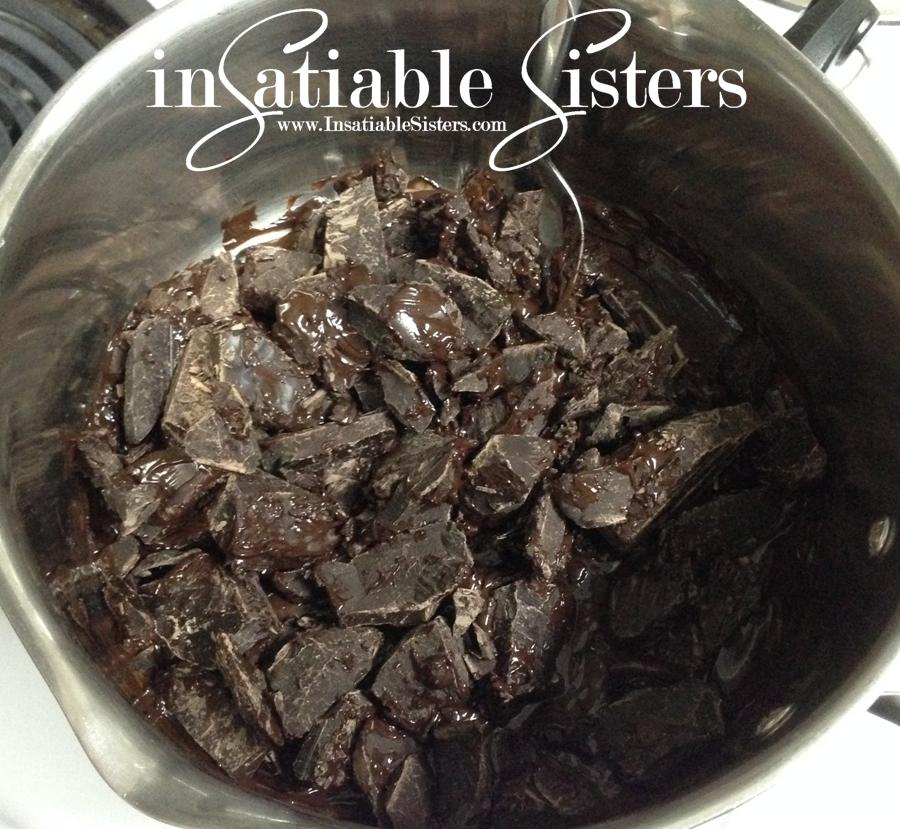
Using a candy thermometer, monitor the temperature of your chocolate.  You don’t want it to get above 110 degrees Fahrenheit.  Stir frequently but gently to make sure you aren’t getting any hot spots. 

While you’re patiently waiting you can set out your candy cups if you’re using them, or spread out a sheet of wax paper for the dipped cherries to dry on.

Holding the cherries by the stem, dip them one at a time into the prepared chocolate, making sure to completely seal them, paying special attention to the base of the stem.  Any holes or breaks will allow the filling to ooze out  You don’t want that.  Allow any excess chocolate to drip off.

Place the dipped cherries stem side up in your candy cups or wax paper and chill until firm (but don’t freeze!).

Now, here’s the thing…you can eat these now, they are incredible!  OR, you can allow them to “ripen” in the refrigerator for a week to allow the cherry juice and the sugar dough to meld together to form that ooey-gooey filling that makes traditional cherries oh-so-messy to eat.  Personally, I like them fresh, but I’m not picky.  =)

Happy Valentine’s Day!!  

Oven Roasted Potatoes

Aside from coffee, potatoes are probably my biggest weakness in life.  Put a potato in front of me in any form and I have a hard time resisting.  I have a weakness for french fries and potato chips (especially salt & vinegar flavored!) but I would take these savory roasted potatoes over those any day!
The sweet onions compliment the potato perfectly and the garlic adds a nutty flavor that completes the dish.  The simple preparation and inexpensive ingredients make this a fantastic addition to your dinner repertoire.
This method is really delicious with sweet potatoes as well.  Enjoy!

Ingredients:

2 lbs medium red potatoes OR white sweet potatoes
1 sweet onion, wedged
10 whole cloves of garlic, peeled
2 sprigs of fresh rosemary, snipped into 1 inch pieces
1 tsp dried parsley
3 Tbs Olive Oil
1 Tbs Kosher Salt
Fresh Ground Pepper


Directions
:

Preheat oven to 375 degrees.

Scrub and quarter potatoes, or if using sweets, chop into approx 2×2 in chunks.  Try to make the size as uniform as possible.

Place potatoes and all other ingredients in a bowl or a large seal-able bag and toss to combine.

Spread out in one layer on a baking sheet or roasting pan.  I recommend using a baking stone for this as it reduces the chances of burning.

Roast for about 45 minutes or until potatoes are tender.  Carefully remove rosemary stems.  Serve immediately and enjoy!

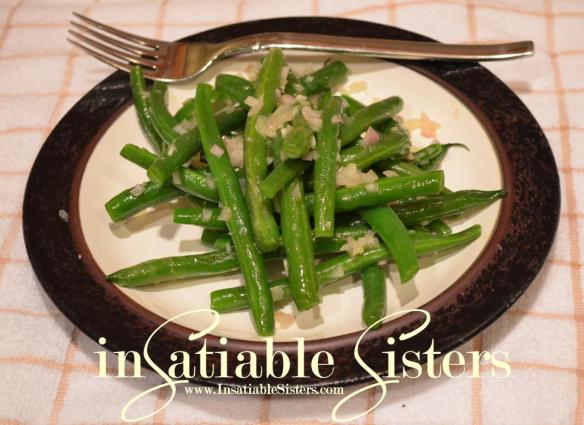
Green Beans n Shallots

I have never had a green bean casserole that I really enjoyed, it just reminds me of canned, lethargic green beans and gelatinous canned cream of mushroom soup…ick!!  The green bean casserole seems like somewhat of an afterthought, something that you throw into a dish at the last minute and pass off as a “healthy vegetable” so you feel less guilty about stuffing yourself silly with homemade dinner rolls, buttery stuffing and 5 varieties of pie a la mode.   Face it, nobody ever says “awe, too bad were out of green bean casserole!”  So here is my alternative.  It’s super easy to prepare, you can do most of it the day before, and it’s a whole lot  healthier than traditional green bean casserole.  I guarantee people will be asking to please pass the green beans at Thanksgiving this year!  ~Janna

DSC_0320Ingredients:

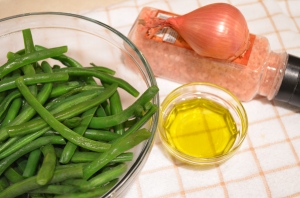
1lb fresh green beans or french beans (I actually prefer French beans, because they’re more tender and delicate).
2 Tbs olive oil
1 med shallot
salt to taste

Method
:

DSC_0311  DSC_0312

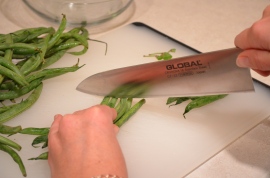
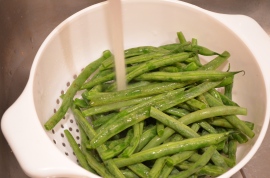
To begin, start by cutting the stem and tip off of the green beans.  You can leave the ends on and just cut the stem off but I think they look more uniform when cut on both ends.  Rinse green beans in cold water.

Next you will blanch the green beans.  Bring a large pot of water to a boil (about 8 cups), also prepare a large bowl full of ice water.  Once your water is boiling put in the green beans and boil for 2-4 minutes, depending on how soft you like them.

When done, immediately submerge the beans in the ice water.  This will stop the cooking process and the beans will keep their bright green color.  At this point you can refrigerate the beans to finish later or you can finish now.  If you are finishing the beans later I would not blanch more than 24 hours in advance (unless you are freezing them) to prevent the beans from getting too soggy and limp.  Store in a gallon zip top bag or in an air tight container.

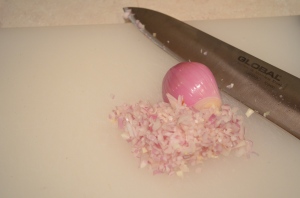
Take the beans out of the ice water and blot dry.  Mince the shallot and set aside.

  DSC_0322

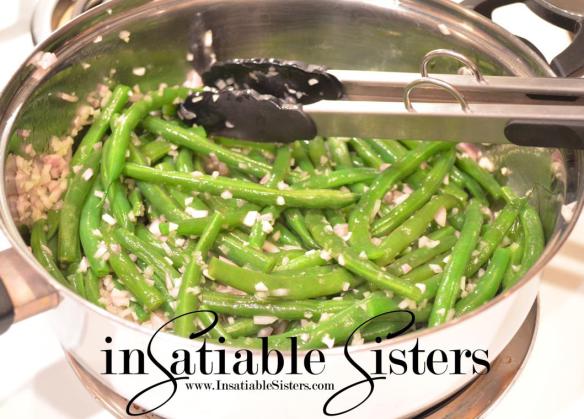
In a large skillet on med/high heat the olive oil, once hot, add the green beans and toss a few times.  Add the minced shallot and cook a few minutes until shallots are tender and beans are hot through.  Add salt to taste and enjoy!
GB&Shallots     GB&Shallots2

Sesame Soy Green Beans

With Thanksgiving just around the corner, fresh green beans are in abundance in the markets.  But we wanted to give you more options than just the typical American green bean casserole.  Although green bean casserole can be DELICIOUS when it’s made from scratch (no canned beans or soup here!), sometimes it’s nice to have an option that’s a little lighter.  Yes, this recipe has soy sauce which is high in sodium, but you are using fresh ingredients which makes a huge health and flavor difference.  And when you think about all the sodium and preservatives in canned green beans and condensed cream of mushroom soup, well, is it really an issue?  However, you can still cut down the sodium by using a low sodium soy sauce or liquid aminos.  Now, let’s get to it!
**Note:  Because of the chili paste, this recipe does have a little heat to it!**

Ingredients:

1 lb fresh green beans
2 Tbs sesame oil
3-4 cloves of garlic, minced
1 onion, sliced or about ½ lb of      frozen  pearl onions
1 tsp chili paste
¼ cup soy sauce or liquid              aminos
¼ cup water
1 tsp sesame seeds (optional)


Directions
:

Blanching Green Beans:  Rinse green beans well and trim off the stem ends.  Fill a large stock pot with water, about 8 cups.  Add 1 tsp salt and bring water to a rolling boil.  Add the green beans to the water and allow to boil until tender and bright green, about 2-4 minutes (I like mine soft, so I go the full 4 minutes).  Remove beans from water and immediately rinse with cold water or plunge into ice water to stop the cooking process.  Set cooled beans aside.
**Note:  You can blanch the beans ahead of time (we recommend no more than a day ahead) and store them in the refrigerator until they’re ready for use.**

In a heavy bottomed saute pan, add the sesame oil and garlic.  Saute garlic on medium-high heat until golden brown, but be very careful not to burn as garlic cooks quickly.

Add the onions, saute them for about 1 minute, then turn the heat down to medium-low.

Add the soy sauce, chili paste and water and simmer for about 15 minutes, stirring occasionally, until liquid has reduced by about half.    

Add the green beans to the pan and cook for another 5 minutes or until beans are heated through.  Garnish with sesame seeds, if desired.  Enjoy!

Cream of Broccoli Soup

There is a place in my heart that only soup can fill.  That sounds silly, but truly, I have rarely found a soup that I haven’t loved to eat…or cook!  The possibilities are endless, and with a little imagination anyone can make a great pot of soup.  Cream of Broccoli is no exception!  This is one of those rich fall soups that leaves you feeling warm and full.  You can change up the vegetables as you wish, adding cauliflower, kale, mushrooms, whatever you like!  Below is my basic recipe for a creamy, flavorful soup.  Enjoy!

Ingredients:

1 medium onion, chopped
2 celery stalks, chopped
1 leek, chopped
4 Tbs butter, divided
2 Tbs flour
4 cups vegetable or chicken stock
2 lbs broccoli, chopped (including stems, peeled & chopped)
1 cup heavy cream
4 oz cream cheese
1 Tbs salt, 1 tsp pepper +/-

Directions:

Saute onion, celery and leeks in 2 tablespoons of butter, until tender, about 10 minutes on medium-high heat, stirring frequently.  Set aside.  

Create a roux: in a large stock pot, add 2 tablespoons each of butter and flour.  Whisk over medium/high heat until the mixture is thick, about the consistency of mashed potatoes.   Continue to whisk and slowly add the stock.  Allow mixture to come to a boil.

Add sauteed vegetables to the liquid and simmer about 10 minutes.  Using an immersion blender, puree soup base until smooth.  

Add chopped broccoli and simmer for about 20 minutes or until broccoli is tender.  Adjust broccoli cooking time to suite your taste: less cook time = crunchier broccoli, longer cook time = softer broccoli.  

Add cream and cream cheese and blend one final time to your desired consistency using the immersion blender.  Add salt and pepper, adjust to taste.

Serve hot and enjoy!

Chipotle Sweet Potato Bisque

BisqueThere are two main varieties of sweet potato here in the U.S.  Many people mistakenly refer to them as “yams” but sweet potatoes are actually not even related to the yam.  The first (and my favorite of the two) has a golden skin and white flesh.  The second is that deep copper -colored tuber with the softer, bright orange flesh, commonly used in the traditional holiday dish “candied yams.”  

Either variety, or even a mix, will do nicely for this recipe.  This bisque is not an original idea.  I found it years ago in a magazine (which magazine, I can’t remember) and have made it many times since, with a few of my own adjustments.

The beauty of this soup is that it is NOT sweet.  The potatoes offer a subtly sweet base, but the ginger, lime and chipotle really take the forefront to create a savory soup that can be as spicy as you want it.  

 Ingredients:

2 Tbs Olive Oil
2 Tbs Butter
1 large yellow onion, chopped
2 Tbs minced garlic
1 Tbs minced ginger
3 Tbs brown sugar
3 lbs sweet potatoes, peeled and cubed
7 cups vegetable or chicken stock
1 cup dry vermouth
1 chipotle pepper in adobo (you can find this in a can in the hispanic section of
your grocery store) OR 1 tsp chipotle powder (more if desired)
2 tsp salt
2 cups heavy cream
Zest and juice from 1 lime

*Serves about 10*

Directions:

Heat oil and butter in a stockpot over medium heat.  Add the onion, garlic and ginger. Cook until onion is soft, stirring frequently, about 10 minutes.

Picture2

Add sugar, sweet potatoes, stock, vermouth, chipotle and salt.  Bring to a boil, then reduce heat and cook until potatoes are soft.
Remove from heat and puree the soup until smooth with a stick blender (you can use a traditional blender, but I find the stick blender makes much less of a mess).
Return soup to a simmer, add heavy cream, lime juice and zest.  Salt and pepper to taste. A sprinkle of chopped pistachios would make an excellent garnish.


Bisque

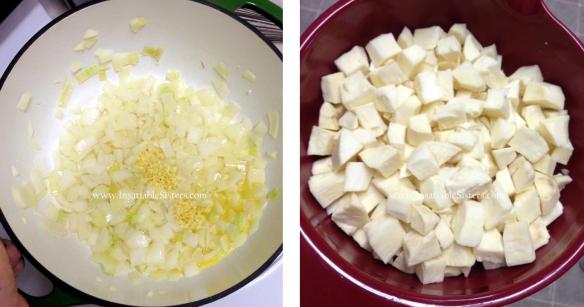
Thai Jícama Salad

A few years ago I started on a mission to discover new fruits and vegetables.  Each week, I would peruse the unique displays of produce, selecting varieties that I had never before eaten or cooked with.  Eventually, I discovered the jícama and it is now on my list of favorites.

Jícama is a root vegetable of Mexican origin, also known as the Mexican Yam or Mexican Turnip.  It has a crunchy texture, much like an apple, but a very mild, earthy flavor.  This particular recipe is a spicy, savory one, but jícama effortlessly combines with fresh fruit as well.

This recipe is not entirely original.  After googling various recipes I found this recipe for Spicy Thai Jícama Salad.  Although that original recipe was delicious, I made a few alterations and substitutions to fit my own taste, and what I had in the cupboard at the time.

1 medium jícama, peeled and sliced into matchsticks
¼ cup red onion, rough chopped
½ cup fresh cilantro, rough chopped
1 jalapeno, seeded & rough chopped (optional)

Dressing:
3 TBS Chili Paste
1 TBS Hot Chinese Mustard
1 TBS Fish Sauce
2 TBS Peanut Butter
2 TBS coconut oil
1 tsp sesame oil
1 TBS fresh ginger, peeled & minced
Juice of 2 Limes

Finish:
1 TBS sesame seeds
Sprinkle of Old City Salts Smoked Serrano, Ghost Pepper, or Thai Ginger Sea Salt (Optional)

In a large bowl, combine Jicama, onion, cilantro, jalapeno.  Toss together and set aside.


In another bowl whisk together the dressing ingredients until well incorporated.  If it looks too thick, add some olive oil until you reach desired consistency.  You should end up with about 1 cup of dressing.

Pour the dressing over the salad and toss to coat.  Serve chilled, and finish with a sprinkle of sesame seeds and a pinch of your favorite Old City Salt blend.  

*This salad keeps well in the refrigerator for a few days, just give it a toss before serving as the dressing tends to pool at the bottom.