Orange Essence Zucchini Bread

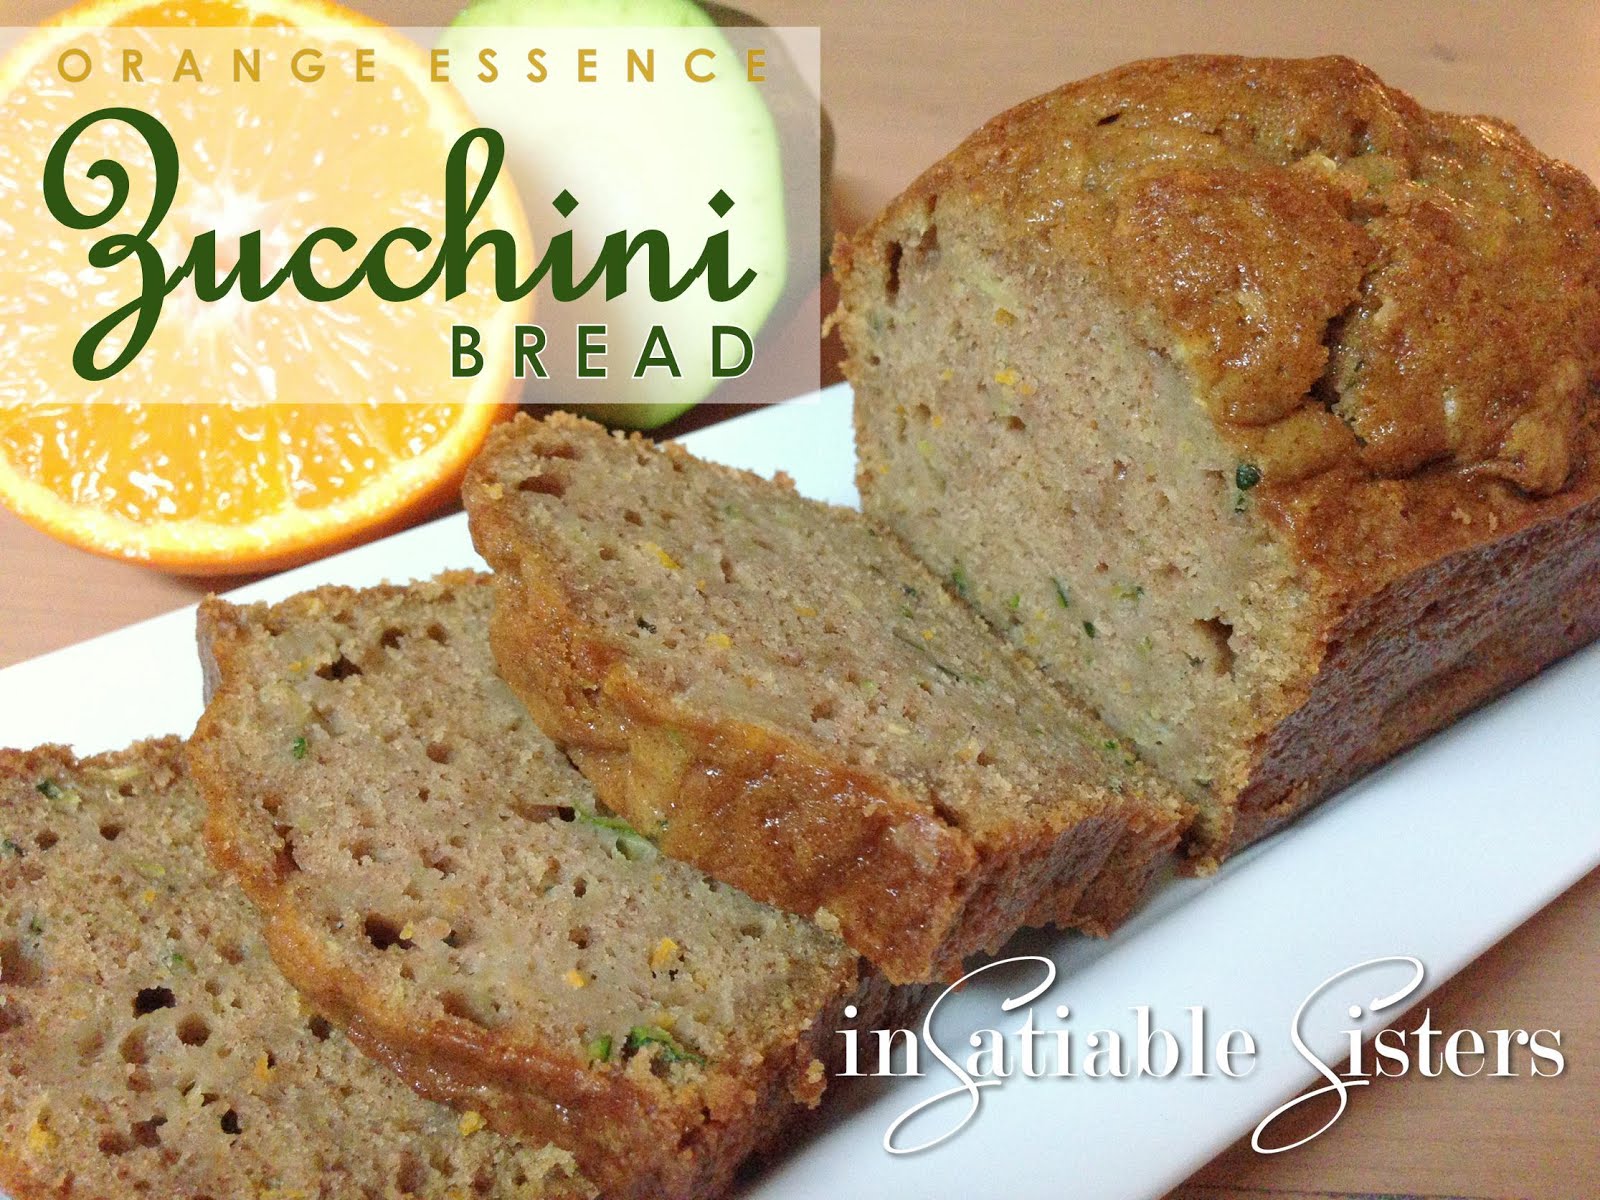
Zucchini is one of the most abundant fall vegetables here in the US.  And zucchini bread is one of the most popular ways to use it up, especially when your garden produces an abundance of overgrown, deep green squash.  While I don’t have a garden (just a few tomato plants on my patio), one of my associates at work has generously shared this years zucchini crop.

Quick breads often seem more like cake than bread, and I’m ok with that.  Classic zucchini bread is so comforting and delicious!  However, I wanted my zucchini bread to really stand apart, so I started baking.  And baking.  And baking.  I don’t know how many loaves and muffins I’ve given away in my quest for the perfect bread, but it’s been a lot!  However, it has been well worth it because I really do believe that this is the best zucchini bread I’ve ever had.  It’s subtly sweet with just a hint of orange while still maintaining that classic zucchini bread flavor.  If you like to drizzle yours with a sweet glaze, I’ve included directions for a quick orange glaze that perfectly compliments it.  I hope it’s your new favorite!

Ingredients:

3 cups all-purpose flour
1 teaspoon salt
1 teaspoon baking soda
1 teaspoon baking powder
3 teaspoons cinnamon
3 eggs
1 cup vegetable oil
1 cup brown sugar
1 1/4 cup granulated sugar
zest from 1 large orange
3 teaspoons vanilla extract
3 cups grated zucchini
1 cup chopped walnuts or unsalted pistachios (optional)

Orange Glaze (optional):
1 cup confectioners sugar
1 teaspoon fresh squeezed orange juice
¼ teaspooon orange zest

Makes about 2 full-sized loaves, 4 mini-loaves, or about 24 muffins.
Ingredients.jpg

Directions:

Prepare your loaf pan or muffin tins.  I highly recommend using parchment if you’re making loaves because, for some reason, this bread seems to stick to my stoneware EVERY time if I don’t.

Preheat oven to 325 degrees F (165 C)

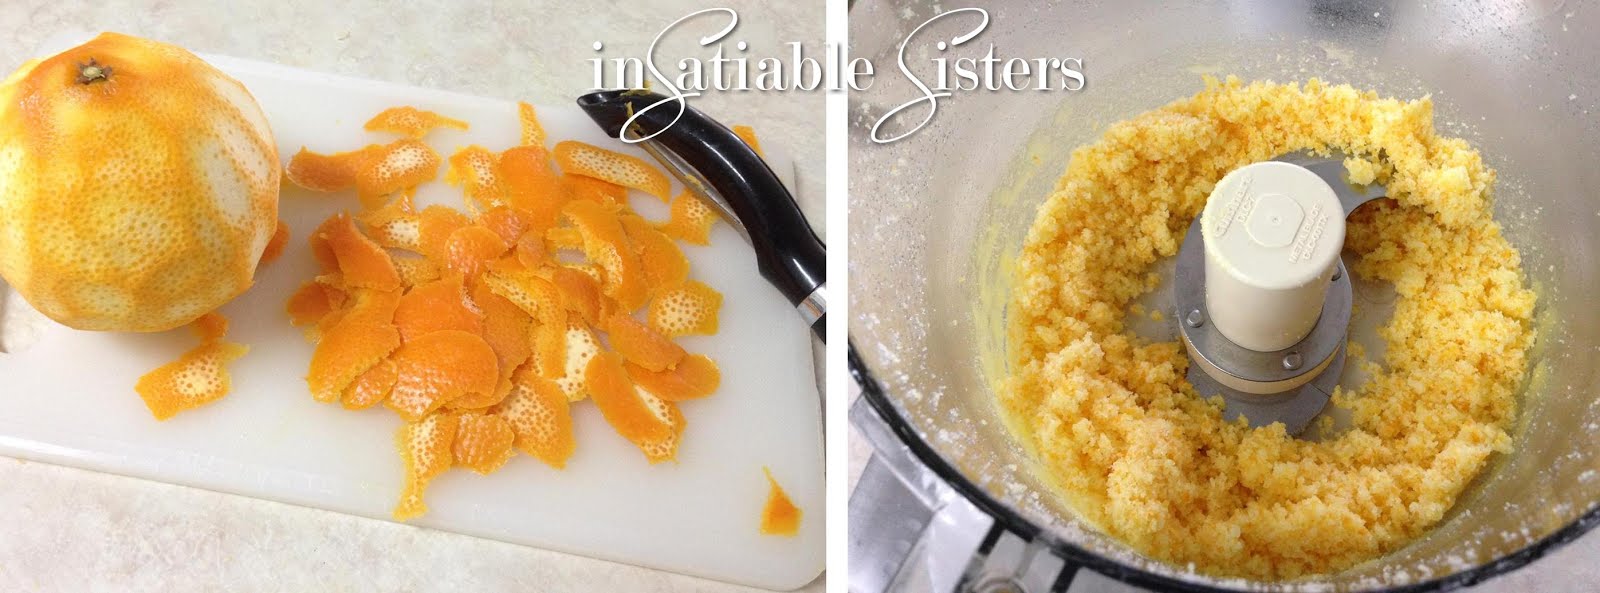
Using a vegetable peeler, peel the zest off the orange being careful to get as little white pith as possible.  Toss the orange peel and the granulated sugar into a food processor fitted with a steel blade and pulverize until the peel is very finely minced into the sugar.  Set aside.Orange Sugar 1.jpg

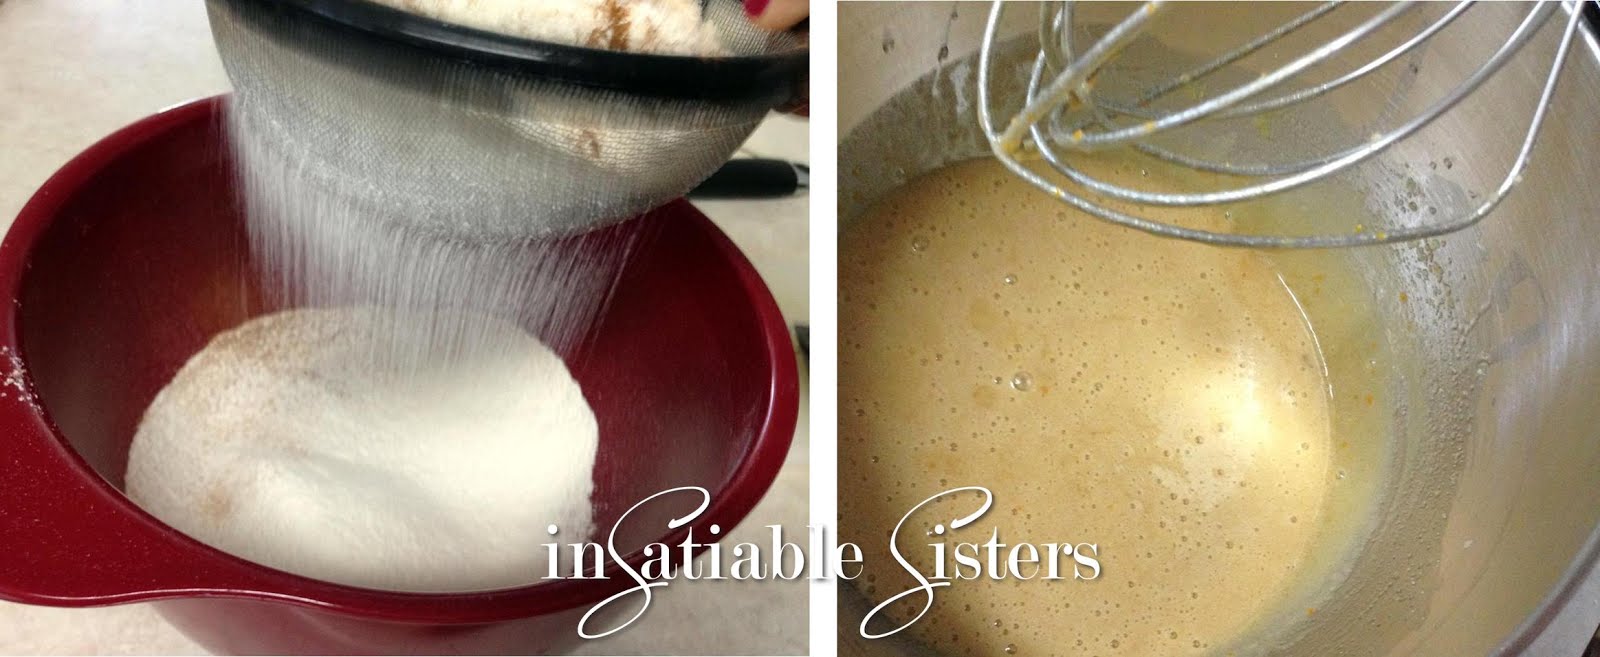
Sift flour, salt, baking powder, baking soda and cinnamon together in a bowl.  In a separate bowl, beat eggs, oil, vanilla, brown sugar and orange sugar together.  Add sifted ingredients to the wet mixture and beat will.
Mix Logo.jpg

Stir in the zucchini and nuts until well combined.  Pour batter into prepared pans.

Bake for 40-60 for a loaf pan.
Bake approx 30 minutes for muffins.

Test doneness by inserting a toothpick or small tester into the middle.  When it comes out clean, it’s done!

Allow bread to cool in pans for about 20 minutes (not necessary for muffins using liners), then turn them out and let it cool completely.

To prepare optional glaze: whisk sugar, orange juice and zest in a bowl until smooth.  Drizzle over bread.

Enjoy!
Title 2.jpg


Six Pepper Chili

I love chili! Probably partly because I like spicy food and I put a lot of kick into my chili.  In our house, when Joanie and I were kids, chili was a staple and it was always homemade. Sometimes we would even make moose chili but that’s a whole other blog!

Over the years I’ve tried many different chili styles adding this or that, making it spicy or mild, or trying different meat or beans.  I even made it cheesy a time or two, which essentially turned out to be a chili dip that went perfectly with nacho cheese Doritos!  I finally perfected this chili on a crisp autumn evening up at our cabin in the mountains.  I also recently used it to win a chili cook-off!  One thing I would change in this recipe is I would fire roast all of the peppers to bring out all of the flavors in the different varieties.  This one is a little spicy, fair warning.  If you don’t want as much spice, omit the cayenne pepper and jalapeno.  ~Janna

Serves: 12

Ingredients:

1 lb sweet Italian pork sausage
10-12oz of pearl onions, whole (or 1 medium yellow onion roughly chopped)
1 red or green bell pepper, diced
2 Serrano peppers, diced
2 jalapeno peppers, diced
2 poblano peppers, diced
12 oz bottle of beer
2 cans 15oz tomato sauce
1 can 12oz tomato paste
1 can, 14.5oz fire roasted diced tomatoes
2 cans 15.25oz each of dark kidney beans, drained but not rinsed
Cayenne pepper
1 Tbs Chili powder
2 tsp garlic powder
2 Tbs Worcestershire sauce
1/2 Tbs sugar
black pepper
salt to taste

Method:

Brown pork in a skillet on med/high heat.

In large stock pot, sauté onions and all peppers. Once tender, (about 5-7 minutes) add the bottle of beer and stir a couple of minutes.

Add the tomato paste, tomato sauce, diced tomatoes and beans, stir to combine and bring back to a simmer.

Add the pork without draining (unless there is tons of grease) and all of the spices.  Stir to combine and Simmer at least 1 hour.  Salt to taste and enjoy on a cold winter evening!6 Pepper Chili with Title

Green Beans n Shallots

I have never had a green bean casserole that I really enjoyed, it just reminds me of canned, lethargic green beans and gelatinous canned cream of mushroom soup…ick!!  The green bean casserole seems like somewhat of an afterthought, something that you throw into a dish at the last minute and pass off as a “healthy vegetable” so you feel less guilty about stuffing yourself silly with homemade dinner rolls, buttery stuffing and 5 varieties of pie a la mode.   Face it, nobody ever says “awe, too bad were out of green bean casserole!”  So here is my alternative.  It’s super easy to prepare, you can do most of it the day before, and it’s a whole lot  healthier than traditional green bean casserole.  I guarantee people will be asking to please pass the green beans at Thanksgiving this year!  ~Janna

DSC_0320Ingredients:

1lb fresh green beans or french beans (I actually prefer French beans, because they’re more tender and delicate).
2 Tbs olive oil
1 med shallot
salt to taste

Method
:

DSC_0311  DSC_0312

To begin, start by cutting the stem and tip off of the green beans.  You can leave the ends on and just cut the stem off but I think they look more uniform when cut on both ends.  Rinse green beans in cold water.

Next you will blanch the green beans.  Bring a large pot of water to a boil (about 8 cups), also prepare a large bowl full of ice water.  Once your water is boiling put in the green beans and boil for 2-4 minutes, depending on how soft you like them.

When done, immediately submerge the beans in the ice water.  This will stop the cooking process and the beans will keep their bright green color.  At this point you can refrigerate the beans to finish later or you can finish now.  If you are finishing the beans later I would not blanch more than 24 hours in advance (unless you are freezing them) to prevent the beans from getting too soggy and limp.  Store in a gallon zip top bag or in an air tight container.

Take the beans out of the ice water and blot dry.  Mince the shallot and set aside.

  DSC_0322

In a large skillet on med/high heat the olive oil, once hot, add the green beans and toss a few times.  Add the minced shallot and cook a few minutes until shallots are tender and beans are hot through.  Add salt to taste and enjoy!
GB&Shallots     GB&Shallots2

Sesame Soy Green Beans

With Thanksgiving just around the corner, fresh green beans are in abundance in the markets.  But we wanted to give you more options than just the typical American green bean casserole.  Although green bean casserole can be DELICIOUS when it’s made from scratch (no canned beans or soup here!), sometimes it’s nice to have an option that’s a little lighter.  Yes, this recipe has soy sauce which is high in sodium, but you are using fresh ingredients which makes a huge health and flavor difference.  And when you think about all the sodium and preservatives in canned green beans and condensed cream of mushroom soup, well, is it really an issue?  However, you can still cut down the sodium by using a low sodium soy sauce or liquid aminos.  Now, let’s get to it!
**Note:  Because of the chili paste, this recipe does have a little heat to it!**

Ingredients:

1 lb fresh green beans
2 Tbs sesame oil
3-4 cloves of garlic, minced
1 onion, sliced or about ½ lb of      frozen  pearl onions
1 tsp chili paste
¼ cup soy sauce or liquid              aminos
¼ cup water
1 tsp sesame seeds (optional)


Directions
:

Blanching Green Beans:  Rinse green beans well and trim off the stem ends.  Fill a large stock pot with water, about 8 cups.  Add 1 tsp salt and bring water to a rolling boil.  Add the green beans to the water and allow to boil until tender and bright green, about 2-4 minutes (I like mine soft, so I go the full 4 minutes).  Remove beans from water and immediately rinse with cold water or plunge into ice water to stop the cooking process.  Set cooled beans aside.
**Note:  You can blanch the beans ahead of time (we recommend no more than a day ahead) and store them in the refrigerator until they’re ready for use.**

In a heavy bottomed saute pan, add the sesame oil and garlic.  Saute garlic on medium-high heat until golden brown, but be very careful not to burn as garlic cooks quickly.

Add the onions, saute them for about 1 minute, then turn the heat down to medium-low.

Add the soy sauce, chili paste and water and simmer for about 15 minutes, stirring occasionally, until liquid has reduced by about half.    

Add the green beans to the pan and cook for another 5 minutes or until beans are heated through.  Garnish with sesame seeds, if desired.  Enjoy!

Thai Jícama Salad

A few years ago I started on a mission to discover new fruits and vegetables.  Each week, I would peruse the unique displays of produce, selecting varieties that I had never before eaten or cooked with.  Eventually, I discovered the jícama and it is now on my list of favorites.

Jícama is a root vegetable of Mexican origin, also known as the Mexican Yam or Mexican Turnip.  It has a crunchy texture, much like an apple, but a very mild, earthy flavor.  This particular recipe is a spicy, savory one, but jícama effortlessly combines with fresh fruit as well.

This recipe is not entirely original.  After googling various recipes I found this recipe for Spicy Thai Jícama Salad.  Although that original recipe was delicious, I made a few alterations and substitutions to fit my own taste, and what I had in the cupboard at the time.

1 medium jícama, peeled and sliced into matchsticks
¼ cup red onion, rough chopped
½ cup fresh cilantro, rough chopped
1 jalapeno, seeded & rough chopped (optional)

Dressing:
3 TBS Chili Paste
1 TBS Hot Chinese Mustard
1 TBS Fish Sauce
2 TBS Peanut Butter
2 TBS coconut oil
1 tsp sesame oil
1 TBS fresh ginger, peeled & minced
Juice of 2 Limes

Finish:
1 TBS sesame seeds
Sprinkle of Old City Salts Smoked Serrano, Ghost Pepper, or Thai Ginger Sea Salt (Optional)

In a large bowl, combine Jicama, onion, cilantro, jalapeno.  Toss together and set aside.


In another bowl whisk together the dressing ingredients until well incorporated.  If it looks too thick, add some olive oil until you reach desired consistency.  You should end up with about 1 cup of dressing.

Pour the dressing over the salad and toss to coat.  Serve chilled, and finish with a sprinkle of sesame seeds and a pinch of your favorite Old City Salt blend.  

*This salad keeps well in the refrigerator for a few days, just give it a toss before serving as the dressing tends to pool at the bottom.

Salsa de Sophia Roja

What’s in a name?  There’s a 2-part story as to how this recipe got its name.  Fresh, homemade salsa is one of the first foods that I started experimenting with.  I thought my original recipe was pretty good, using fresh (un-roasted) tomatoes.  Then my niece, Sophia, came back from almost a year in Guatemala and introduced me to their way of making salsa: roasting it.  Since then, I have roasted my salsa ingredients, both in the oven and on the grill, and it tastes amazing.

The second part of my story is this:  A couple years ago, Sophie and I were making salsa together.  Actually, I was making it, and she was hanging out.  =)  Once it was finished, we had about ½ gallon of red, spicy salsa.  It was beautiful.  After the salsa chilled for a bit, Sophie decided she wanted to have some with tortilla chips.  She pulled that big bowl out of the fridge….and dropped it on the floor.  NOOO!  All of that time, energy, and those beautiful tomatoes and peppers all over the floor!  Here’s the best part…I’m not sure if I’m allowed to tell you this, but she actually scooped a lot of it off the floor and ate it.  Don’t kill me, Sophie!

Since Sophie improved my salsa and provided me with a cringe-worthy story, she will be forever associated with this recipe, hence the name.

Ingredients:
(Think of these ingredients as more of a guideline and feel free to experiment.)

6 large Roma Tomatoes (or similar vine ripened tomato)
9 mini or about 2 regular bell peppers – Red, Orange, or Yellow
2 green chili peppers
2 jalapeños (optional)
2 cloves (pieces) garlic
2 stalks of green onion, chopped
1 cup cilantro, rough chopped
1 tbs lime juice
1 tbs white vinegar
1 tsp kosher salt + salt to taste

Directions:

Preheat your roasting appliance of choice:  Grill=low flame, Oven=400 degrees

Wash tomatoes and peppers.  If grilling, arrange them directly on the grill rack.  Oven users, arrange on a cookie sheet or other oven safe vessel.  Make sure they have plenty of room to roast and do not stack.

Allow to roast 15-30 minutes or until skin is blistered, TURNING THEM ABOUT EVERY 5 MINUTES.  The turning is especially imperative for grill users.  A little char is okay, but you don’t want blackened produce.  You may want to rotate them to get an even roast, but be careful not to squeeze any of the juice out of the tomatoes!  

Once roasting is finished, ALLOW PRODUCE TO COOL COMPLETELY before handling. When they are cool, carefully peel off the outer membrane.  For the peppers:  cut them open and scrape out all the seeds.  You may choose to use rubber gloves for this step. Cut into large chunks, toss them all into the blender with the garlic, and pulse until your desired consistency is reached.

Dump the tomato mixture into a bowl, add remaining ingredients, salt to taste, and devour.

Makes about 5 cups of salsa.

Savory Cilantro Sauce

Have I mentioned that I love cilantro?  It’s one of my favorite herbs.  I love the distinctive flavor and I use it in many of my dishes.  Unfortunately, fresh cilantro does not last very long once picked.  You can prolong the life of it by snipping the ends and storing it in your refrigerator in a cup of water, like a bouquet of flowers.  Or, preserve it in the freezer using this incredibly flavorful sauce.  Drizzle over meat or seafood, use as a marinade or a stand-alone sauce, toss with pasta, the sky is the limit!  ~Joanie

Ingredients:

2 cups cilantro, roughly chopped
3 cloves garlic
¼ cup olive oil
Juice of 1 lime
½ tsp sea salt
⅛ tsp cayenne pepper

Directions:

Toss all ingredients into a food processor and puree, OR use an immersion blender.  The immersion blender takes a little more time and patience, but it works out.  Taste test it to make sure you have it how you like it.


Fill a clean ice cube tray with the sauce and let freeze overnight.  Once frozen, pop those babies out, throw them in a ziplock and store them in the freezer.  The small cubes make thawing a cinch, and you now can add that fresh cilantro taste to any dish.


Pork Curry

Janna:  Curry is probably my husband Erik’s favorite foods.  Erik has been asking for curry for weeks now, so I decided to make him suffer no longer with a curry dinner!!  This curry is pretty simple to make, I use a good red curry paste instead of all the different spices because it’s easier, cheaper and I think the taste is better.  You may have to do a little searching for the red curry paste and the fish sauce and kaffir lime leaves, the kaffir lime leaves you can leave out if need be and just use fresh basil, but they do add another layer of delicious flavor.  If you have a local Asian Market in your area, they will surely have what you need.

In this recipe I’m using pork, but in the past I have used chicken, steak, tofu and also duck, which are all fantastic!  You can make it vegetarian by just adding more vegetables or tofu in place of the meat (though I don’t think fish sauce or curry paste are vegetarian, curry paste is made with shrimp paste).  Red, yellow and green peppers, onion, green onion, carrots, broccoli, cauliflower, zucchini, potato, water chestnuts, baby corn are all great additions to this dish!  Feel free to play around with the veggies and let me know what you used and how it turned out!  Serve this curry over rice (brown or white)  cook the rice according to package directions.  This recipe makes about 8 large servings.  This dish is spicy, on a scale of 1-10 I’d call it a 5, you can make it spicier by adding more chili paste, cayenne pepper or I’ve even chopped fresh jalapenos in it!

Ingredients:

¼ cup olive oil
4-5 Tbs red curry paste
1 1/2 lb boneless pork chops or pork loin, cubed
1 green bell pepper, cut in large chunks
1 red bell pepper, cut into chunks or an assortment of bell peppers
1 medium onion, cut into large chunks
2 zucchini, sliced
3-4 kaffir lime leaves
4-5 basil leaves, plus more for garnish
2 cans coconut milk
4 green onions, thinly sliced (use white and part of the green)
1 can pineapple tidbits
1 can bamboo shoots
3 Tbs fish sauce (plus more to add later if needed)

Pour olive oil in large frying pan, add curry paste and stir, heat until sizzling and aromatic.

Add the meat and cook through, turning meat occasionally.

Add vegetables and kaffir lime leaves and basil leaves, cook until veggies are tender.

Add coconut milk and bring to simmer.

Add pineapple, bamboo shoots and fish sauce.

Serve over rice and garnish with basil leaves, enjoy!

Crispy Kale Chips

These crispy greens are an interesting alternative to fattening potato chips, and a flavorful way to get more vegetables into your diet.  They have a simple, earthy flavor and a delicate crunch.  They are also naturally gluten free, and the fat in the olive oil helps your body absorb the vitamins.  Not bad for a few minutes of prep!  Just be sure to check your teeth when you’re done munching! ~Joanie

*  *  *  *  *  *  *  *  *  *  *  *  *  *  *

Ingredients:

Large bunch of curly kale

2 TBS Olive Oil +/-

Sea Salt or Kosher Salt

Baking Sheet

Directions:

Wash your kale, then dry it THOROUGHLY.  I use my salad spinner, then a clean towel to dab off any excess water.  If there is any water left, your kale will steam instead of roast, which will turn them brown and keep them from getting crispy.

Once kale is clean and dry, remove the spines and tear into pieces a bit larger than bite sized (they will shrink) and spread out on a baking sheet.  Drizzle with olive oil, then get your hands in there and make sure every piece is lightly coated.  Sprinkle with just a little bit of salt.  Be careful because these are easy to over-season, you can always add a sprinkle of salt at the end.


Bake in a 275 degree oven for about 20 minutes, turning halfway through.  Chips should come out crispy!

Don’t be afraid to experiment with different seasoning  combinations.  Garlic or onion powder would be great, as would a little black pepper.  I sprinkled a little parmesan over mine when they were finished and it was yummy!  Let me know what variations you try!

Crunchy Honey Dijon Chicken

This chicken really needs no introduction. Its crunchy, tangy, and delicious, and takes less than 1/2 hour to prepare.

Ingredients:

2 lbs Boneless Skinless Chicken Breast
1 8.5oz bag Honey Dijon Kettle Chips
5 TBS Honey
3 TBS Dijon Mustard
2 TBS White vinegar

Directions:

Honey Dijon Sauce

Combine honey, dijon mustard, and vinegar in a bowl. Whisk until smooth.

**If you want extra sauce for dipping, make a double batch and reserve ½ for your meal.

Crunchy Honey Dijon Chicken:

Preheat oven to 350 degrees.

Cut your chicken so that all pieces are uniform in size. This recipe is tailored toward cutting the breast into three pieces: removing the thin end first, then splitting the thick part of the breast. You can do it however you like, but remember to adjust cooking time and coating amounts accordingly.

Throw chicken and honey dijon in a bowl, stir to coat each piece, and set aside. Remove about ½ of the kettle chips from the bag and set aside. You may not use these. Lay the ½ full bag out and use a rolling pin to break up the chips into crumbs.

Coat each piece of chicken thoroughly in chip crumbs. Spray a baking sheet with non-stick spray or olive oil and arrange the chicken evenly. Bake in a 350 degree oven for about 15 minutes, or until internal temperature reaches 165 degrees. If it needs a little extra browning, throw it under the broiler for a minute but watch it very carefully!

Drizzle with a little of the reserved honey mustard and enjoy!!
Final with Title